
Mother's Day will soon be here again - some are annoyed, others celebrate it.
A day to honour our moms. To show them how grateful we are for everything they have done for us throughout our lives. This day is an opportunity to celebrate all moms by giving them little gifts, buying flowers, or making cards.
It doesn't matter how you find and spend Mother's Day, a little something for your mom always works, doesn't it? In my tutorial, I'll show you how you can use your Mr Beam to make a beautiful wooden Mother's Day card that doubles as a small vase.
What you need for your wooden Mother's Day card

- poplar plywood
- for a bit of colour the brightly coloured poplar plywood or
- spray paint
- wood glue
- clamps
- kraft paper
- Quickie Glue or other glue with a thin tip
- a few flowers or dried flowers that you have picked yourself
- and the file from the Mr Beam design store
Plywood Pack of 5
Sale price
From CHF 30.00
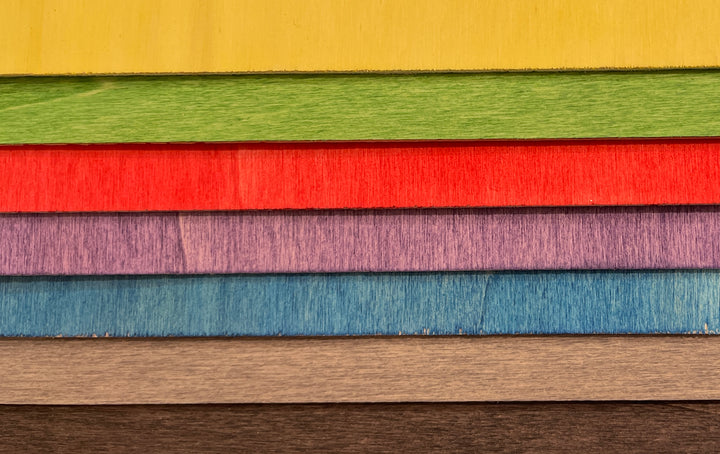
Mr Beam poplar plywood coloured (different colours)
Sale price
From CHF 21.00

KRAFTPLEX Sample package, 15-pack (0.5, 1.0 & 1.5mm)
Sale price
CHF 57.00
Colour design of your Mother's Day card made of wood
How you colour your Mother's Day card made of wood is up to your creativity.
I chose muted colours so that the colours of the flowers stand out beautifully afterwards. I lasered the card's baseplate out of gray poplar plywood from the Mr Beam Shop. Likewise, I painted the wood for the “glass”, which will become the flower vase, in “mellow mint” before lasering.
If you want to paint your Mother's Day card yourself
Make a paint booth out of old cardboard boxes. This is important to protect the environment from the paint mist.
To protect your airways and hands from the spray, I recommend wearing a mask and gloves. You should always paint outside when it's not raining, or look for a place that is covered and protected from the wind as much as possible.

You lean your plywood against an object, for example an old jam jar, a piece of wood or simply against the back wall of your paint booth. This will prevent paint from creeping under the board and getting to the back when you paint it.
If present, remove the latch on the spray head and shake the can vigorously for a few minutes. You can find detailed information on how to prepare your spray can in the manufacturer's instructions. Depending on the coverage of the paint, spray your wood thinly several times and always let the paint dry in between. After drying, your varnished poplar plywood can go into the Mr Beam.
Your Mr Beam lasers a Mother's Day card out of wood
Start your Mr Beam and open BeamOS on your computer. In the bar at the top, click on “Designstore” and look for the file for the flower vase card and load it into your design library. If you then open it in the workspace, you'll see that the file consists of the basemap and the two elements for the flower vase. In addition - in blue - you will find a template in the file to make it easier to position a greeting or wish on the glass. I'll show you how to do that later.
You can give this file away for many different occasions: birthday, wedding, Valentine's Day, anniversary or just because.

In the lower area of the baseplate for the wooden Mother's Day card, I added an engraving: "Von Alina und Julia". If you also want to engrave something, you can do it in your graphics program, or much easier and faster directly in BeamOS. To do this, click on “Text”, type in the desired text and select a font. The text field can then be scaled and moved in the camera view. So you can adapt it to your needs.

Now put the wood in your Mr Beam and start the laser jobs. You laser the layer of poplar plywood into which the flowers are inserted from normal poplar plywood, as it is no longer visible after gluing.

Apply the glue to the middle layer and position it in the middle of the bottom area of the base card, so the flowers have enough space at the top. Press it down and fix it with clamps.

Then you glue the “glass” in place. Press well again and make sure that it fits properly on the lower element. Fix with the clamps and wait until everything is dry.
The template for a “Happy Mother's Day”
A "Happy Mother's Day" or "For Mom" shouldn't be missing, right?
To do this, use the template in the file (blue).
You can insert your greeting either in your graphics program or directly in BeamOS .

For orientation, place the element with the engraving for the glass one level below the template, this will prevent you from sticking your letters onto the engraving when you stick it on.
When your "Happy Mother's Day" is finished, you remove the guide with the engraving and your stencil is ready for lasering.

I recommend kraft paper as the material for the template.
You can then use the lasered letters for your wooden Mother's Day card and stick them on. Of course, you can also laser them out of wood or other material.

Fix the template with washi tape to prevent it from slipping. Since the letters are quite filigree, the Quickie Glue is very suitable for sticking on. It is structured like a gel roller and thanks to this thin tip, the glue can be applied very precisely. After drying, remove the washi tape and simply lift off the stencil.

Now only the flowers are missing. To keep them fresh a little longer, I recommend wrapping the flowers in a small piece of damp kitchen paper and placing the whole thing in cling film to protect the wood. Put the "flower package" in the opening and the card is ready.

I wish you a lot of fun imitating - and giving away!
Your Rina
PS: Looking for a quick, last-minute Mother's Day gift? Then this last minute gift is just right for you!


