April is almost over and the wonderful month of May is about to begin.
For many, this is their favourite month. The weather becomes milder, lilies of the valley, daisies, pansies, daisies and much more are blooming everywhere. The songbirds can hardly be contained and sing their songs all day long. The transition from April to May is celebrated with a festival: the May Dance.
Maypoles are also put up in many places. And not just in Germany, but also in Austria, the Czech Republic, Hungary, Slovenia, Slovakia and even parts of Romania where decorated trees or tree trunks are put up as decorations.
Especially in Baden-Württemberg, the Palatinate and Bavaria, the erection of the maypole is accompanied by a village festival.
So everything outside is getting a little more colourful thanks to the flowers and the colourful maypoles, and in this tutorial I'll show you how you can welcome May in a colourful way at home too.
Material for the May decoration
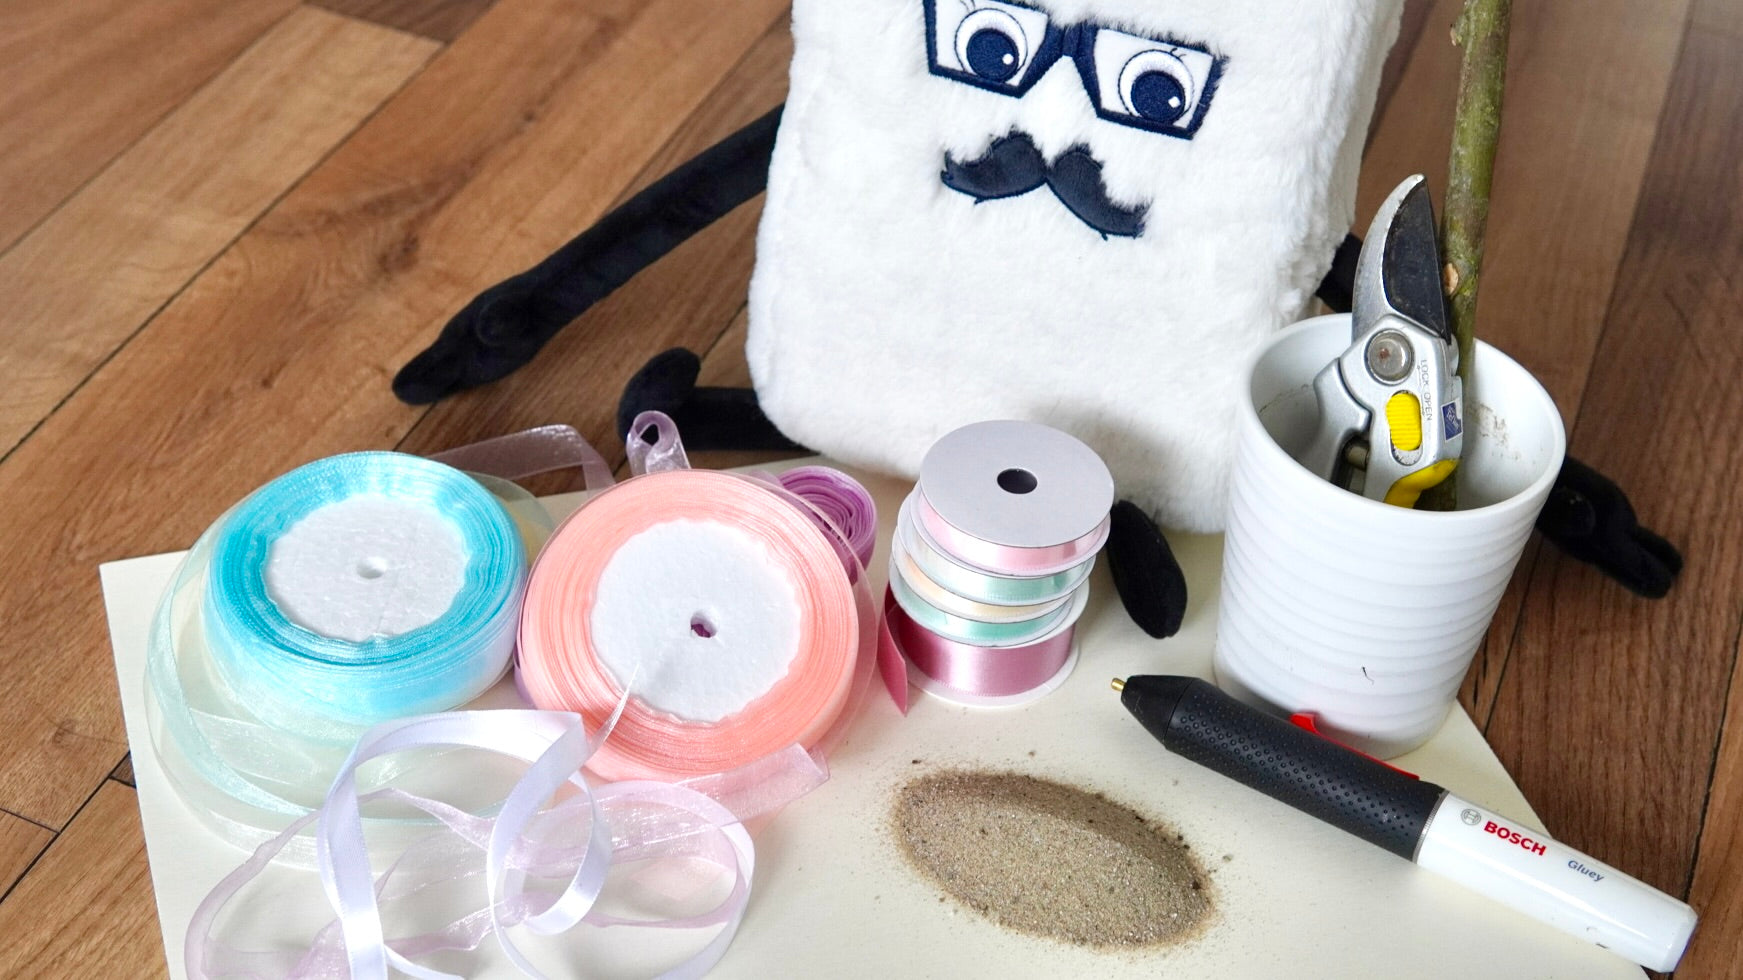
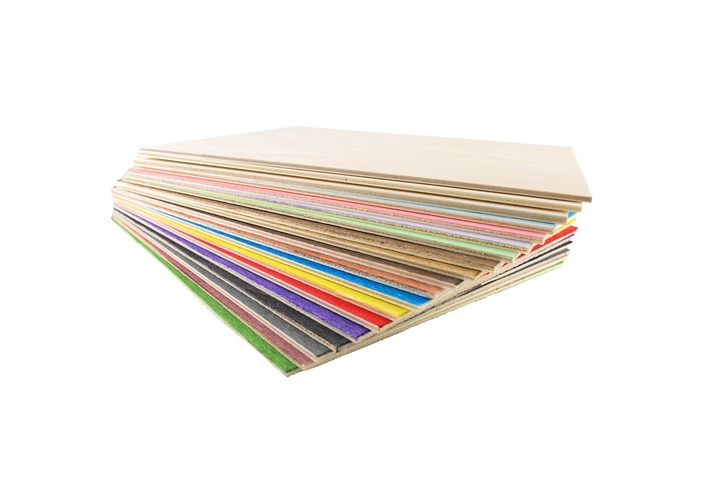
- Poplar plywood in 3 or 4 mm thickness
- Colourful ribbons made of satin and organza in different widths from 10 to 15 mm
- a 50–60 cm long, preferably straight, stick
- hot glue
- a thumb tack/drawing pin
- a flowerpot
- Sand for the flowerpot
- alternatively for the last two points a flower in a pot
EuerKonstantin "handicraft box", wooden trial set
Sale price
CHF 62.00
Plywood Pack of 5
Sale price
From CHF 30.00

Mr Beam Poplar plywood suitable for [x], 4mm, A3
Sale price
From CHF 34.00
Quickly laser a matching ring for your May decoration
Do you know that feeling when you have a decoration idea but don’t have the right material?
That's how I felt about this maypole as a decoration for May 1st. Everything was there, except for a suitable ring to which I could tie all the colourful ribbons.
There it was again, the moment when I was once again glad to have a Mr Beam!
Lasering the right ring is even quicker than buying one in the shop. And if I laser it myself, I can choose exactly what diameter my ring should have for my May decoration. Another advantage is that poplar plywood is much lighter than a metal ring.
To laser the ring, start your Mr Beam and open the Mr Beam software.

Then you create a circle that forms the outer diameter of the ring and a second circle that has a diameter that is 10 mm smaller. Now you centre the smaller circle in the outer circle and you have created a ring.
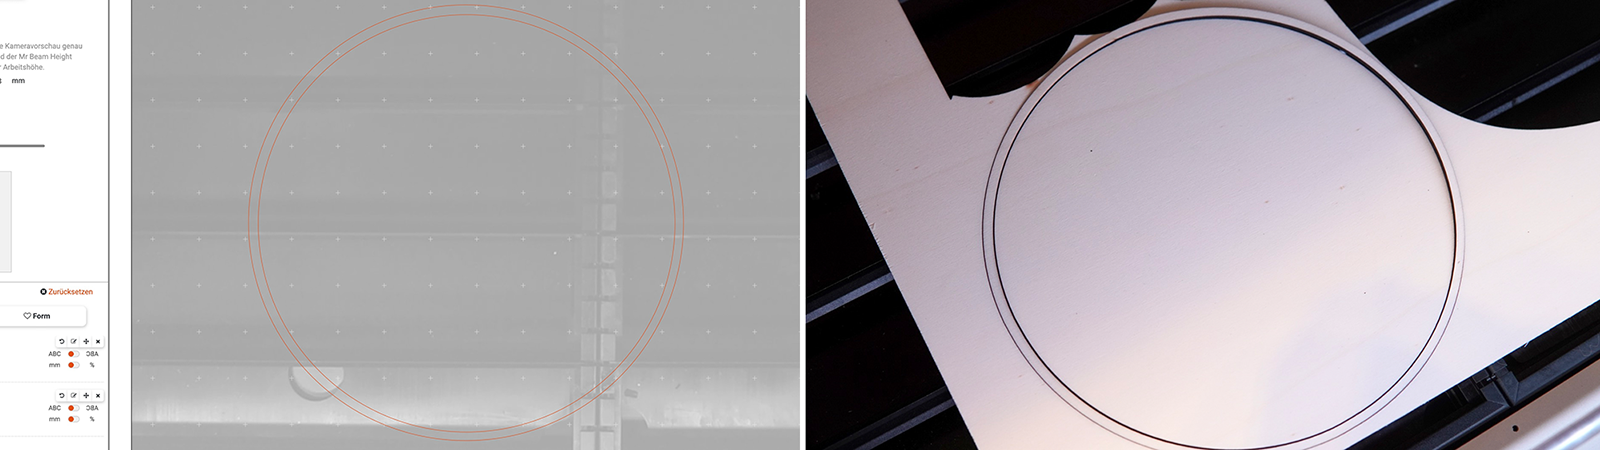
Now place the poplar plywood into the Mr Beam and focus the laser head.
Close the Mr Beam and start the laser job. To do this, simply use the standard settings for poplar plywood. When your Mr Beam has finished lasering the ring for your May decoration, take it out.
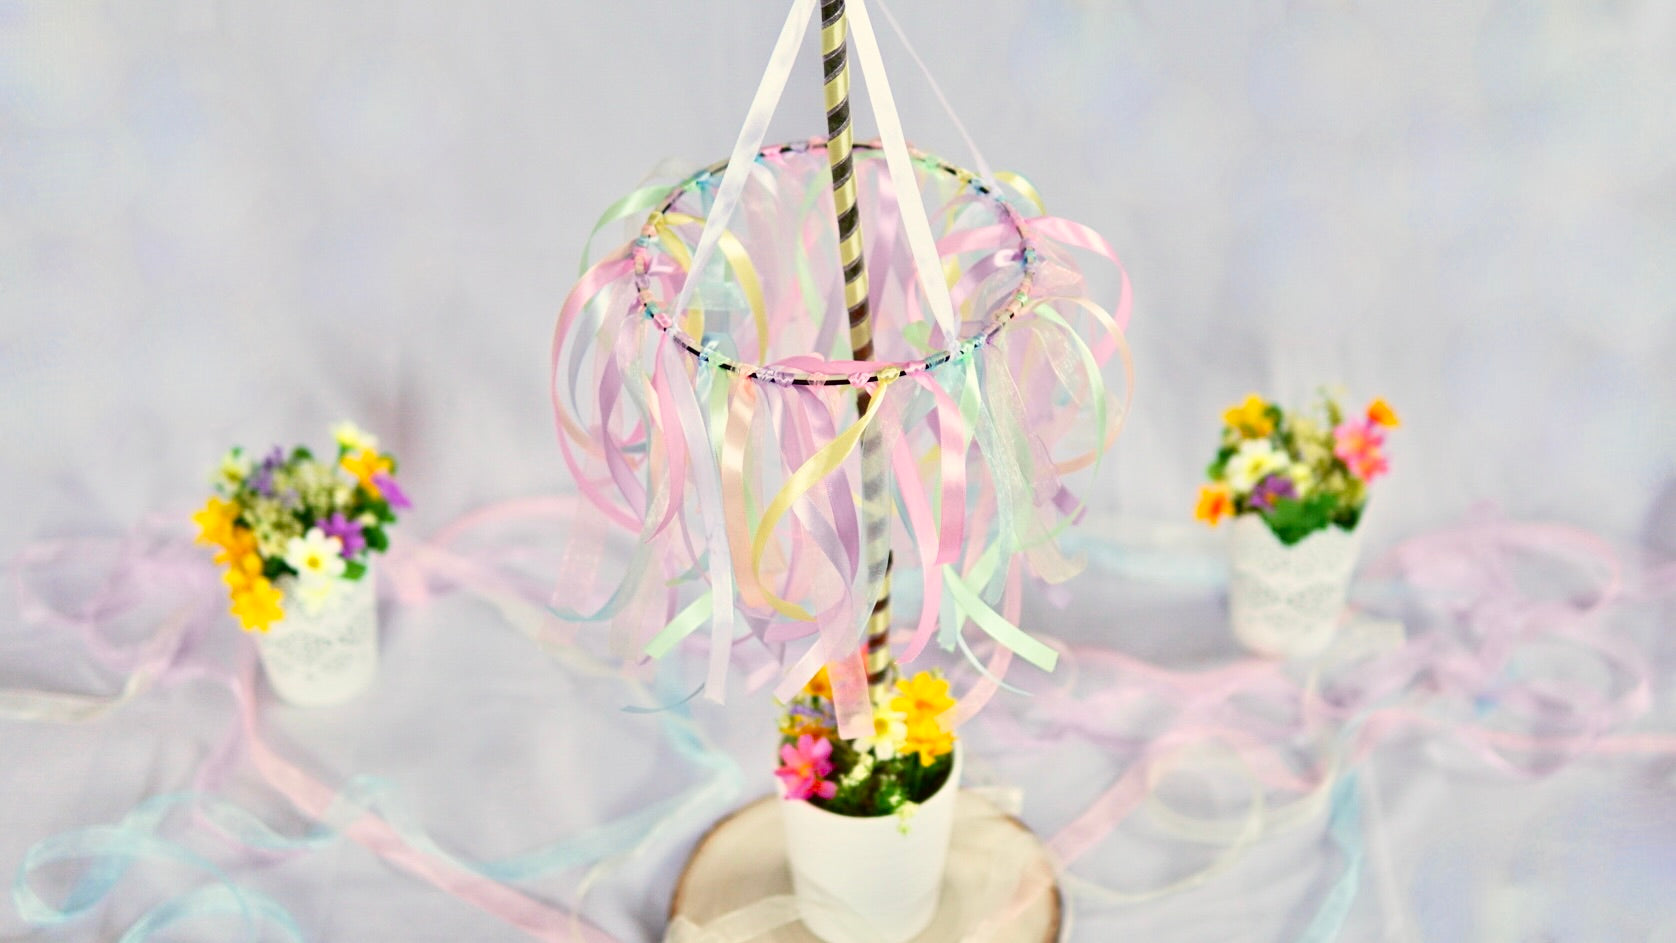
Make your own maypole as decoration for May 1st
The pole for your maypole
For your May decoration, you need a stick that is as straight as possible. Now use garden shears to cut off all the small twigs from this stick as close to the branch as possible. Then it's time to decorate the stick.

To do this, take a ribbon in the colour of your choice. You can also take a wide organza ribbon and a thin satin ribbon on top of it and lay them on top of each other.

Now use hot glue to glue the ribbons onto one end of the stick. This should be done at a slight angle so that you can wrap the ribbons around the stick without overlapping. When you reach the bottom, cut the ribbons and glue the ends back onto the stick with hot glue.
Now fill the flowerpot with the sand and put the already decorated stick in the middle and press the surrounding sand.
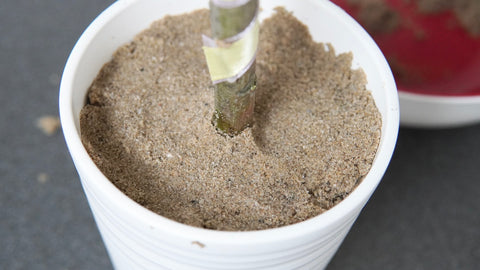
Alternatively, you can also stick the stick in soil. In this case, it would be a good idea to use a planted flowerpot directly.
Now comes the colourful part for your maypole as decoration
To prepare, cut 25 to 50 cm long pieces from all the ribbons.
I used ten different ribbons and cut 4 and 6 pieces from each ribbon.

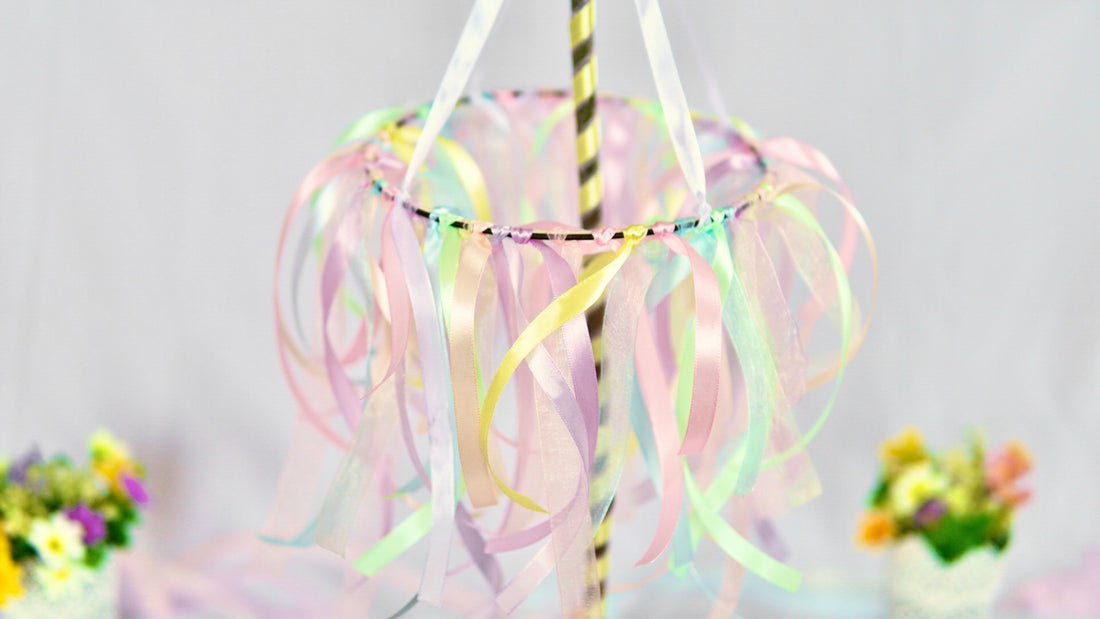
This will make your Maypole beautifully colourful, and the different lengths of the ribbons will make the whole thing look more relaxed. Then follow lots of knots. Distribute the colours evenly around the ring of your May decoration, and tie the ribbons in place with a double knot.
With a simple knot, the ribbons would stick out to the side, but with the double knot they hang down.
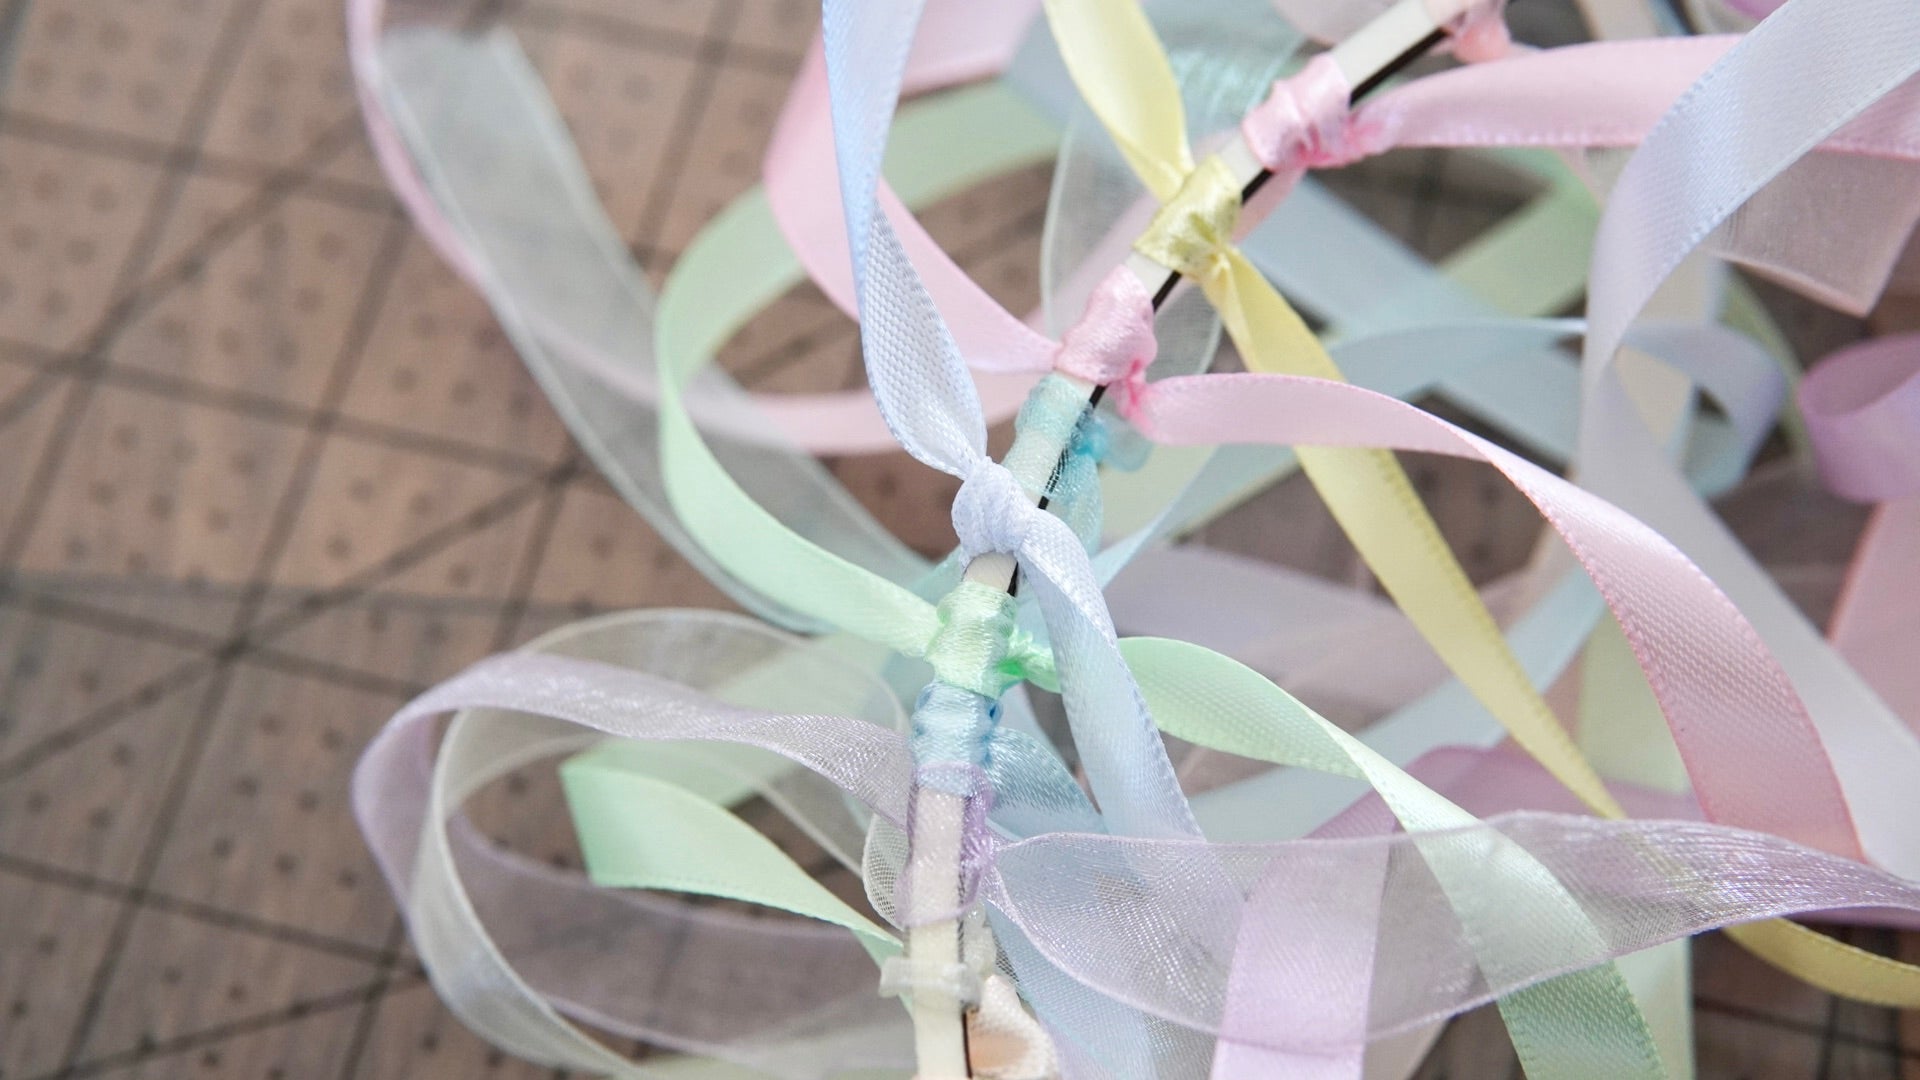
Finally, your maypole needs a suspension. For this, you need two ribbons that are about 30 cm long. You tie these to the ring opposite each other, one at 12 and 6 o'clock and the other at 9 and 3 o'clock. So that they are crossed afterwards.

Now hang your May wreath on the stick and secure it with the thumb tack. This will prevent it from slipping down.
To cover the sand in the flowerpot a little, you can put a few artificial flowers in it.

Your maypole as a decoration for May 1st is now ready. You can use it as a decoration for the dining or garden table, the windowsill or anywhere else.
I hope you have fun making this and have a lovely dance into May!
Your Rina