
Many of you probably know the blocks from the Block Man. For example, Rina used them in her tutorial for the wooden gift tags.. But who is actually behind the blocks? We would like to introduce you to one person in our #beamies article who is also an enthusiastic Mr Beam user. But read for yourself. 🙂
Katrin introduces herself

Hello Katrin, first introduce yourself. Who are you, and where do you come from?
So, as it says above, I am Katrin, still 39 years young, proud mother of 2 boys and happily married. 🙂 I or we come from the Ruhr area, specifically from the city of Marl. Most people in the craft world know me as Mikalule, which is the name of my hobby pages on Facebook and Instagram :)
Love at first sight! 🧡
How did you become aware of Mr Beam? Which model are you currently using?
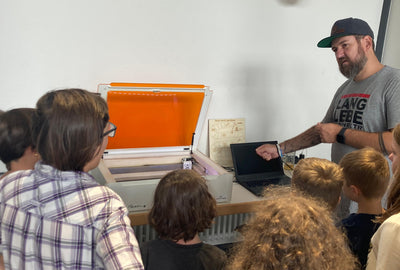
I saw the Mr Beam live for the first time at Creativa 2023 in Dortmund and was quickly impressed. This came about because of the blocks from the Klötzchenmann, with whom I was at Creativa and you engraved blocks for us as a demonstration, but our Jessi from the team was even more behind about testing it. 🙂 I use the Mr Beam II dreamcut [x] and love it!
How did you actually end up at the Klötzchenmann?
It's actually a slightly longer story about how this all came about, but to keep it short, it was in 2021 in the plotter group on Facebook by kleine Göhr.e Design, because that's where all the hype about him and his blocks started. He himself was also in the group, we wrote and quickly realized that we were neighbors, so to speak, because we lived a few streets apart, so he also lived in Marl. His only shop is in Dortmund. A really funny story overall. A small team quickly emerged, the Klötzchenmann team, consisting of the rooster Jaro and his chickens Jessica, Ines, Cornelia and Katrin. That's what he always calls it himself. 🙂

Why are the block man and Mr Beam a perfect match?
For me, it's the endless possibilities of the blocks, with which I can build/glue whatever I want at the moment, be it the napkin holder, which is where it all started, or a picture frame, which Mr Beam can always personalize for me, be it with a great one engraving or even a nice cutout, because the Mr Beam II dreamcut [x] can also do what we wouldn't have thought, namely cutting 8 mm thick blocks! I just love creating/building things myself the way I need them!
The main thing is to be creative

What other projects are you implementing? Is there a specific focus or everything across the board?
I always like to say that I'm kind of an all-rounder because I like to try a lot of different things, but mainly I'm very active in the crafting and plotting world. There I create e.g. B. Cutting files for the plotter! But I quickly discovered that cutting and engraving paper works wonderfully with the Mr Beam. Even better than with the plotter, which is why it has been out of work since then. 😀
What material do you prefer to work with the Mr Beam? Would you rather cut or engrave?
I like everything about wood, but right now I really, really like your sign material. I have a balance between cutting and engraving, and I really enjoy doing both with the Mr Beam.
Creating embossing stencils made easy

You told me in advance that you make embossing stencils with the Mr Beam. How exactly do you go about this? What material do you use for this?
Yes, exactly, that was a spontaneous idea, of course there are already endless things like that. But no stencils from kleine Göhr.e Design, although I really like the files, which can always be lasered really well. Then I wanted to try it somehow, but of course I got an OK first. Eva (little Göhr.e Design) must have rolled her eyes because I have to say that you can do anything privately with your files! Now I thought about what would be the best possible?! I quickly ended up with the sign material from your shop and tried it out a bit to see how it looked best in the end. For this I use e.g. For example, I always use my plotter program, Silhouette Studio, where I always prepare all my files, including the embossing stencils. Then I have the desired motif/text engraved, setting the focus of the laser head a little lower than the focus tool indicates. So of course I ended up with the engraving a little deeper than actually, which makes the result perfect! It is also important that you reflect your subject or whatever. Texts or motifs should not be too delicate, as then the embossing will not be as strong on the paper.

Do you have any special tips for our users?
As described above, the laser head is slightly deeper than the focus tool indicates. I always leave the engraving and cutting with your saved presets, which works very well. Another tip I would give is that when you create the stencil, you should first think about which card format you want a stencil for, because simply cutting a motif with offset always results in the edge in the middle of the paper. So I create a stencil for a B6 card that fits exactly to size, so I don't have any impressions anywhere that aren't wanted and best of all, the stencil can be used again and again and the possibilities are now limitless. I explain everything in more detail in the tutorial for the embossing stencils. 🙂
Everyone can improve
Do you perhaps have any suggestions for improvement? Hardware or software?
It's actually just small things, not annoying, but would be a little easier. On the one hand, it would be great if you could make smaller jumps when positioning in the work area with the arrow keys, although we have already found out that this works great with the Ctrl key if you keep it pressed :)
And the second thing that I would have found great, especially as a paper crafter, would be if the bottom of the frame had been magnetic again. Otherwise, I can't think of anything else other than to conclude by saying that Mr Beam has become a very reliable "buddy" of mine :)
Thank you for taking the time to answer our questions. We hope you continue to have so much fun with Mr Beam and that we can continue to follow your creations!

2 comments
Megaaa Bericht von Katrin…
Sie macht uns ganz schön wuschig auf ihrer Seite mit ihren tollen Ideen.
Irgendwann – wenn ich genug gespart habe, gönne ich mir auch einen Mr Beam
Tolle Idee von Katrin, tolle Frau und vl zieht irgendwann auch bei mir ein Laser ein 😅. Katrin setzt uns ja immer so tolle Ideen vor 😍.