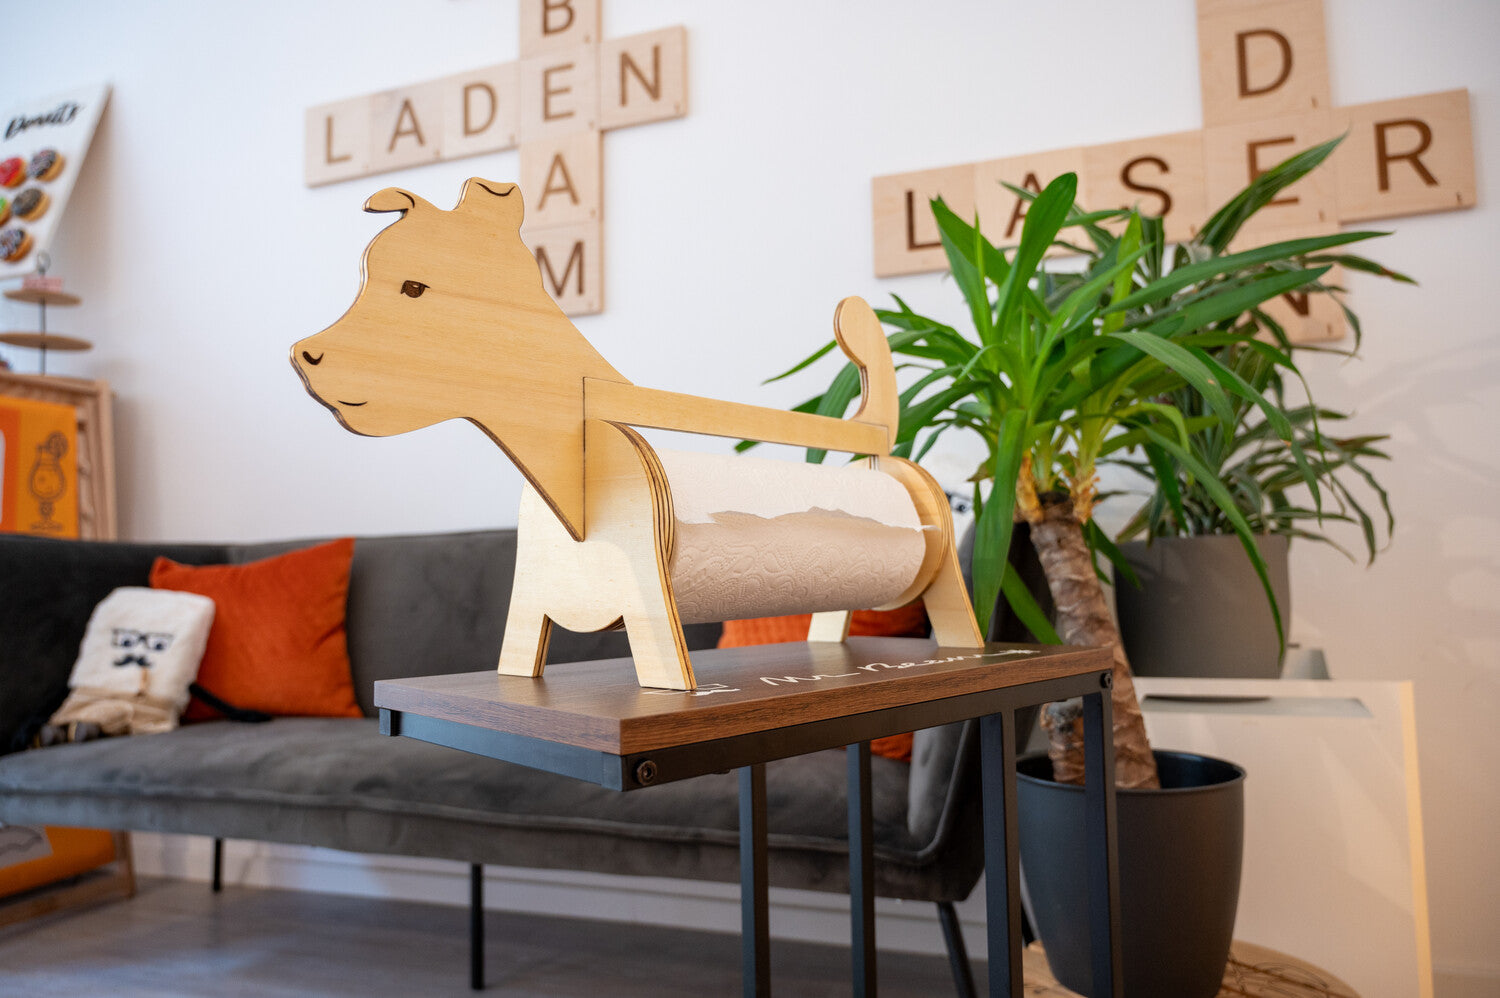
What do you give someone who already has everything? Since I started lasering, the answer to this question has always been personalized stuff! But personalized doesn't always have to mean simply engraving the name or cutting out the first letter. Pet motifs are also great as individual souvenirs. So the idea was born to design a kitchen roll dog exactly based on the photo of a real dog. And here I'll show you how you can do it.
Material for the kitchen roll holder
- 2 A3 panels poplar plywood 8 mm
- sandpaper
- possibly a rotary or multi-sander
- wood glue
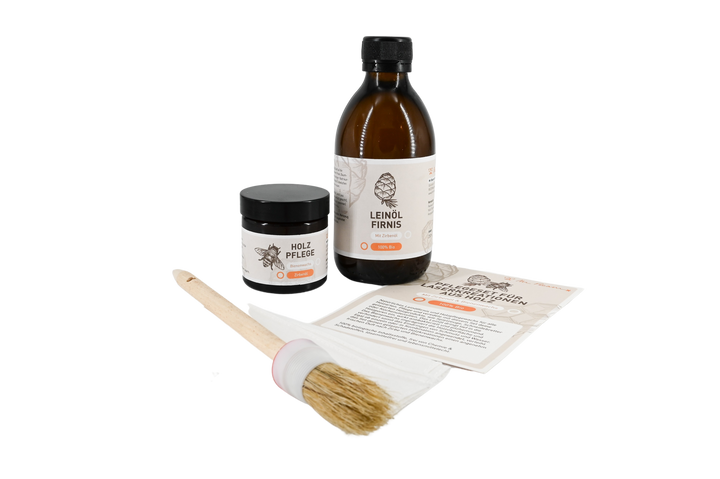
- Linseed oil varnish
- coarse brush
- Graphics program of your choice (e.g. Illustrator or Inkscape)

Mr Beam poplar plywood, 8mm, A3
Sale price
From € 59,00 EUR
Mr Beam wood care set with stone pine oil and beeswax
€ 59,90 EUR
Sale price
€ 29,90 EUR
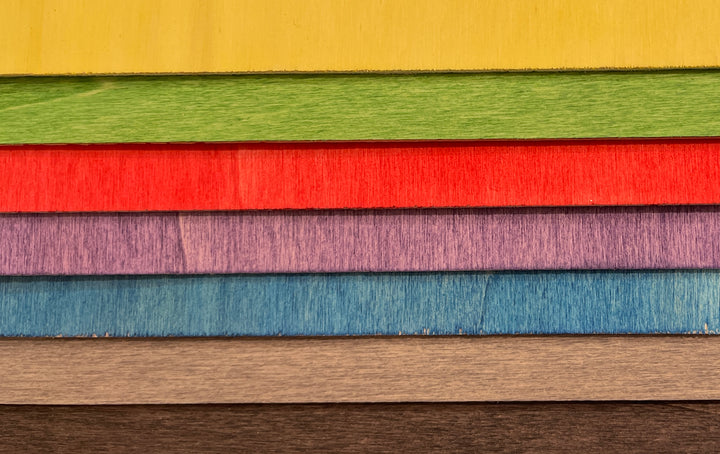
Mr Beam poplar plywood coloured (different colours)
Sale price
€ 59,90 EUR
How to personalize your file
You can find the file for our dog in the Mr Beam Design Store. It is designed so that you can easily swap out the head and tail with your own design. To make your own version, you'll need a side-on photo of the animal (I bet you could easily do a cat!) that shows the profile particularly clearly. You also need a graphics program. For example, I use Adobe Illustrator from the Adobe Creative Cloud. You can also use free programs like Inkscape.
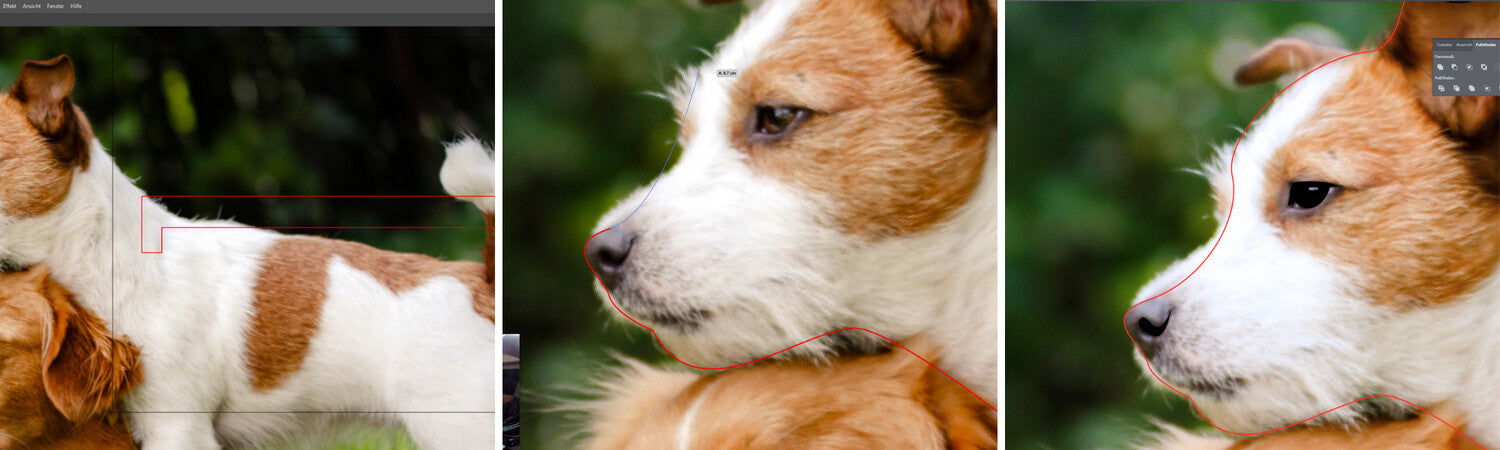
How do you actually trace a photo?
To path a photo in Adobe Illustrator, you must first import the image and then create the path manually. Here's how to achieve your goal in four simple steps:
- Load image into software : This is easy to do via drag-and-drop or via the File -> Place tab.
- Drag and Lock Photo: Use your Selection Tool (V) to drag your image file to the correct size and align it with the back of the paper towel holder. Also make sure that the file is on the lowest level and lock it. This can be done with the small lock symbol in the layers window.
- Trace contour: Now, we trace the outer contour of our dog's head. To do this, take the Pen Tool (P). Use this to set an anchor point at the point you want to start from, then the second point at the next curve. By holding down and dragging, you can now manipulate the line between both anchors. It's best to just try it out. If you want to make a curve out of a corner afterwards, you can do this with the anchor point tool (Shift+C). Photos by Paths is the best practice for using the path tools in graphics programs. I recommend you choose a bright colour like red so that you can still see it clearly in the photo.
- Create engraving details: If you like a simple look better, the outline is enough. But a few nice engraving details breathe life into your project. Find the darkest parts of the photo, i.e. eyes, mouth, shadows, etc. and trace them. When you're done, select your objects and switch from contour to filled area.
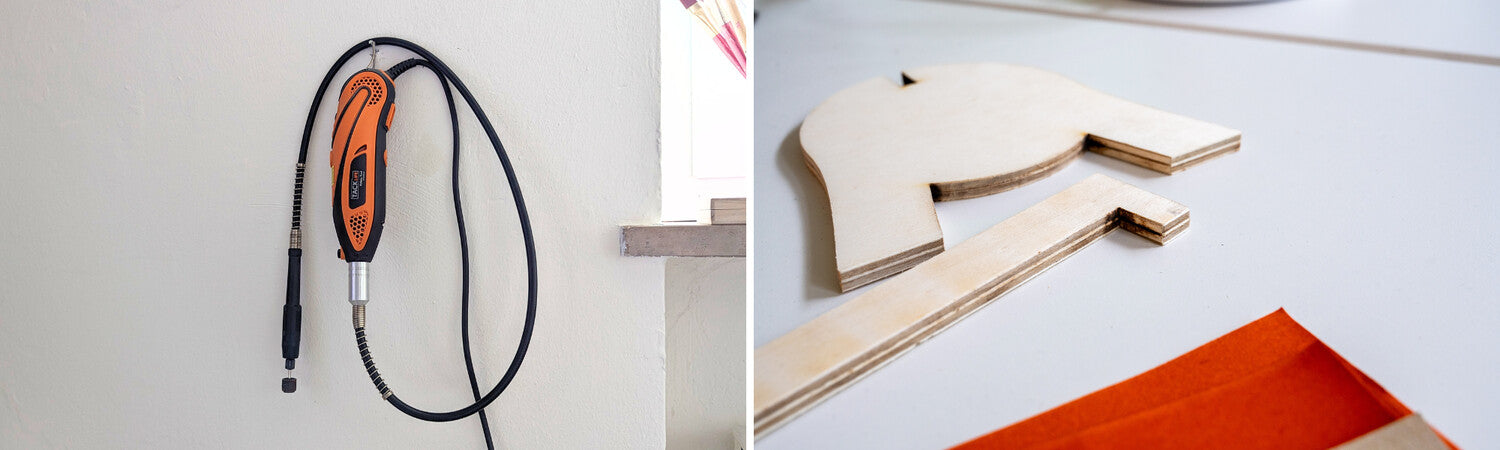
Cut wood for the kitchen roll holder with the Mr Beam
Now it's time for my favourite part: the lasering! Save your finished file as an SVG file and load it into BeamOS using drag-and-drop. Place your wood on the work surface. To avoid traces of smoke, you should definitely use Stix. Either lying on the flat floor or, if you have installed the Mr Beam Height Extension, in the cutting frame. The pieces are all very large, so you don't have to worry about small parts falling out. Use the camera to slide the design into the appropriate spot on your wood, focus your laser head, press laser and select the settings for 8mm poplar plywood.
Since we are working with very thick wood in this project, it may be helpful to select “progressive” in the advanced settings. But it's also important to make sure that you don't drive too slowly or too often, as this will save you the grinding work later. It's best to do a test cut.
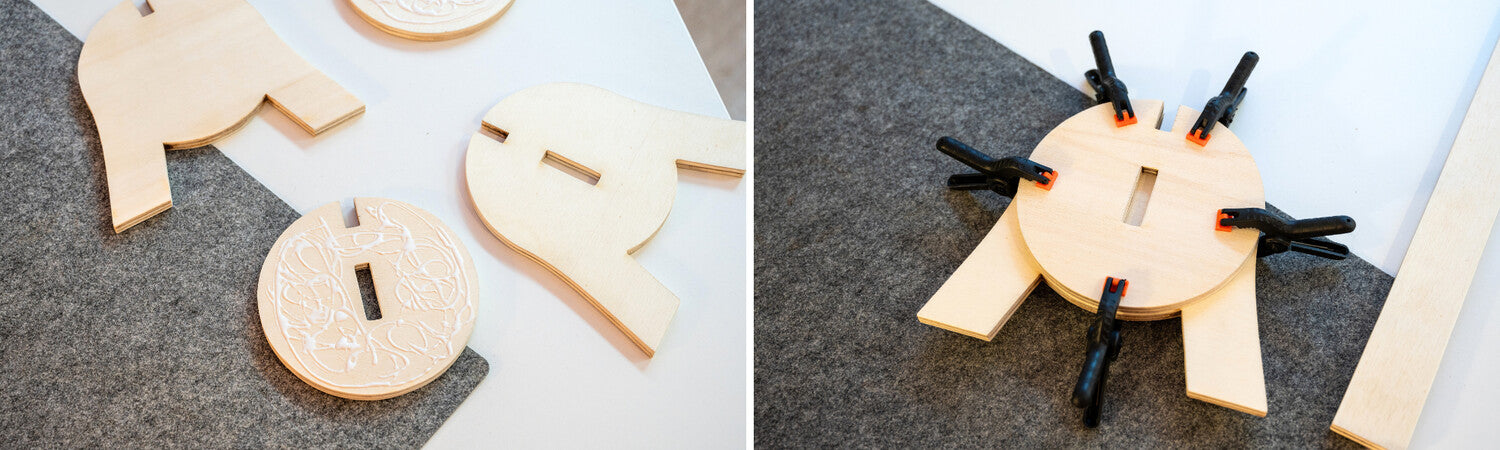
Sanding and gluing for a clean result
This time I decided to sand the edges clean. Since the dog is supposed to hold kitchen rolls afterwards, you might otherwise get them smeared with soot. To speed up the process a little, you can use a rotary or multi-sander and, after removing the rough material, finish it with sandpaper. You can get into the corners even better with the paper.
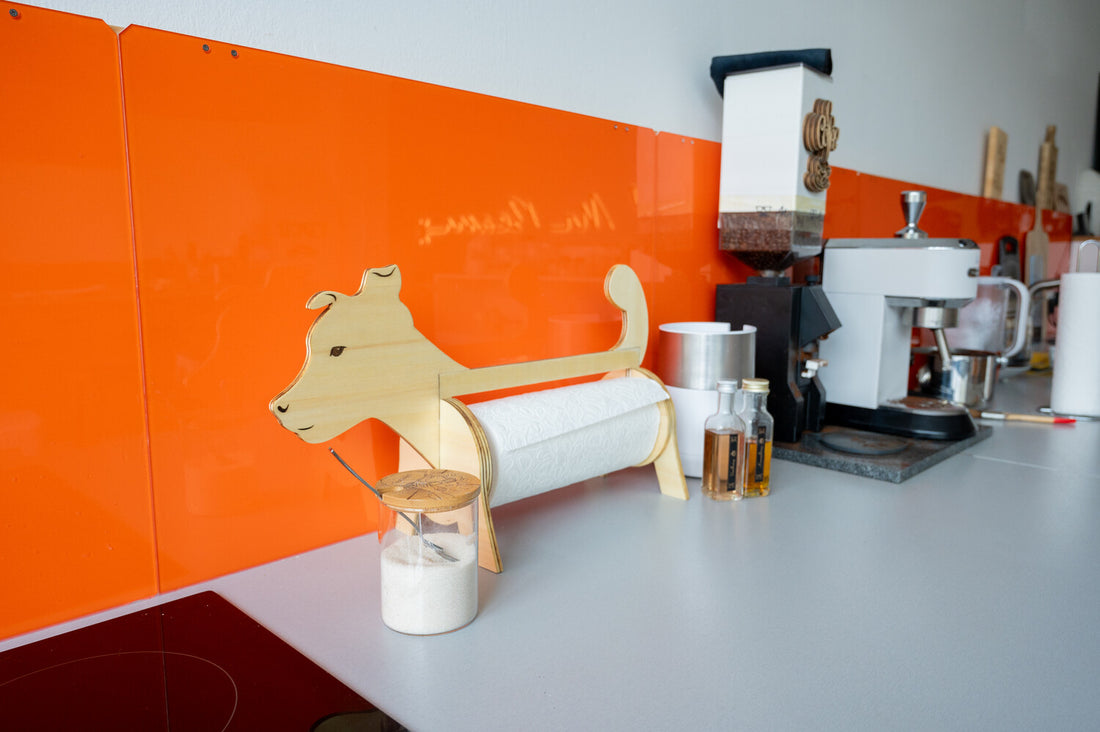
If you are satisfied with the result, it's time to glue it together. You always stick a round disc on a base disc. The base disc without a hole will then be the front, as the middle bar can snap into place here. It's best to attach the head and tail to the back piece first before gluing it to the feet.
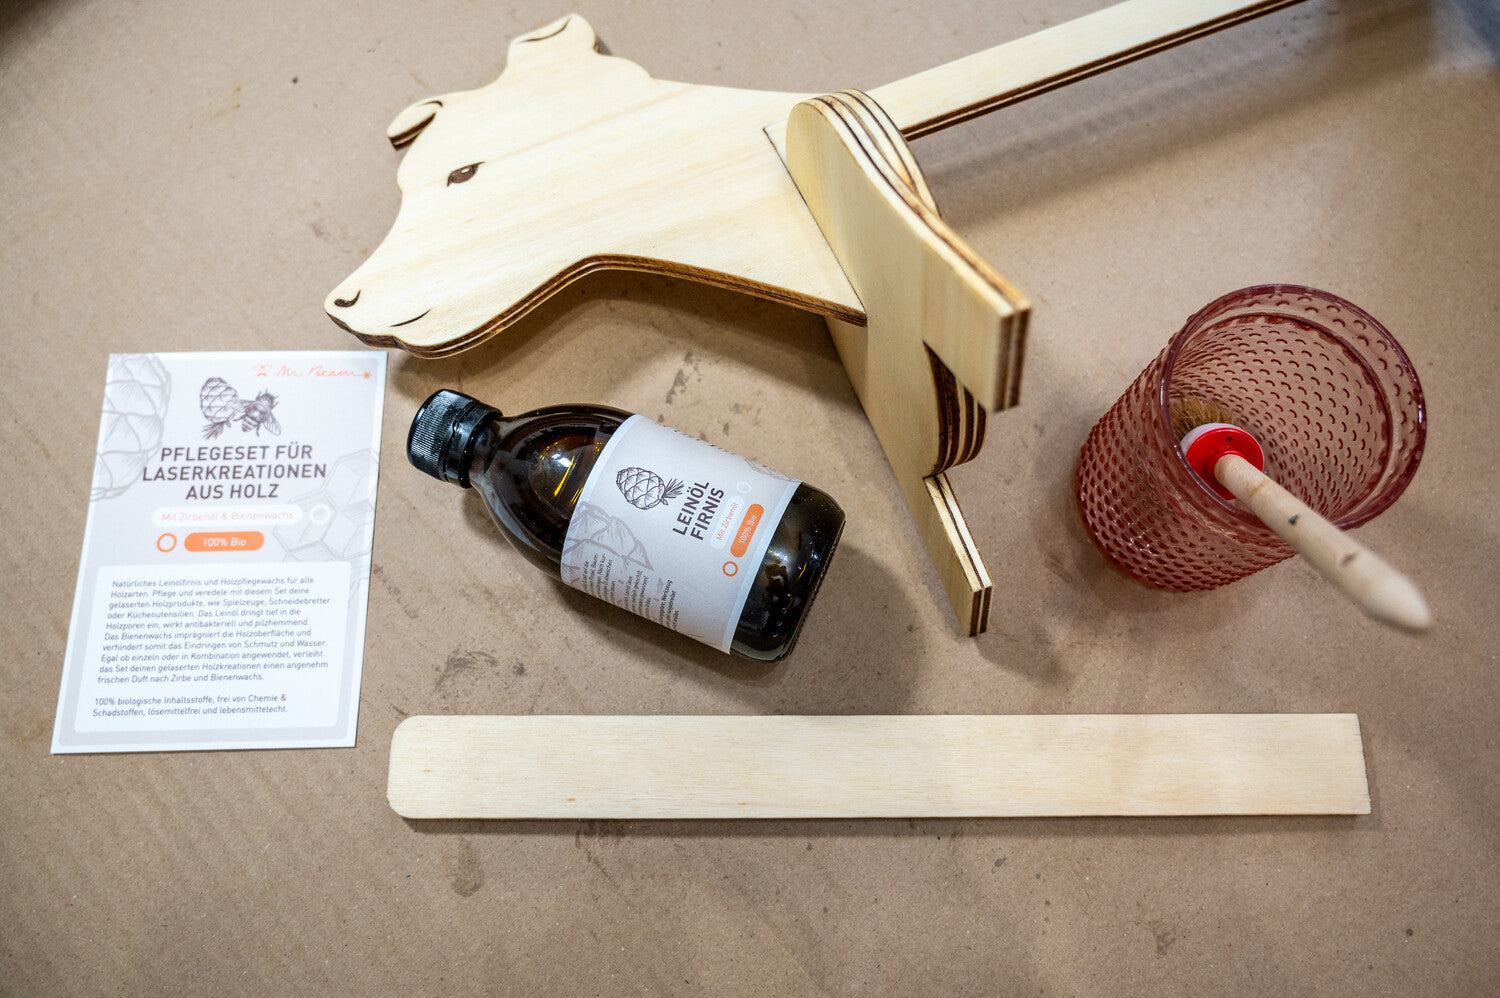
Protect your wood from external influences
Since this project will be in the kitchen and therefore has to be robust, I also decided to seal the wood with linseed oil varnish. This paint is often used outdoors because of its water-repellent properties. The result has a honey yellow colour.
When working with linseed oil varnish, there are a few points to keep in mind. Brush your cleaned wood generously with a coarse brush, let it absorb for a few minutes, and then remove the excess with a cloth. Linseed oil is self-igniting. That's why you should keep your brushes and cloths watered or away from air. The greatest danger comes from crumpled rags, as the heat generated can hardly escape from them.
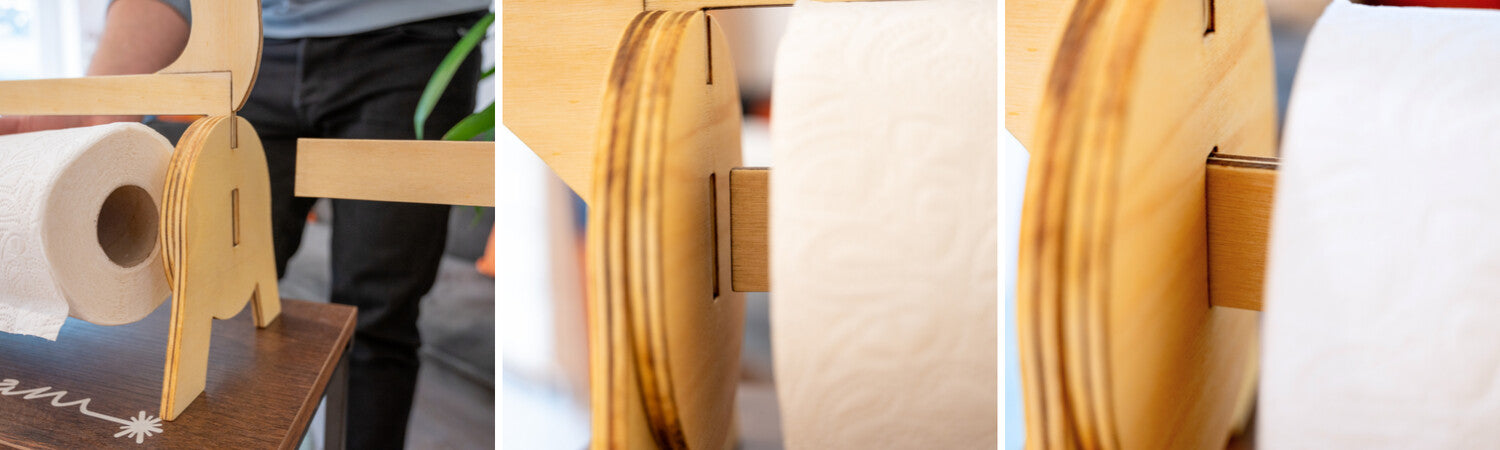
This is how you assemble your kitchen roll holder
You can easily use a new kitchen roll. Hold the roll in the middle and push the stick with the square side first through the opening provided and the roll. Make sure that the rod clicks into place at the front, as you can see in the picture here.
Your practical kitchen roll holder in a dog design is ready ! I'm really looking forward to seeing your versions of the trusty companion on Instagram using our hashtag #madewithmrbeam.
Your Marie