December has arrived. The last month of the year. And it's gotten pretty nasty outside.
The busier it gets outside, the more I feel the need to be more comfortable in my own four walls every year.
I like it when there are small lights scattered throughout the house in the dark season and create a cosy atmosphere. In this tutorial, I'll show you how you can make beautiful glowing Christmas decorations with reindeer for the table from simple 3 mm poplar plywood.
Material for your reindeer Christmas decorations for the table

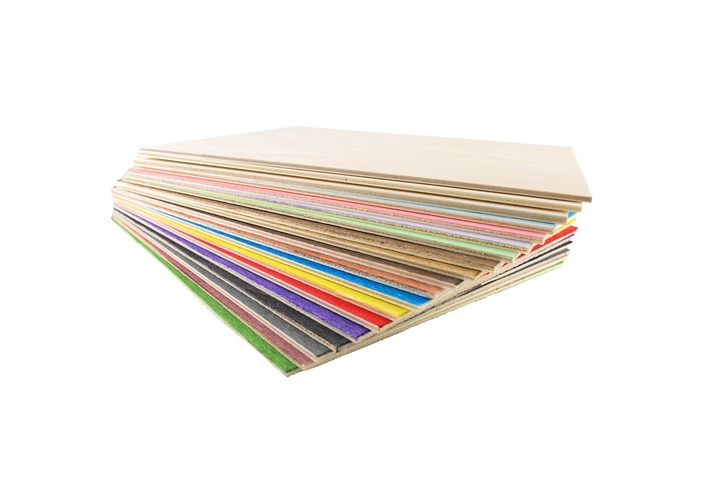
- Poplar plywood in 3 mm
- wood glue
- battery operated fairy lights
- hot glue
- Paper glue
- Scissors
- Cutter knife
- white tracing paper
- silver glitter spray
- night sky blue acrylic paint
- Paint brush
- white acrylic spray
- Masking tape
Plywood Pack of 5
Sale price
From CHF 30.00

Mr Beam poplar plywood coloured (different colours)
Sale price
From CHF 21.00
EuerKonstantin "handicraft box", wooden trial set
Sale price
CHF 62.00
I bought the file with the reindeer in the snowy forest on Etsy. There you will find some files like this.
Laser your reindeer Christmas decorations for the table
After you have downloaded the file, you can drag and drop it directly into your workspace in the Mr Beam software and get started. Or you can adjust it a little beforehand.
Small adjustments make lasering the reindeer Christmas decorations easier
I first opened it in my graphics program.
Here you can adjust the size of your table decoration and, if necessary, other parts.
For my reindeer table decoration, I made full use of the size of the poplar plywood panels from the Mr Beam Shop and therefore needed a plywood panel for each layer of the bright reindeer table decoration. To make it easier for me to distribute the laser jobs in the Mr Beam software, I coloured the cutting lines in a different colour.

After customizing, save the file and then load it into the workspace of the Mr Beam software.
Laser your Christmas decorations with reindeer
Place the poplar plywood in your Mr Beam and start the first laser job.
The laser settings for the poplar plywood material are stored. Confirm the thickness of 3 mm and determine which layer of your reindeer Christmas decoration should be lasered by first dragging all the colours of the cutting lines into the "Skip" field.

You then drag the layer you want to laser into the “Cutting” field. After the laser job, take the finished lasered part out of the Mr Beam, put a new sheet of poplar plywood in it and start the next laser job with the next colour.
Do this until Mr Beam has lasered all eight layers of your glowing reindeer Christmas decorations for the table.

Note: The second layer is the cavity for the fairy lights. If you don't use a thin string of lights, you may need two layers or use a stronger one, such as 5 mm, instead of the 3 mm poplar plywood for this layer.
Paint the night sky and the top shooting star
Two of the eight layers of your bright reindeer Christmas decorations are painted.
For the night sky, I mixed black and dark blue acrylic paint and made it a little thinner with a little water. This meant that the paint could be distributed more evenly with the brush and was absorbed nicely into the wood.

While the blue night sky dries, mask the reindeer on the top layer of the shooting star as a Christmas decoration with masking tape so that they don't get painted.

To paint with spray paint, you will need:
- a place in the fresh air protected from rain and wind
- a paint booth or a cardboard box set on its side to protect your surroundings from the spray mist
- your white spray paint
- the silver glitter spray
- Gloves for you and, if necessary, a breathing mask
You have to shake the spray cans before painting. Then spray a thin layer onto the wood at a sufficient distance. If the coverage of the white paint is not enough for you, you can apply another thin layer after it has dried.

A little glitter for your reindeer Christmas decorations
While the white painted shooting star of your reindeer Christmas decoration is drying, you can shake the glitter spray well. Especially with spray paints with glitter or metallic effects, you should always make sure to shake sufficiently to achieve an even distribution of the particles.
After shaking, the first thing you do is spray the night sky with the glitter spray.

When assembled, it looks like little snowflakes glittering in the moonlight. Now, you can also spray the white shooting star of your reindeer Christmas table decoration with glitter.

A string of lights for your glowing reindeer Christmas decorations
While the paint is now drying, you can slowly start gluing together your Christmas decorations for the table. The first step is to glue the back wall and the poplar plywood layer for the cavity together.

After the glue has dried, lay the string of lights in the inner frame of the shooting star. First stick them in place with masking tape and make sure that the lights are evenly distributed.

No LEDs are needed in the lower part because the snow landscape will be in front of it.
Now glue the fairy lights in place with hot glue by applying a drop of hot glue to the wood at the corner points and simply press the wire of the fairy lights in and hold it briefly until the hot glue has dried.

Use transparent paper to create diffuse light for your reindeer Christmas decorations
Now apply paper glue to the back of the night sky. Place the tracing paper on top and let everything dry. After drying, cut off the excess tracing paper around the shooting star with a knife.

The transparent paper ensures a nice distribution of light and prevents you from being able to see the wires of the LEDs in the fairy lights later.
Your reindeer Christmas decoration for the table is ready
The lowest layers are already glued, and the fairy lights are glued in place. Now glue the night sky onto it.

This is followed by all the other layers of your reindeer Christmas decorations for the table. At the end, you check again that all the shooting stars line up exactly and either use clamps or place something very heavy on your reindeer Christmas decoration to set the glue. Then your new reindeer Christmas decoration for the table is ready.
I hope you have fun imitating it and enjoying cozy hours at the table with your family and friends!
Your Rina