January - for me, a month without a real decoration theme. Christmas is over, but spring and Easter are still a long way off. Do you also know that you still want something “green” in your decoration?!
And where can you find the perfect material for it? Right, in nature. A real craft trend !
So go ahead, enjoy a walk, collect natural materials that you like, and I'll show you how you can beautifully display them on a laser-cut tray yourself.
Material for your winter tray with natural materials

- 3 mm birch plywood
- wood glue
- Acrylic paint for spraying in the colour light gray
- two old jam or chocolate cream jars
- two tea lights or LED tea lights
- and above all natural materials such as moss, cones of conifers, ivy, nuts, sticks and whatever else your garden or surroundings have to offer.
- The file “ Advent wreath as a tablet ” and “ Snowflakes ” from the Mr Beam Design Store

Mr Beam poplar plywood 3mm, pastel, A3, economy pack (4 colors)
Sale price
CHF 62.00

Plywood Pack of 5
Sale price
From CHF 30.00
Plywood birch 5 pack
Sale price
CHF 47.00
Now you're probably wondering what I want with an Advent wreath in January? The question is of course legitimate, but if you look at the file you will see that you can actually use the tablet at any time, and I'll show you how in a moment.
Make the tray for your winter decorations
Start your Mr Beam and open BeamOS in your browser. Load the two files from the Mr Beam Design Store into your design library. You'll notice that the file for the tablet has two parts. Of course, you don't need the Advent plugs now.
There are four slots in the bottom of the tray - they were originally intended for the Advent plugs. And there are stars in the edge of the tray, which are then lasered out.
You can remove the slits and stars in your graphics program before lasering by downloading the file to your PC and then editing it.
Because the slits in the bottom of the decorative tray are no longer visible at the end, and I'll show you how we simply glue over the stars, you can also simply laser the file as it is.
Laser your tray and winter decorations
Place your birch plywood in the Mr Beam and align the tray's file with it. Since the tray for your winter decorations fits exactly onto a sheet of plywood, setting the correct working height for aligning the file on your material is particularly important.

After focusing the laser head, click on “Laser”. The laser settings for birch plywood are already saved in the Mr Beam software. Just confirm the material thickness of 3 mm and start the laser job. When your tray is ready for your winter decorations, take it out of the Mr Beam, put plywood in it for the snowflakes and laser them too.

Birch plywood and a little paint make a tray for winter decorations
Now, you glue the individual parts of your tray together. Make sure that all parts are straight and let the glue dry. Since the glue cannot set under pressure, the drying time takes a little longer.

In the meantime, you can prepare the spray paint to paint your winter tray. You can usually find information about this on the spray can itself.
Once the glue has dried, you can start painting.
I used the colour “light gray” from Edding. You should always paint in a well-ventilated area that is also protected from wind and rain.
Grab an old cardboard box that your winter decoration tray fits into and turn it on its side. Now you have a small paint booth to protect yourself and those around you from the spray mist.
Put on gloves and a mask and start with a first thin application of paint. This way you prevent “paint noses” and the result will be more even.
Now let this first thin application of paint dry for a few minutes.
Then spray another thin layer evenly onto your tray and let it dry as well.

Once the paint has dried, you can start decorating your winter tray.
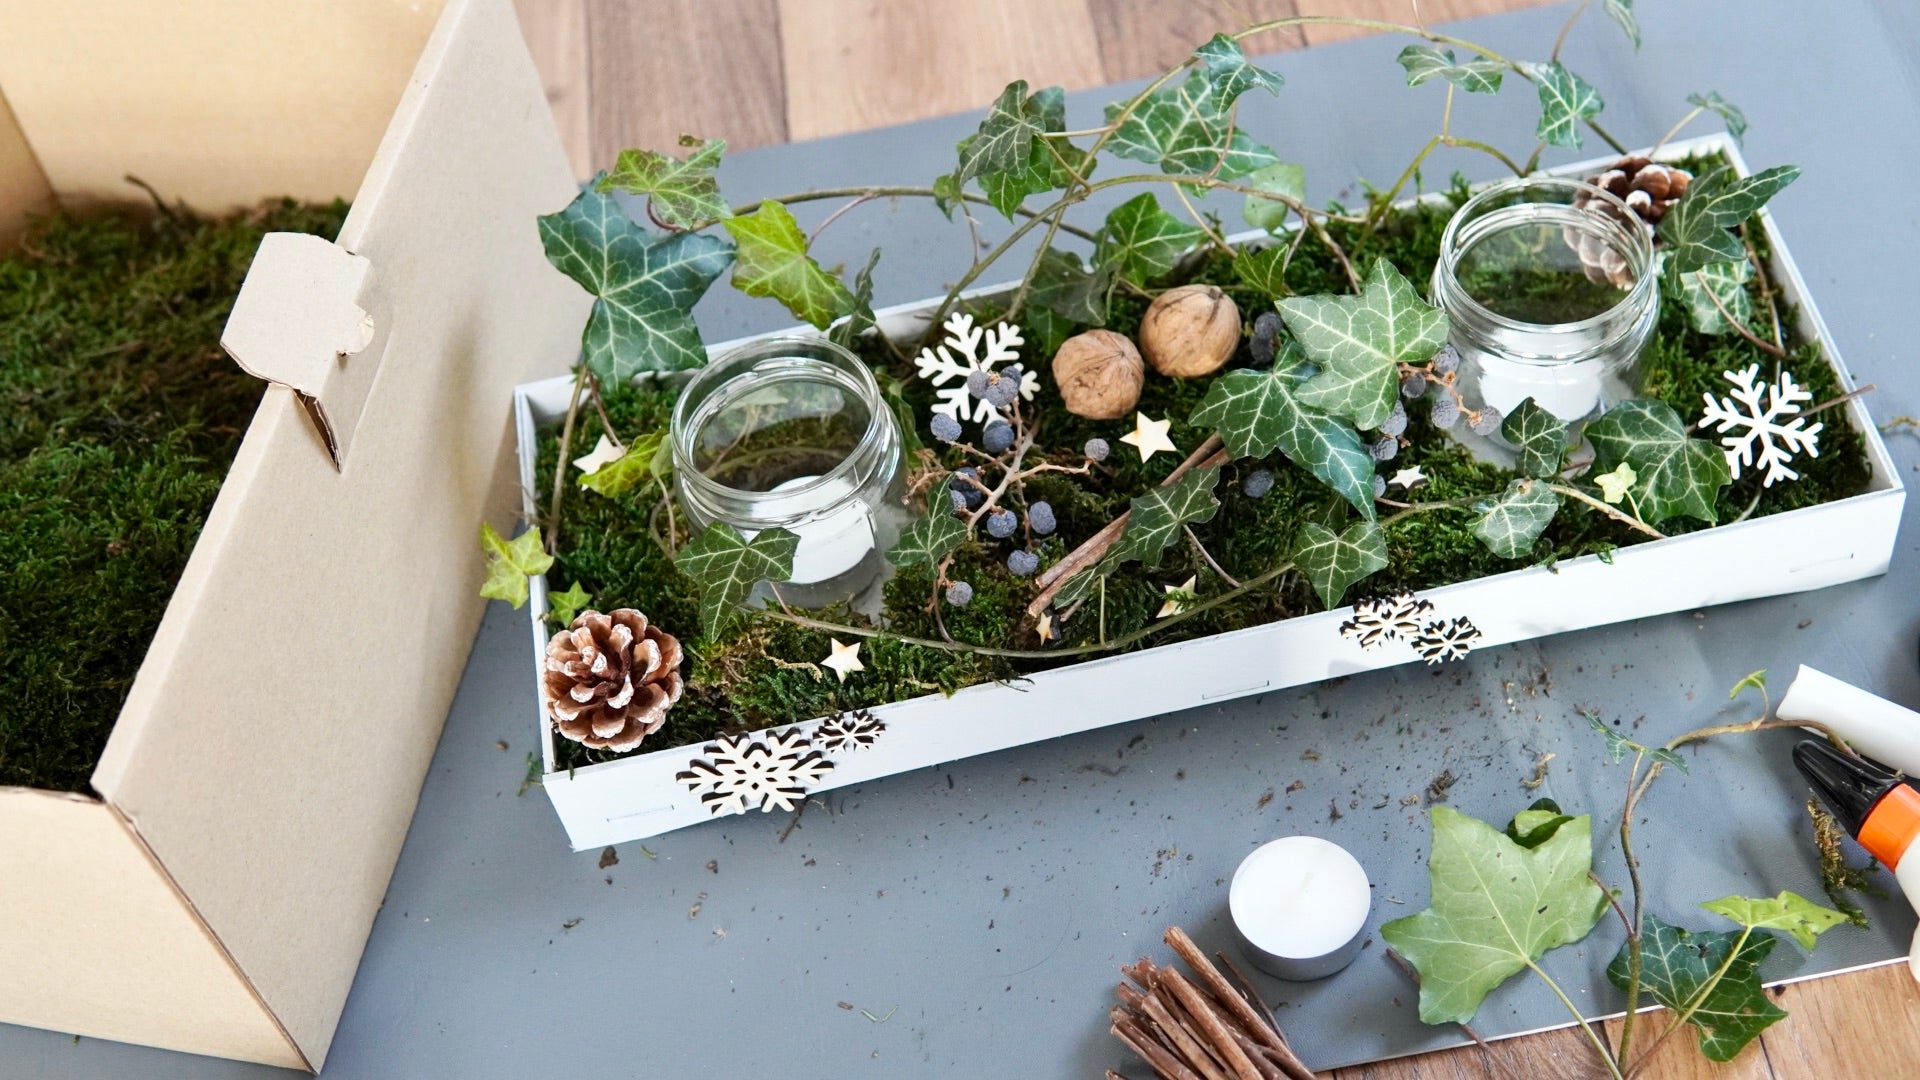
Lanterns made from jam jars for your winter decorative tray
Remove the labels from the two empty - and of course washed - jam jars, and then place them on your tray. They will later serve as lanterns for your candles. This means that the candles are protected from drafts and, conversely, the decorations made from natural materials are also protected from the fire of the candle.
Natural materials for your winter decorative tray
There are no limits to your creativity when designing your winter decorative tray .
The moss for your decorative tray in winter
If, like me, you use moss for your decorative tray, you can either buy it or collect it outside. If you want your self-collected moss to stay fresh and green, you should preserve it. Drying moss is really not difficult. 🙂
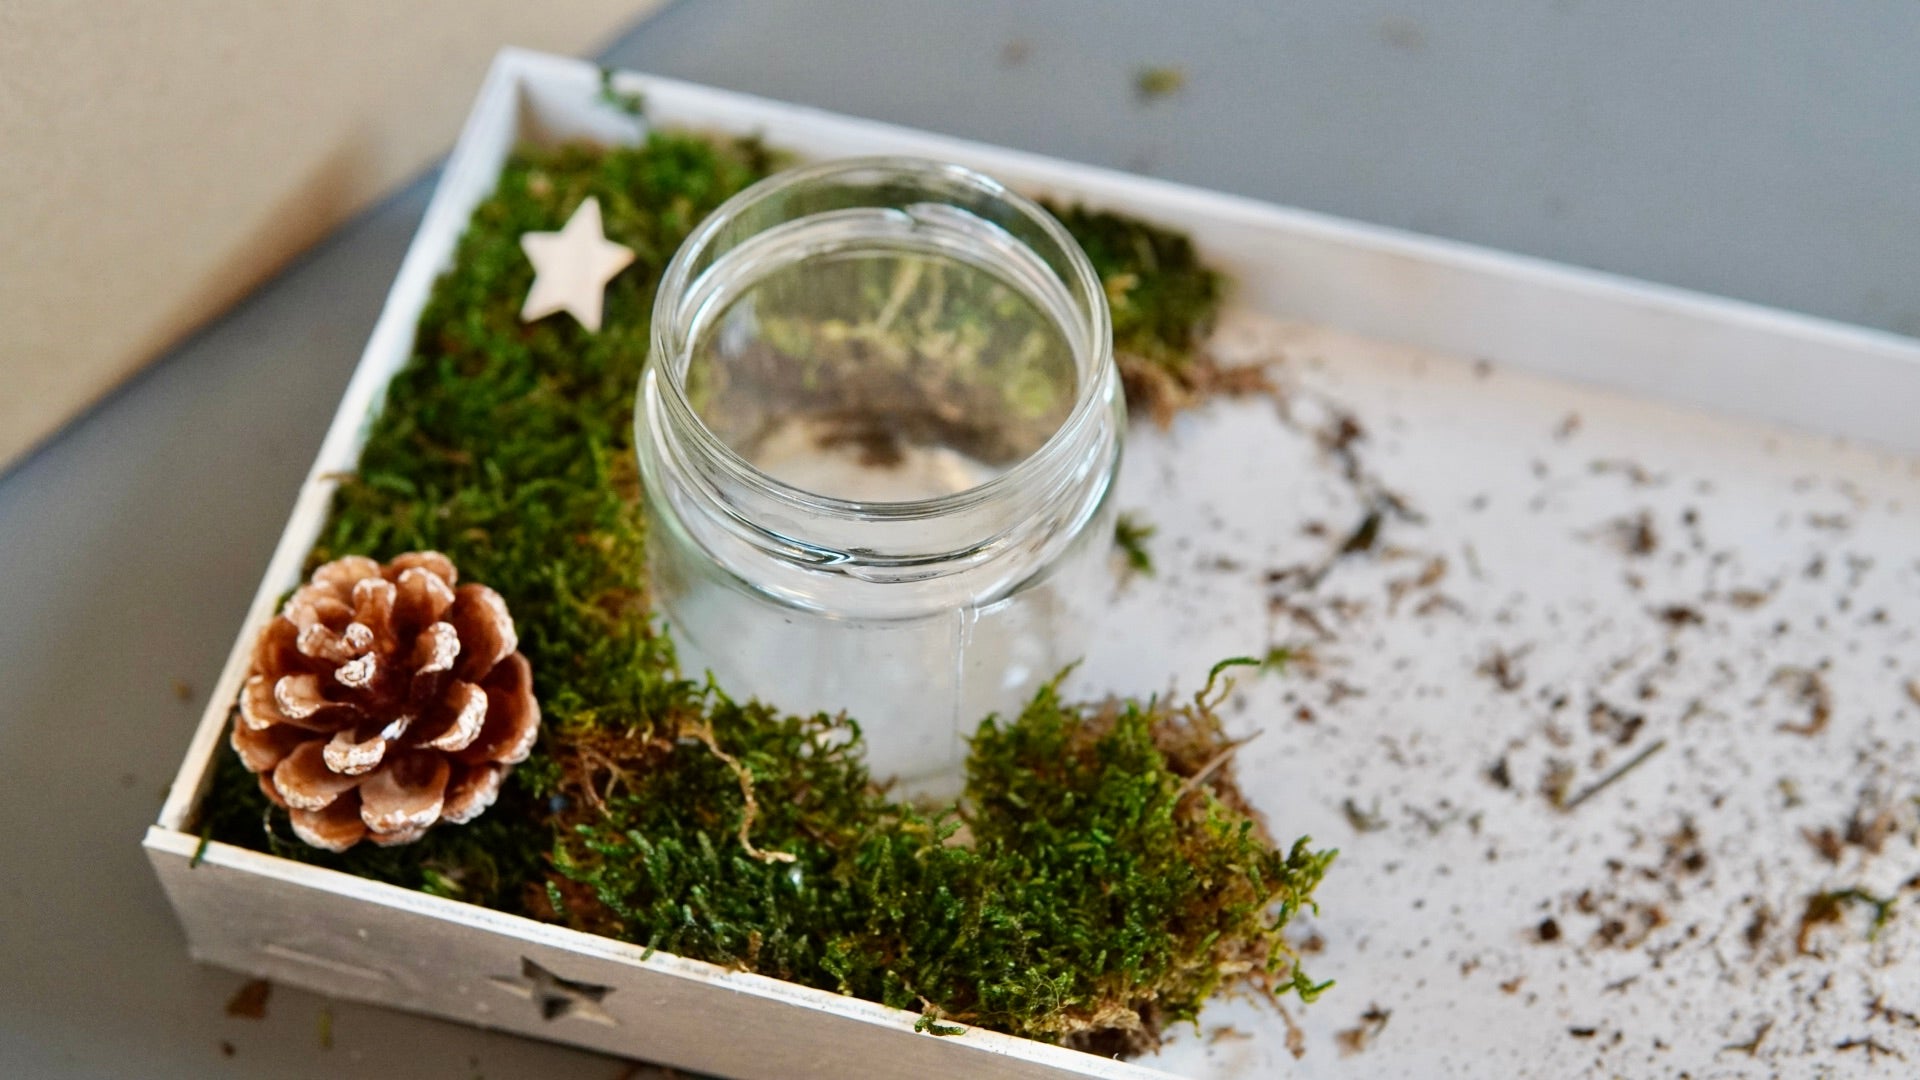
Around the jam jars, spread the moss over the entire tray.
This creates a beautiful, green moss carpet for your winter decorative tray, which you can now decorate according to your taste.
Winter tray with cones, ivy, walnuts etc. as decoration
If you have collected your cones yourself, you should remove any coarse dirt from them and then dry them in the oven at around 90 degrees. Purchased cones are already dried and cleaned.

I gave the cones a wintery look by painting the tips with a white acrylic pen.
I distributed the stars and a few of the snowflakes that were laser cut out of the edge of the tray on the moss, as well as the walnuts, cones, sticks and ivy.
I placed the ivy around the lanterns and stuck the ends into the moss behind the lanterns in an arch shape.

Finally, glue the snowflakes to your tray. If you want, you can use it to cover up the lasered out stars.

Place tea lights in the glasses, light them and your winter decorative tray with lots of natural materials is ready.
I hope you have fun making and decorating.
Your Rina