Do-it-yourself cosiness - if you get the decoration fever but can't find the right part in your repertoire, then just make it yourself!
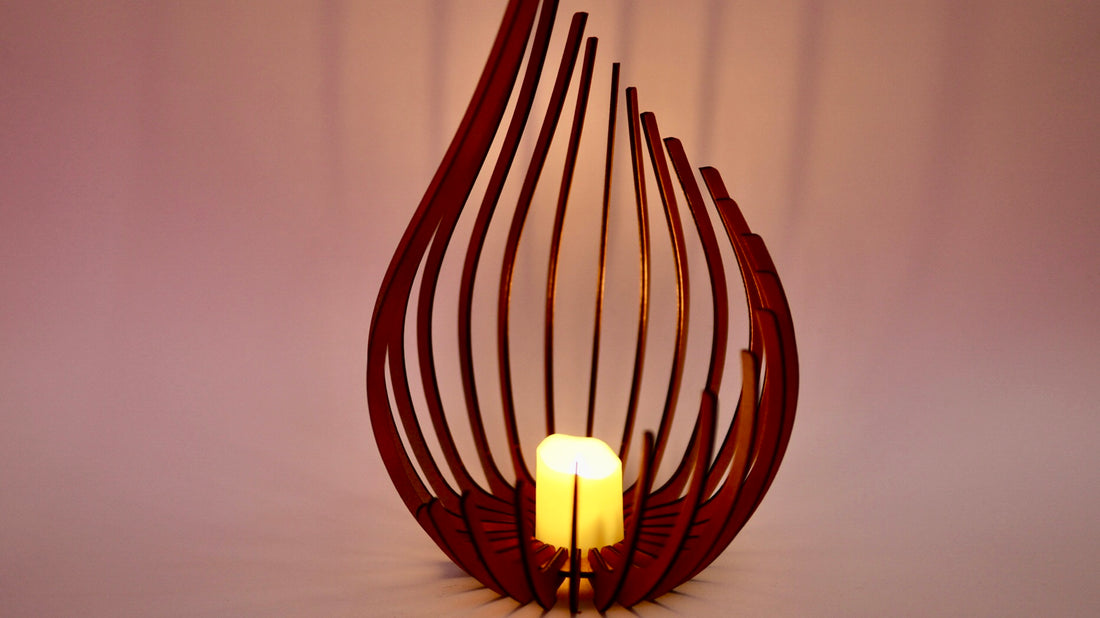
The warm flickering light of a candle is pure comfort. And in this tutorial I'll show you how you can use your Mr Beam to make a beautiful, modern wooden candleholder for the terrace or living room in no time at all.
Thanks to the simple operation and the materials that have already been tested for you in the Mr Beam Shop, nothing stands in the way of your idea.
I bought the file for my modern wooden candlestick on the Internet. I really liked the curved design, but there are countless other designs. Pick one you like, as the assembly is very similar for all of them.
Materials for your modern wooden candleholder
You really don't need a lot of materials, but the wooden candleholder still makes a great impression.
- Poplar plywood in the thickness of your choice. The files are usually designed for several wood thicknesses, so you have a free choice here. For this project, you can very well fall back on leftover pieces, since the candleholder consists of many small elements.
- Spray paint in your desired colour. I took "copper". For a beautiful candlelight effect, it should be a shimmering shade, for example silver, gold, copper or rose gold.
- Wood glue, possibly waterproof depending on where it is used.

Mr Beam Poplar plywood suitable for [x], 4mm, A3
Sale price
From € 35,90 EUR
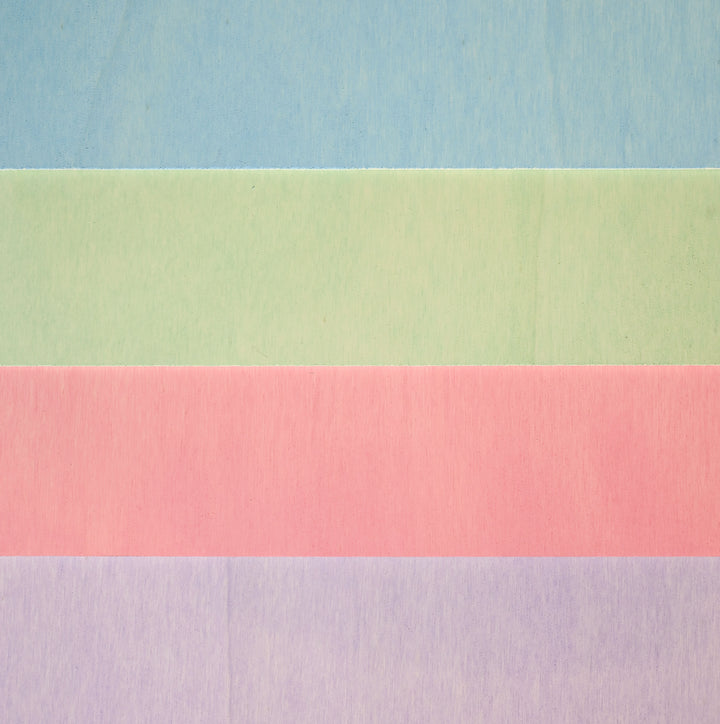
Mr Beam poplar plywood 3mm, pastel, A3, economy pack (4 colors)
Sale price
€ 65,90 EUR

Mr Beam poplar plywood, 8mm, A3
Sale price
From € 59,00 EUR
Varnish the wood for your modern candleholder
The candleholders consist of many individual elements. So I varnished the poplar plywood before lasering.

You should definitely check the ingredients of your spray paint beforehand.
Here is an excerpt from the Mr Beam knowledge database:
Materials with the following ingredients must not be lasered :
- chlorine
- bromine
- beryllium oxides
- fluorine
- chrome
- iodine
- astatine
- carbon fibres
You can usually find lists of ingredients on the manufacturer's website or in the safety data sheet.

Prepare the spray can according to the manufacturer's instructions. With most sprays, you will first have to remove a fuse and attach the spray head to new cans. Then shake the spray can vigorously for several minutes. Now you still need a paint booth. I always use a large cardboard box that is set on its side. This protects the environment from the spray mist.
Also make sure that you paint in a well-ventilated place that is protected from the wind and rain if possible.
Tip: Always wear gloves and a mask when painting to protect yourself.

Especially with shimmering colours, you should shake the spray can from time to time, otherwise the shimmer particles may land too selectively or, in the worst case, not at all on your wood.
Paint your poplar plywood on both sides and then let it dry well before you put it in your Mr Beam.
Laser-cut your DIY wooden candle holder
First open the file for your wooden candleholder in your graphics program.
Here you divide the individual elements into meaningful, smaller groups and then save them. These groups are easier to arrange on your leftover wood in the BeamOS preview. In order to get the most accurate camera preview possible, you should of course set the object height.
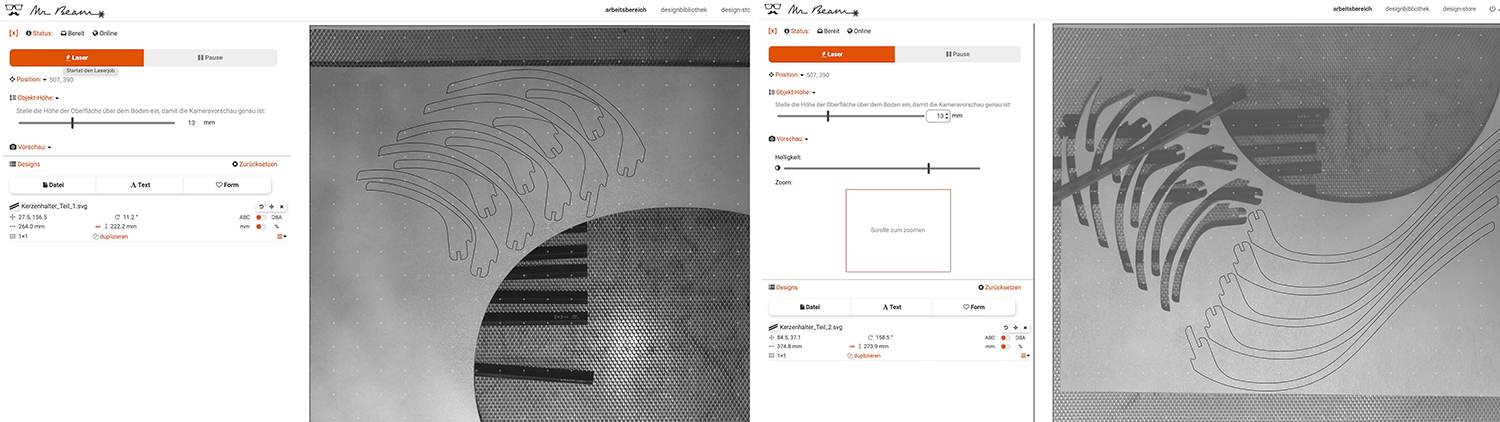
The settings for lasering poplar plywood in different thicknesses are already stored in BeamOS, but I reduced the speed a bit because of the varnishing. The same applies here as always: test beforehand.

After focusing, your Mr Beam can get started and laser your wooden candleholder for you.
Make your modern wooden candleholder
Now lay out all the elements and sort them out to make putting them together easier. Theoretically, you can just put the wooden candleholder together without gluing. Then the whole construct is quite unstable, and the vertical elements are sometimes criss-crossed.

I used a small brush to apply the glue more precisely.
Ponal Express wood glue only takes 5-10 minutes (depending on environmental conditions) to dry, so I divided everything into sections of six studs each.
The glue is applied in the interstices of the core element and also on the surface where the male elements rest. It doesn't matter where you start with the smallest plug-in element. Slide them onto the candlestick one at a time, following the order.

When the first section is attached, the glue must first dry so that the parts can no longer slip as you continue to assemble your wooden candleholder. Make sure that the plug-in elements are vertical.
Tip: You can shorten the setting time of the glue with a little pressure - you can simply apply it with your hand from above.
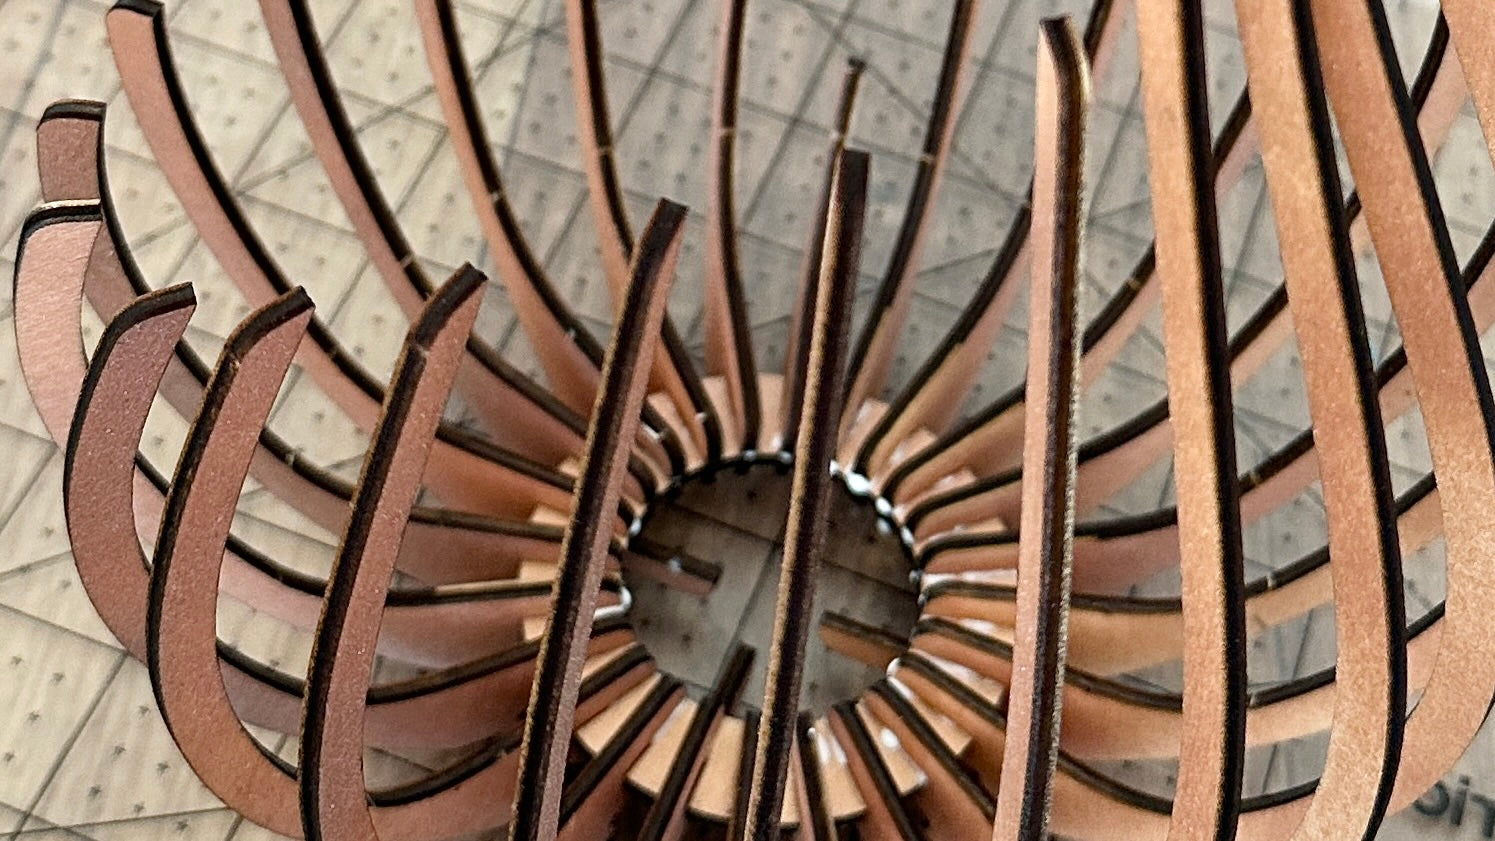
And so you now work your way around the candlestick.
Glue usually dries transparent, so that you can no longer see the excess glue afterwards. You can also remove it from the wood with an ear stick.

Your modern wooden candleholder is now ready for use. Now place a tea light or a candle with the diameter of a tea light in the circular opening, light it and enjoy your modern DIY wooden candleholder.
Cosy as it flickers to itself, right?
I wish you a lot of fun imitating and a lot of joy with your handcrafted wooden candlestick.
Your Rina


