
First milk tooth wobbles? Surprise your children with these cute DIY tooth fairy ideas
When the first baby tooth starts to wobble, there is great excitement! It won't be long before the tooth that has fallen out can be placed under the pillow, where it waits for the tooth fairy to pick it up. But how does the tooth fairy know where to go and leave her little gift? I've put together a few cute DIYs for you to give your little ones a great tooth fairy experience.
Where does the tradition surrounding the tooth fairy actually come from?
The tooth fairy tradition has its roots in various folklores. The custom of children placing their fallen baby teeth under the pillow so that the tooth fairy can exchange them for a reward is widespread. However, the exact origin of the tooth fairy tradition is not entirely clear. Some European countries, such as Spain, France and Italy, have similar customs in which a small mouse or other fantasy creature exchanges teeth for a reward. Ultimately, the tooth fairy tradition is a charming ritual that helps children experience the loss of their baby teeth positively.
Engrave milk tooth can
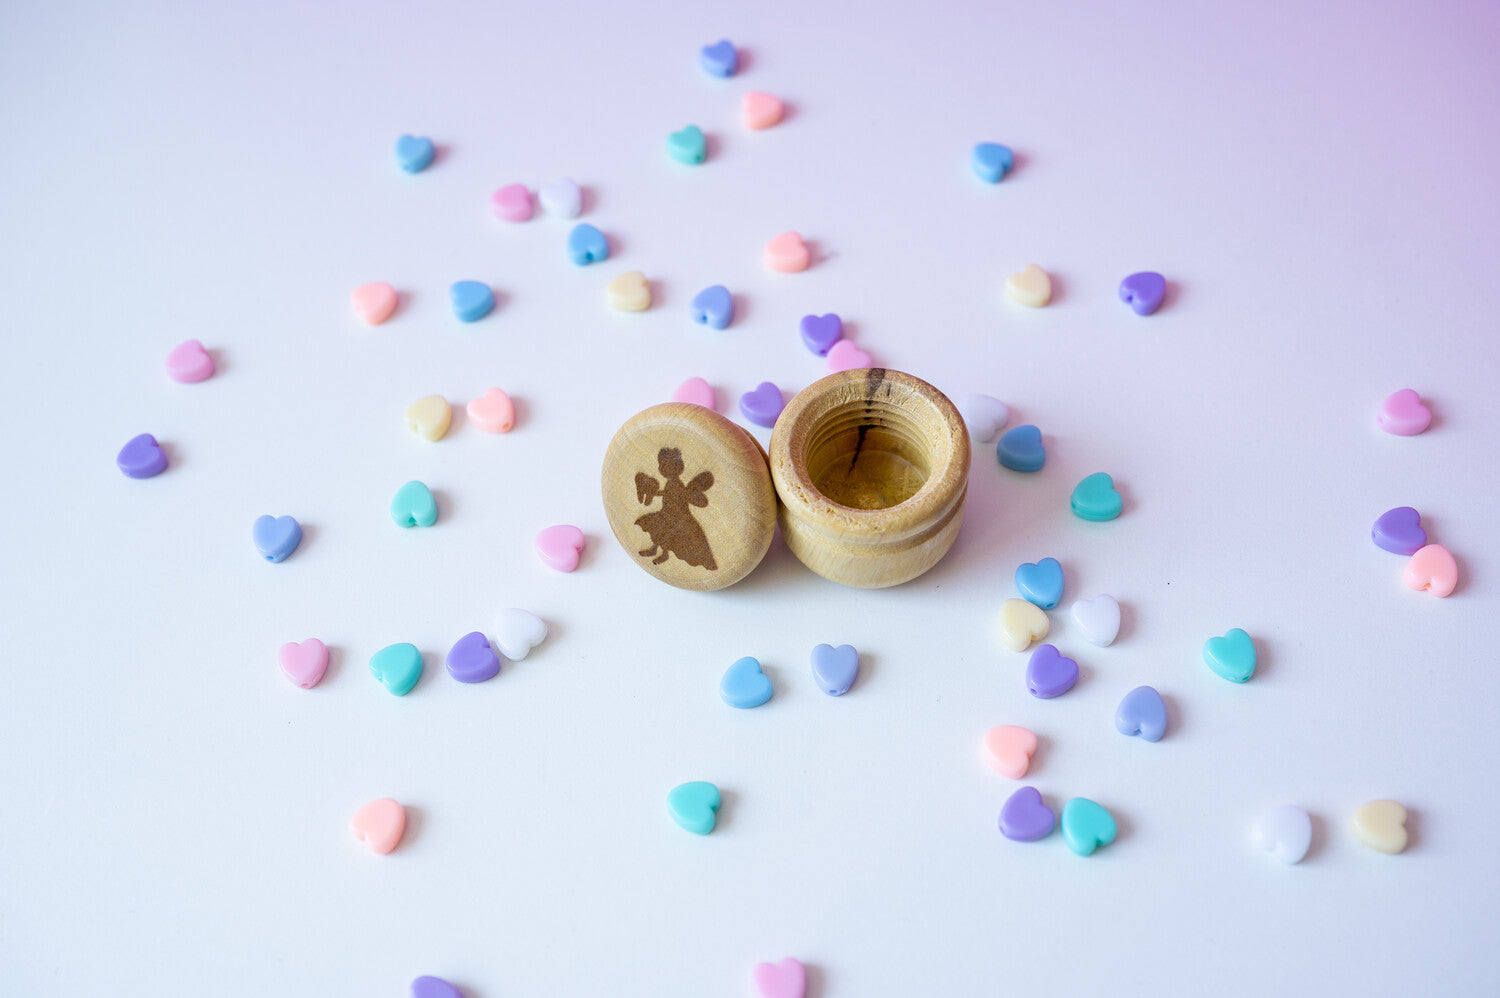
Do you still have your baby teeth? Probably not in your mouth any more, but definitely stored somewhere. A tin or box like this is a great gift that can be easily personalized with the Mr Beam. In the example we used a classic milk tooth box, the kind you can find in a craft store. By the way, the sweet tooth fairy file is available in the Mr Beam Design Store. You can easily access this via BeamOS and load the file directly into your workspace. For such a small object, I strongly recommend using a stencil to place your engraving perfectly.
This way the tooth fairy is sure to find the right room
The tooth is ready under the pillow and the little ones are off to dreamland. But how is the tooth fairy supposed to know where to go? This cute door sign helps, even with a compartment to leave a small gift of money. I implemented it in two different material variants.
Material for the tooth fairy gifts
For these door signs you need:
- version 1
- Poplar plywood blue 3 mm
- Poplar plywood natural 3 mm
- wood glue
- Variant 2
- Pastel Acrylic Orange Fizz 3 mm
- white acrylic 3 mm
- Acrylic colour mint
- Paint brush
- cleaning cloth
- UHU Hard
Mr Beam Pastel Acrylic, various colours, 3mm, A3
Sale price
From € 14,90 EUR
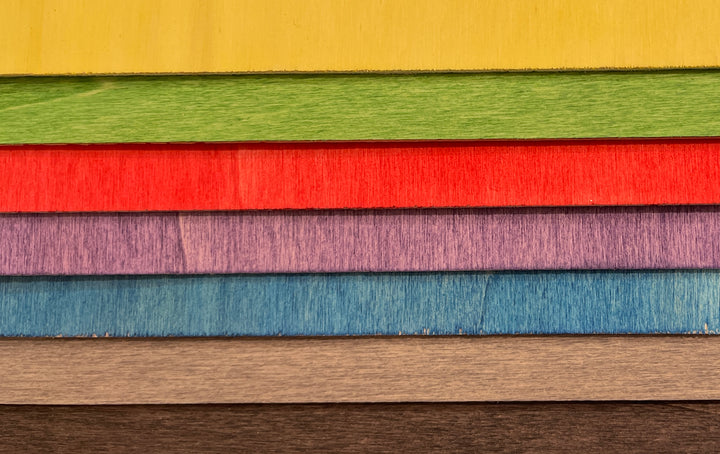
Mr Beam poplar plywood coloured (different colours)
Sale price
From € 21,90 EUR
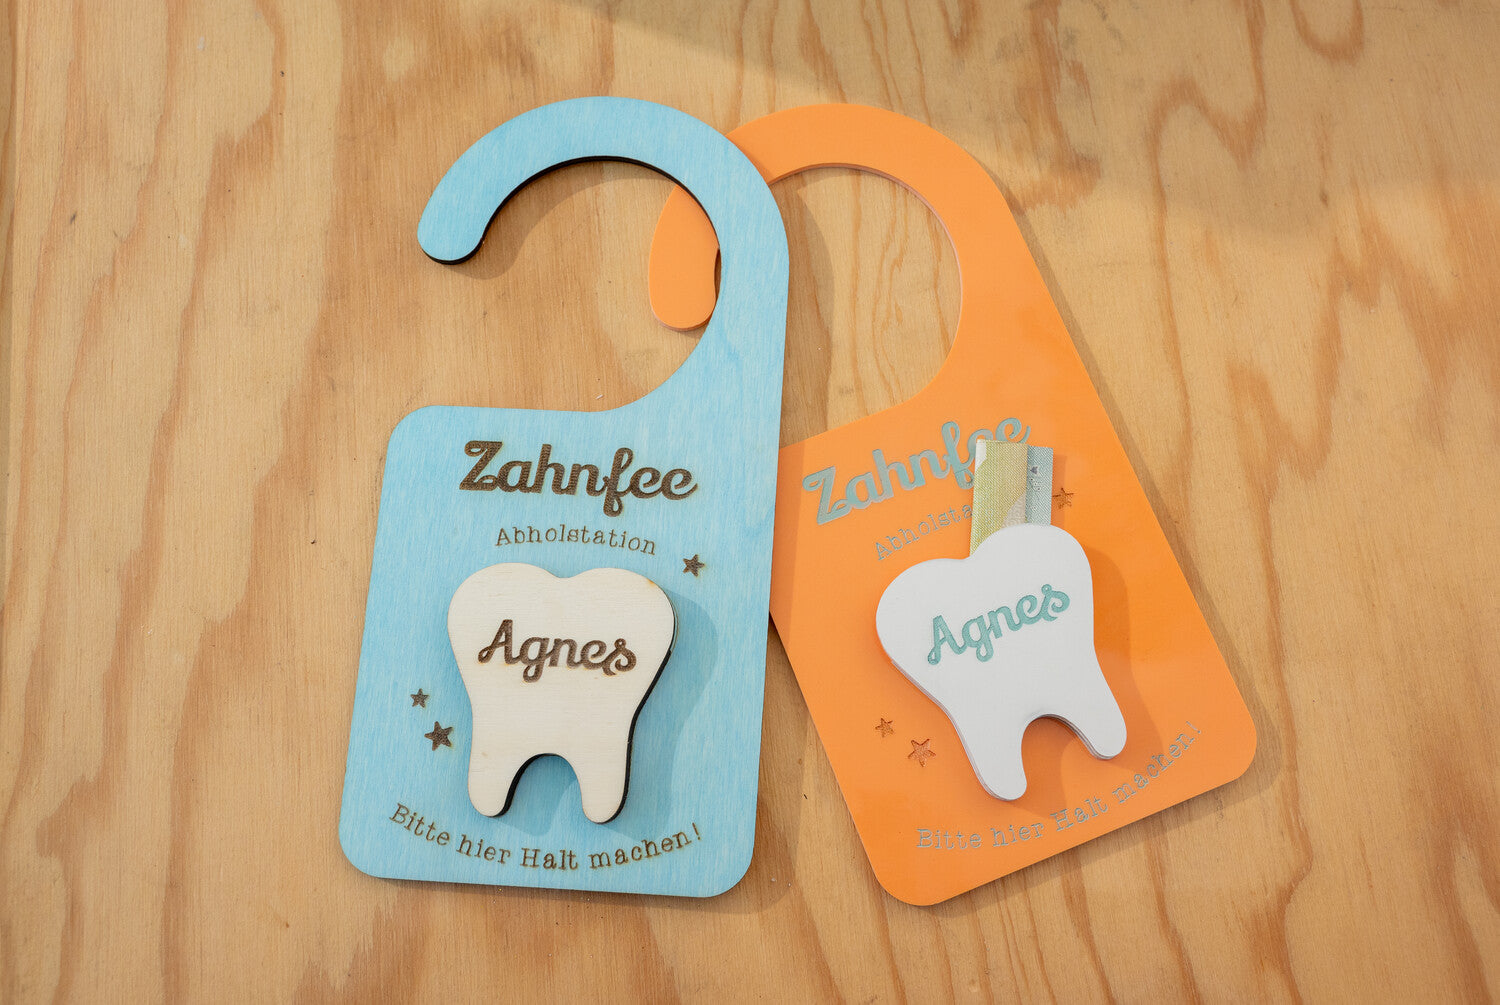
Door sign for the tooth fairy
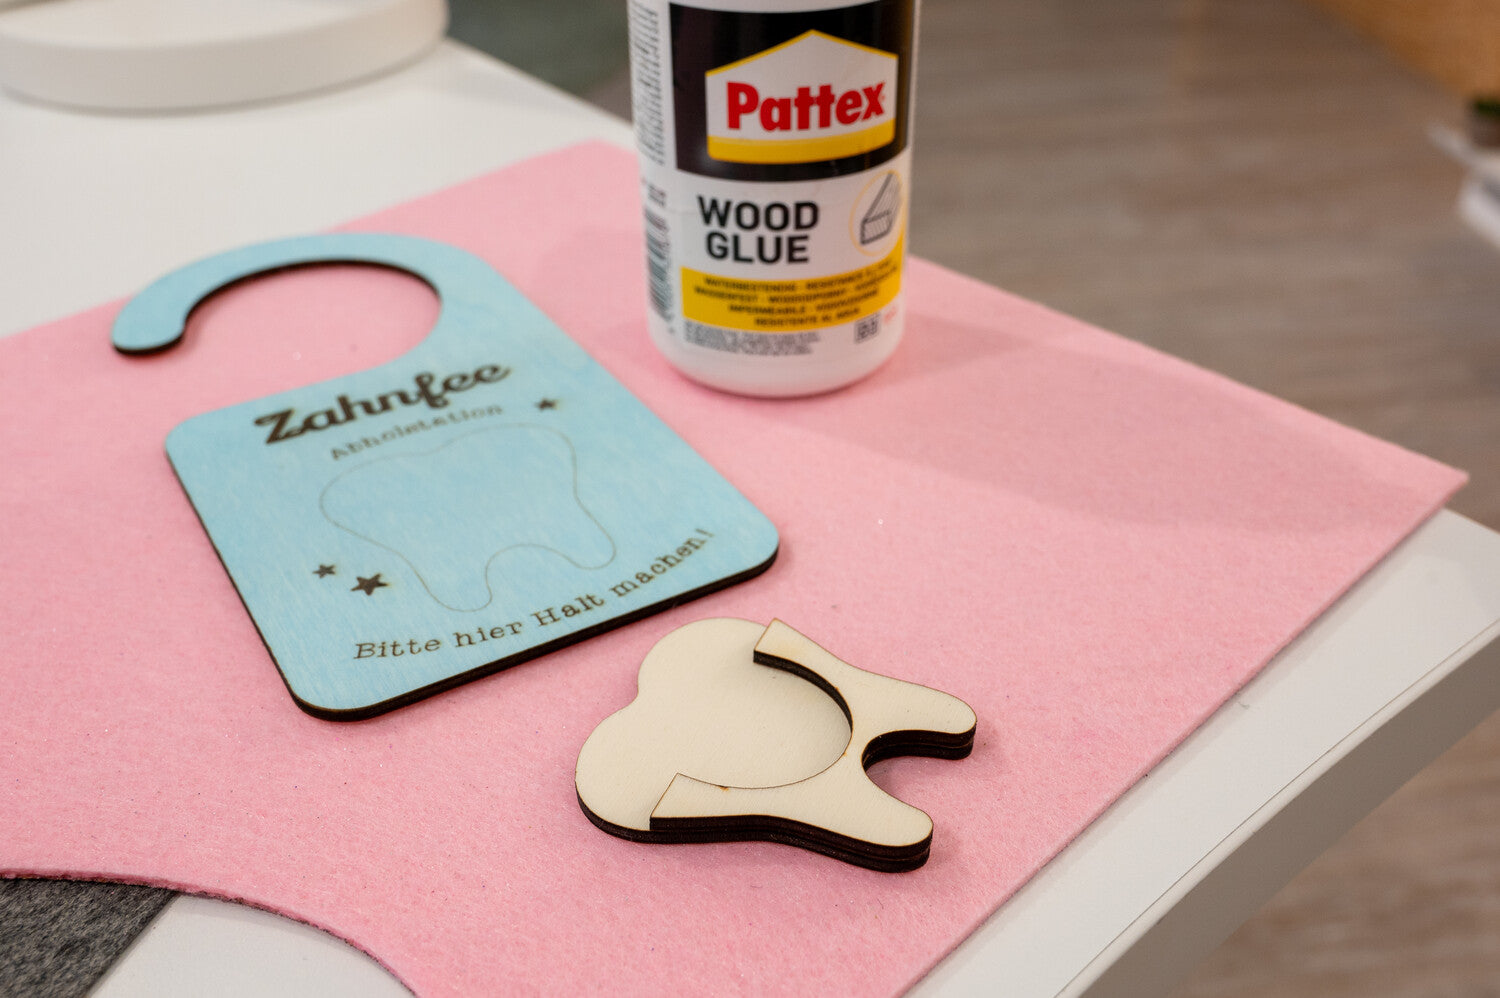
Variant 1 is very simple and quick to implement. Place your material in the Mr Beam. Load the file into the workspace and use the camera to place it where you want to cut it. Then you focus your laser head and press the laser button. Here you select the default settings for 3 mm poplar plywood. The tooth for cutting out and the tooth on the shield have a different line colour than the shield outline.
I.e. when choosing the laser parameters you can move them to different settings. You set the blue contour around the “external” tooth to skip in the first step, as you only want to cut it from other material in the second step. You give the red tooth on the shield its own parameters by dragging the symbol onto a new block. Here you can now freely set how you want the lasering to take place. Since I only want it to be a gentle mark and not a cut, I set 2000 mm/min at 30%.
Now you can start the laser process, remove the finished result and repeat the whole thing again with the undyed poplar plywood. Here you just have to make sure to move the lines so that the one you just skipped is lasered, and the others are not. Also, don't forget to engrave the roommate's name. You can simply add this in BeamOS using the text tool or create a corresponding lettering in a graphics program beforehand.
Acrylic tooth fairy magic
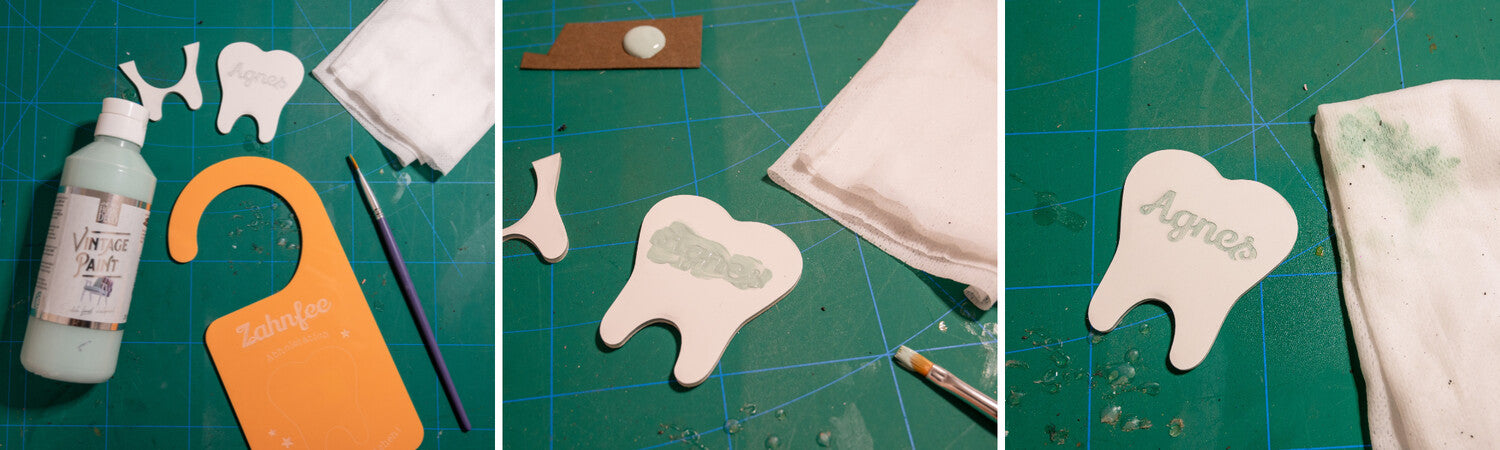
For the second version made of acrylic, do the same. I just reduced the engraving speed a little to create a deeper result. This makes filling with colour easier afterwards. For the colour, I tried a new technique that worked very well. To do this, generously smear acrylic paint over your writing and then gently wipe it with a damp cloth so that only the paint is removed from the surface.
You will get the best result if you use a lot of paint and let it dry slightly, but not for too long. Then you just have to fix the tooth with a plastic adhesive. By the way, we also have a detailed video on the subject of gluing acrylic on our YouTube channel.
Mail from the tooth fairy
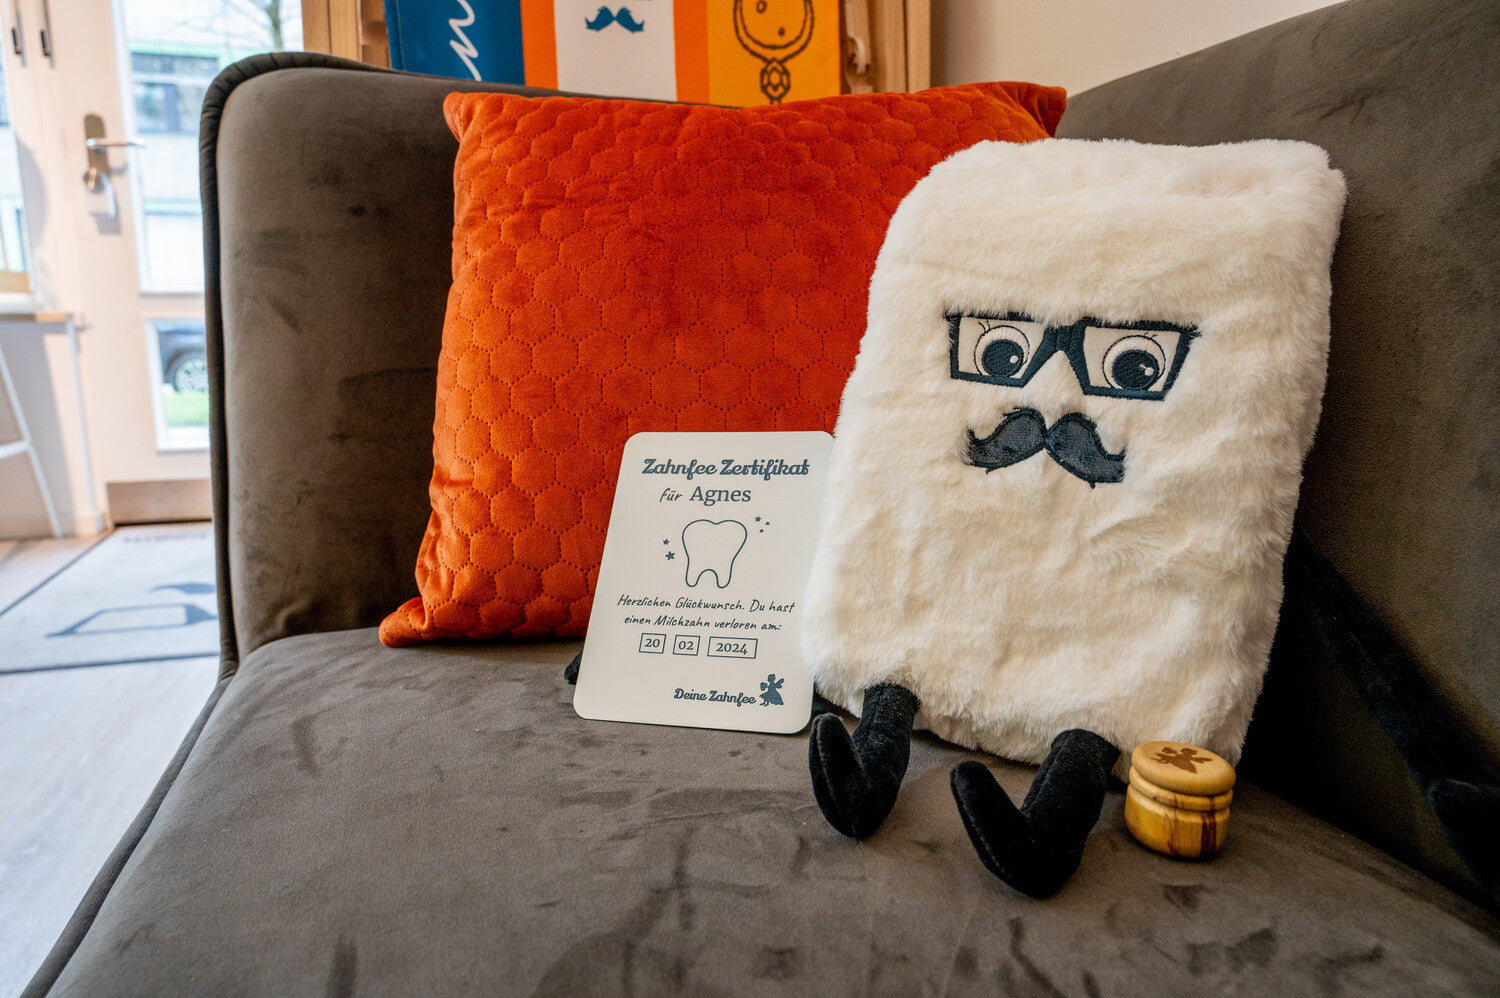
A current trend is to print out tooth fairy letters that record when the tooth fell out. To make this keepsake last longer, I thought you could also make a tooth fairy certificate out of our two-tone acrylic. This layered acrylic consists of a base colour and is covered with a thin layer of another colour. I have also put the appropriate file in the Mr Beam Design Store for you.
Once you have dragged it into the work area, you can enter the child's name and the date the tooth fell out. Numbering would also be a cute idea. For example, you could also enter these into the tooth. When making your engraving settings, you should make sure that it is strong enough so that the colour layer is completely removed, but not too strong, otherwise the base colour can “bleed out”. You can find suggestions for good laser parameters in the shop article, among others.
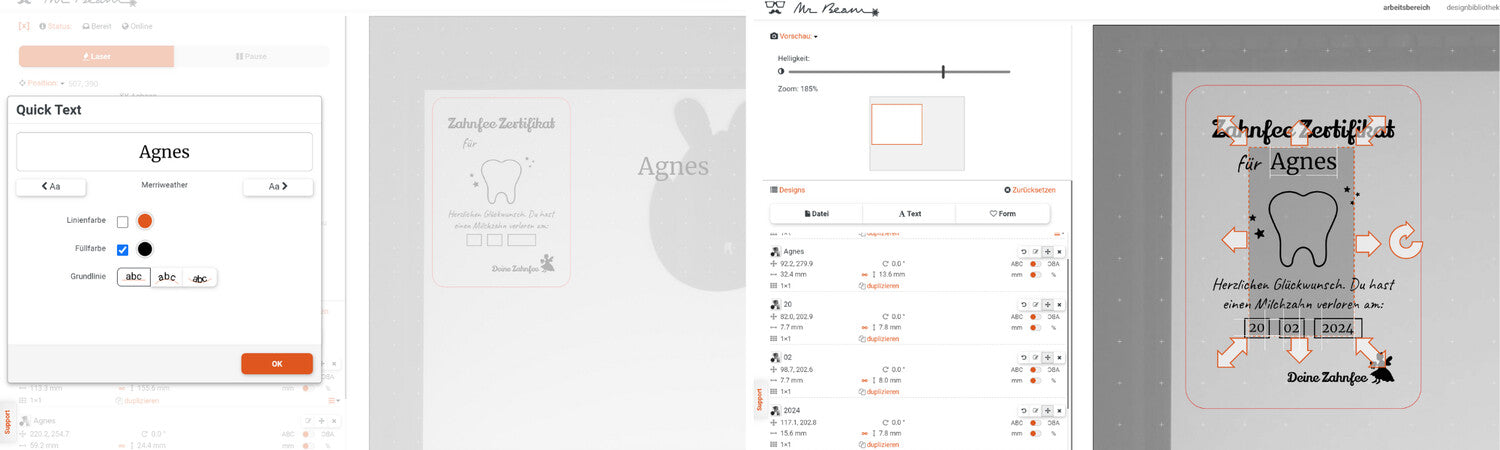
Tips for refining our two-tone acrylic: Lasering acrylic creates dust that can discolour the top layer. To prevent this from getting stuck, it is important to clean the workpiece immediately after reading. The best way to do this is to take a brush or a rough sponge and scrub the surface with water. You can then remove particularly stubborn residues with a wet wipe, such as the Ultra Grime cleaning wipes. Scratching with a fingernail or another tool can also help here.
The first tooth fairy visit is an exciting moment. I hope these sweet gifts make him something extraordinary, and I hope you have fun making them.
Your Marie


