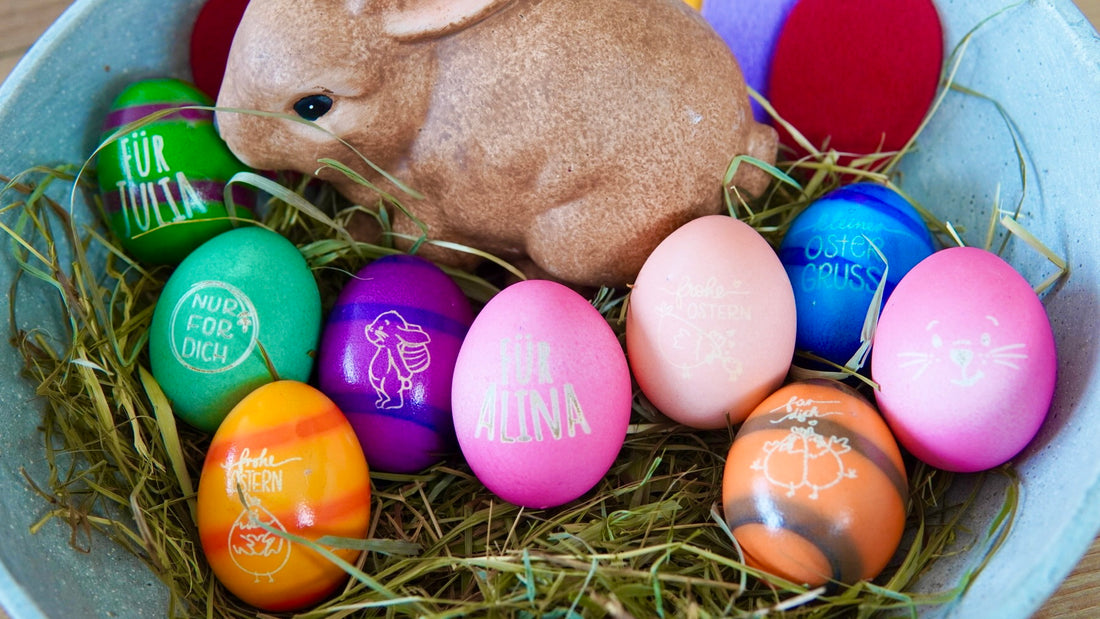
Painting eggs was yesterday! With the Mr Beam you can easily engrave your coloured eggs. I'll show you how to do this in this tutorial, because it's really easy with the height extension and the cutting frame.
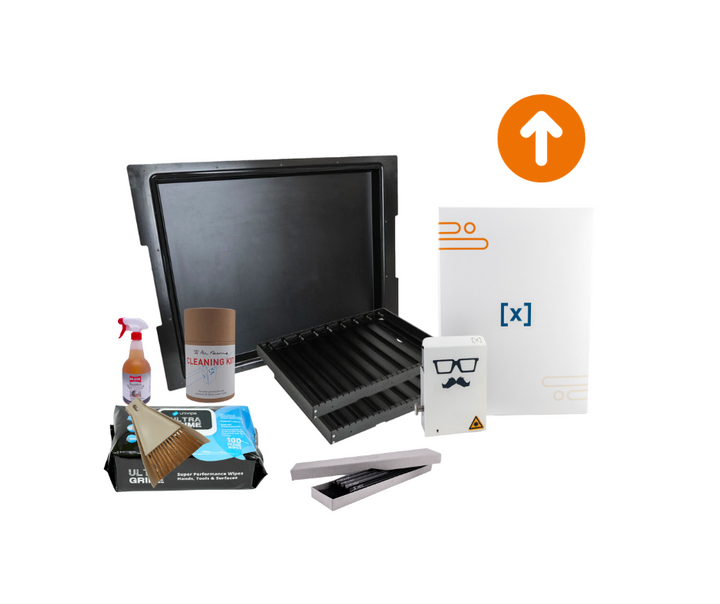
List of materials for engraving your eggs

- eggs, boiled and coloured; Bought ready-made or homemade
- your Mr Beam
- the height extension
- a cutting frame
- two Stix
- black construction paper in DIN A4
- Masking tape

Mr Beam Height Extension & Cutting Frame
Sale price
CHF 309.00
Mr Beam Upgrade Kit ([x]Laser Head + Height Extension + Accessories) / Rotary
Sale price
From CHF 935.00

Mr Beam Upgrade Complete Set ([x] laser head, height extension & air filter III)
Sale price
CHF 2,057.00
To engrave, the eggs must be colourful
You can buy colourful eggs almost everywhere at Easter. These are then already cooked and coloured. If you want to dye it yourself, you will need egg dyes. You usually need water, vinegar and various glasses or bowls as a colour bath.

Colouring eggs with egg dyes is very easy
- Boil eggs and keep warm.
- Shake one colour cartridge per colour bath and empty it into the bowl or glass.
- Then add two tablespoons of vinegar and 250ml cold water.
- Add an egg to each dye bath, making sure it is completely covered.
- Now colour the egg in it for 2 to 4 minutes and then remove it with a tablespoon.
- Dab a little with a kitchen paper and let dry.
Preparing to engrave your eggs
Create a stencil for precise engraving of your eggs
In order to place the engraving on your egg as accurately as possible, I recommend using a stencil. You make these out of the black construction paper.
To do this, start your Mr Beam and open the Mr Beam software.
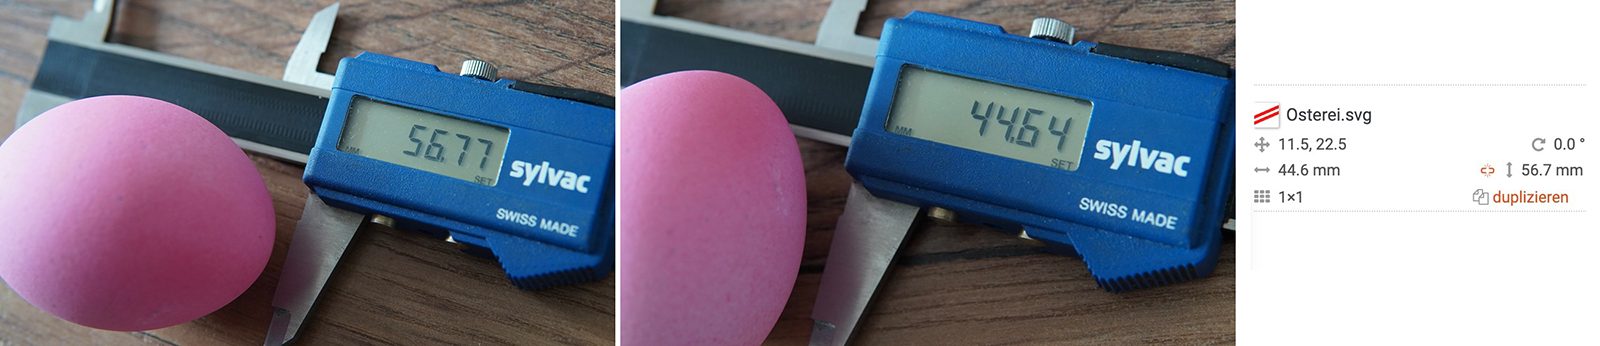
You load the “simple egg shape” from Mr Beam Design store into your workspace, then measure the height and width of one of your eggs, because the template does not have to fit every egg exactly. Now transfer the dimensions to your egg shape for your template.
If you want to engrave several eggs at the same time, duplicate the egg shape as often as necessary.
The engraving area of your eggs
Since the eggs are domed, the exact focus is only possible in a smaller area.
This leads to you
- you can't engrave an entire side of your eggs and
- that the outer areas of this engraving may be engraved less intensively.

That's why I recommend only using the area marked in gray here for engraving.
The engraving for your eggs for Easter
You then fill the egg shape as a stencil in the work area with engravings of your choice. You can buy many beautiful Easter designs on the Internet, but you should make sure that they are not too wide and not too detailed.
I used the designs for small Easter greetings on the eggs, also for giving as gifts, from the “Easter 2024” file bundle from Mama's Things. Great motifs can be put together with the crazy chickens and Easter greetings.

Or you can use the “Text” function in the work area of the Mr Beam software and personalize the eggs with a name or a “Happy Easter”
Engrave eggs in Mr Beam
Prepare the laser head and cutting frame
Everything is prepared and you can start lasering.
To do this, place the cutting frame with two Stix into the Mr Beam. The Stix should be three rows apart so that the eggs can be easily fixed between them.

Now you prepare the laser head. To do this, place an egg between the Stix. Adjust the holder of your laser head so that it does not hit the eggs during engraving, and take the egg out again.
Laser the template
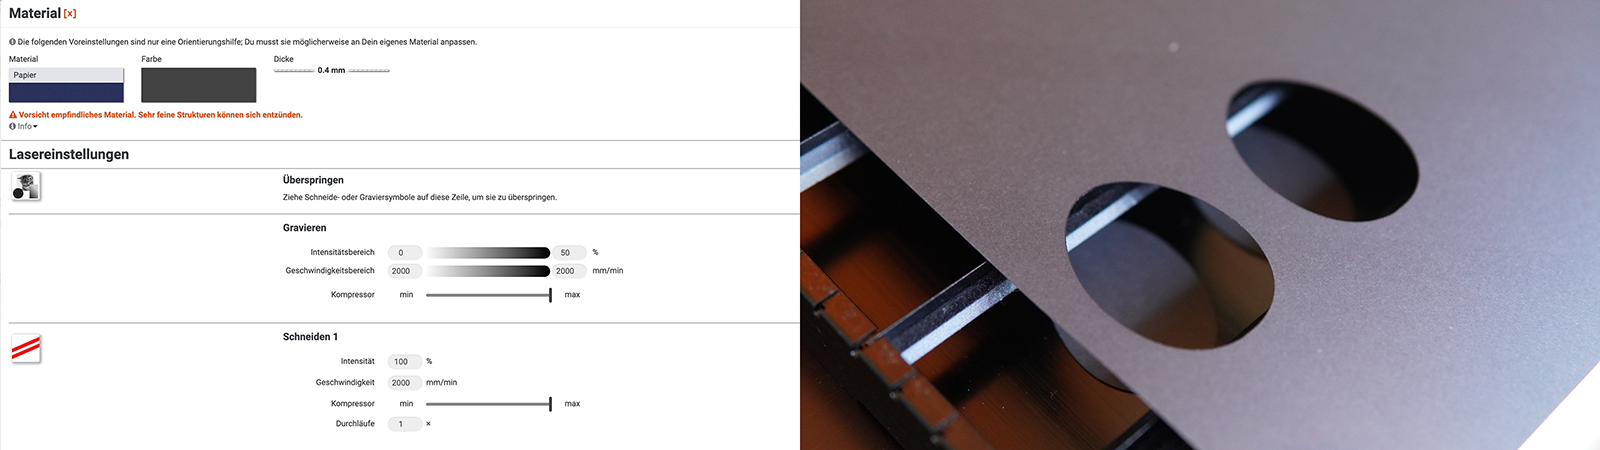
Now place the black construction paper for your stencil on the cutting frame on the frame of the Mr Beam and secure it there with masking tape.

Now loosen the screw on the laser head and push it to the lowest position of the holder. As you can see, the focus is not at all right, but the Mr Beam still cuts the black construction paper.
Now arrange the eggs in the work area of the Mr Beam software. Using the camera preview, position them in a row at the height of the two Stix that serve as fixation. To laser engrave the stencil now, skip the engraving. You can maintain the laser parameters of black paper; due to the black colour of the paper, the Mr Beam cuts the construction paper despite the wrong focus.
The template for precisely engraving the eggs is ready, and you can place your eggs in the Mr Beam. If the opening for your eggs does not line up with the fixation between the Stix, you can move the cutting frame under your template until everything fits.
Engrave the eggs for Easter
Using the focus tool, you can now focus your laser head on the highest point of one of your eggs.

Close the Mr Beam lid and click “Laser” in the Mr Beam software.
Now you skip the cutting. To engrave my eggs, I used the following settings on my X-head, which you can use as a guide:

Depending on the colour and thickness of the colour layer on your eggs, they may of course differ slightly for you. You may need to do a little testing here. Once you have found the right laser settings to engrave your eggs, start the laser job.

After lasering, you should wipe the engraved eggs with a damp cloth or remove the engraving residue under running water. Your engraved eggs for Easter are now ready and can be hidden and given away or just eaten ;-).
Tip: You can now rub your eggs with a little neutral oil. To do this, rub the oil on the egg with a kitchen towel, and it will give it a nice shine as a finish.
I hope you have fun imitating it!
Your Rina


