It is still cool outside, but the sun has displaced some clouds. You look out of the window and see how the sun radiates the bet with the first spring flowers? Now it will be Time the spring to seeIf you look out the window, no matter what the weather is out there.
In this tutorial you will learn how you just Hanging spring decoration for the window with your Mr Beam can make crafts.
- Baby glasses or jam jars
- Filler wadding or Earth
- spring flowers
- cord
- branch
- Kraftplex, Poplar wood or another material you feel like
- Spray Paint (Please pay attention to the ingredients!)
- Glue
Preparations for the hanging spring decoration
To hang Deco into the window, if a beautiful branch is suitable, when you then Garlands or fasten. Think about how long or wide your DIY deco-branch should become. Then you are looking for a nice, suitable branch in the next park or forest. Under certain circumstances, you have to rinse him or brush him before you hang it.He should definitely be stable enough and not bend as soon as you hang something on it. Now one or two hooks must be in the wall over the window to fix the branch.
Let him hang him all year round and take advantage of him again and again Decoration ideas at the window.
How should your hanging DIY Spring decoration look like for the windows?
This is of course always dependent on the Size of the window, the branch and just the personal preferences.
Small garlands in Combination with spring flowers In former baby glasses or jam jars, which you can hang down at the branch, look beautiful and leave your window to the spring highlight.
Where do you get your file (-EN) for the Hanging spring decoration for the window From?
- From the design gates of Mr Beam
- Laser files from designers
- Create something own
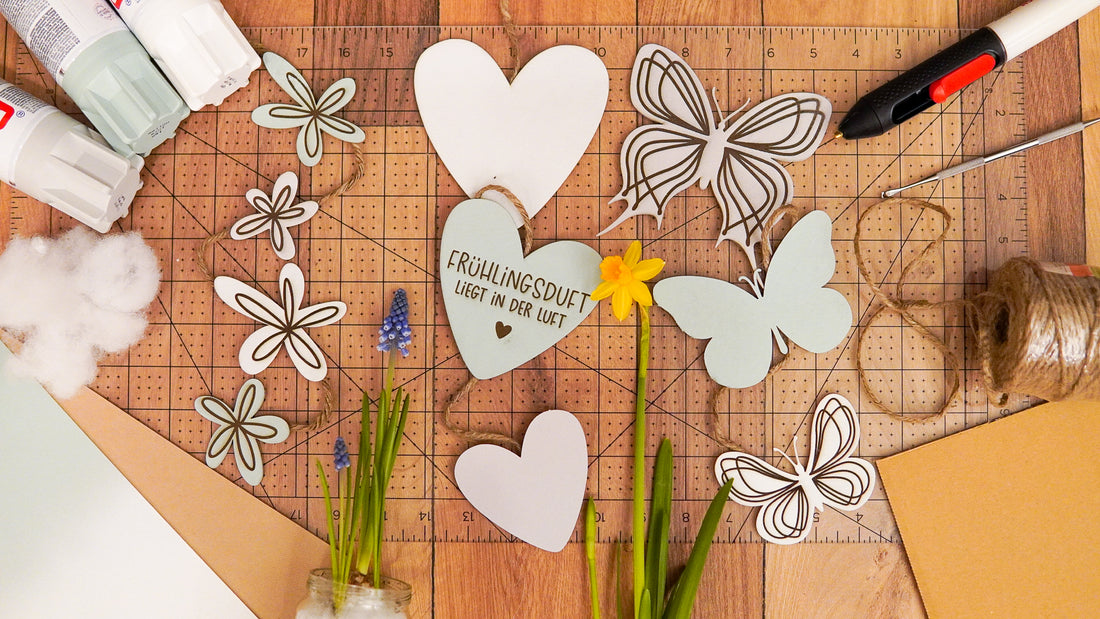
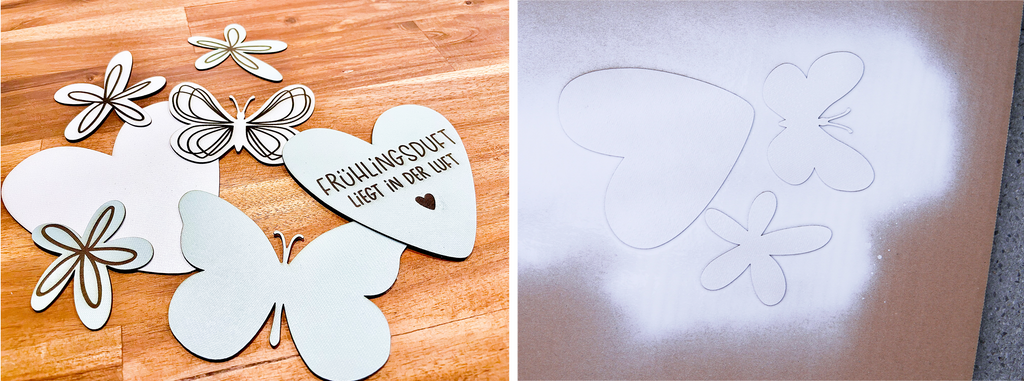
The hearts used here, the saying, the butterflies and the flowers come from MamasSachen.
The individual elements for yours hanging spring decoration, for example, you make before, for example in Inkscape or in the silhouette studio (Business Edition, because you have to save the file as SVG) according to your wishes, save it and save Simply drag and drop them into your design library Beamos.
Now comes to color in the game at the spring decoration!
Different colors? No problem! Just paint your kraftplex as you want and Let it be left Mr Beam Engraving and cut.
You paint the best outside or in a garage, It is only important that the site is wind and rainproof. Prepare the spray cans according to instructions.
For painting, you put a large piece of cardboard on the floor or a table as a base. Then you put the kraftplex and paint it nicely evenly. Now the paint must dry, mostly about 30 minutes.
In the time you can already put the baby or jam glasses in a vessel with water to soften the labels and later resolve.
Everything ready to start? Laser!
When the paint is dried, you put the kraftplex on the Cutting mat in the Mr Beam.

In the beamos you can now recognize the different color areas of your paint in the preview and align your files, if necessary, again. If your chosen colors should be similar, you can either the Change exposure Or mark your areas for orientation on the kraftplex with a pen.
Now choose your type of material (here kraftplex).

During the Mr Beam Laser, you get the glasses from the water bath and take off the labels. Plant now your spring flowers into the glasses. Filling wadding is suitable as a substitute for earth, as it is particularly light and looks good. Wrap plenty of filling wadding around the onions and roots of your spring flowers and gently put the whole thing into the glass. A little water and finished.
Now it's time to hang your spring decoration for the windows
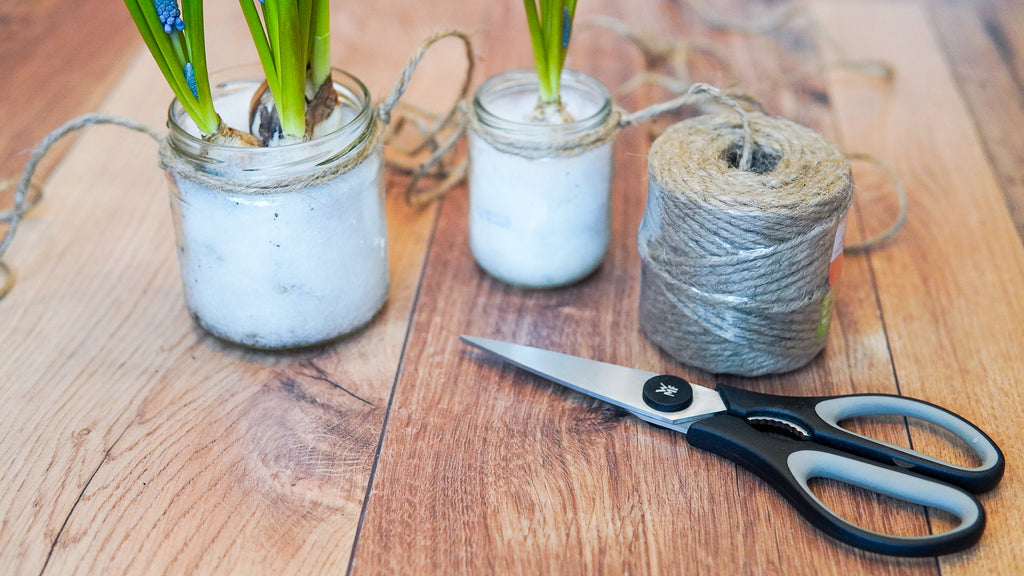
Cut off a long piece of cord, put them around the thread and crack them.
Now you take one end of the cord, push it on the opposite side of the node under the cord and make a node again there. So the glasses later have two cords for attaching to the branch And thereby hang horizontally.
Laserjob done? Then get your finished decoration elements for the hanging Spring decoration for the window from the Mr Beam.
Snap your spray cans again and the carton and paint the rears of the spring decoration. When everything is dried, it is glued. Let the hot glue gun already preheat, while you choke cord pieces, in length, which should have the decoration elements later as a distance and a longer piece for attachment to the branch.

Apply a hot glue drop, carefully push the cord and allow to dry. You do that now for all garlands so.
In your branch you can screw small hooks or eyelets to your DIY DEKO Hanging or you just knot the cords.
Done is yours hanging spring decoration for the window. 😇

You have that Tutorial like? Then continue ours Mr Beam Blog And to subscribe best to our newsletter to miss no item. We provide you regularly with inspiration For your own projects. Under the Hashtag #madewithmrbeam Can you also be inspired by other users. We are very happy if you have your results with ours Mr Beam Laser machine participate under the Hashtag on Social Media.


