
It's that time again. Punctually Carnival time Let's go a step by step Adobe Illustrator tutorial for you. And this time it is not a single, but two different variants. Our Garlands to craft yourself from the Mr Beam Let your Carnival decoration Guaranteed shine in new splendor! Alternatively, you can also download the laser files in Designstore. Have fun!
Variant 1: Penny garland craft
Let's start with the Mother of all garlands. It is very classic from triangular pennant.

1. Create a drawing surface
At all first, it is to be cleared, how much space you have available to laser. A maximum of your workpiece is known to be 500 x 390 mm in size. However, as the pennant garland is made of paper, it makes sense to use the classic standard sizes here. In our case, we have created a drawing area in DIN A3 size, ie 420 x 297 mm. We recommend using as a unit, really millimeters to use, so you know how big your pennants will be later.

2. Create and transform rectangle
This is illustrator ready, and you can get started, yours to create first pennants. For this purpose, select the rectangle tool and create a square in any size. The diagonal of your square will later be your double length of the spin.
Next you turn the rectangle by 45 ° and click on it Right-click> "Transform"> "Scaling". Then a dialog opens in which you click on "uneven" and scales the square vertically to 50%.

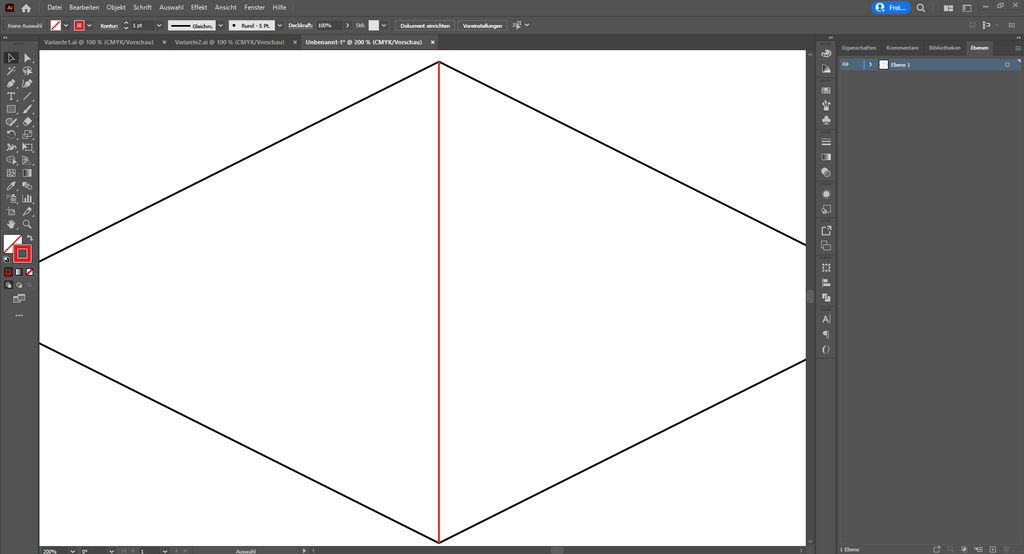
3. Create ankling fold
This is the basic form of the first piss already done. If you bring together the pennants later, of course it should be easy to fold them exactly in the middle. To do this, we create a simple line that we place in the middle of the rhombus and color in a different color. You can later in the Mr Beam Software define other laser parameters for this color.
4. Duplify and arrange pennants
Of course, there is a garland not only from a single pennant. Therefore, we reproduce the finished pennant now and arrange all copies directly edge to edge until the whole character surface is filled.

5. Clean up and export file
Finally, there is still the file to clean up so that the Mr Beam Laser machine There, where the edges overlap, do not laser twice. So remove each edge that is doubly occupied. Use this Scissor tool to divide the rhombuses to the corners.
This is the part we as Tutorial Deploy, completed. Of course, you can now place text or other ornaments on the pennants. There are no limits to your creativity. So that the Mr Beam The file can also process, you only have to export it as SVG only.

6. Lasers and crafts of the pennant garland
If you want your design in the Mr Beam software Placed on the work surface and inserted a matching paper, the laser process can already start in principle. The only thing you have to pay attention is that you define your own laser parameters for those - in our case - red line with which you scratch the paper only. Because every paper is different, we recommend it to try out something here and it before to test on a small piece before you remove a complete DIN A3 paper.
Combat, if the Mr Beam His work has done, is quite simple. Simply fold the pennants along the edge, put them in a row on a string and then glue the two surfaces together.
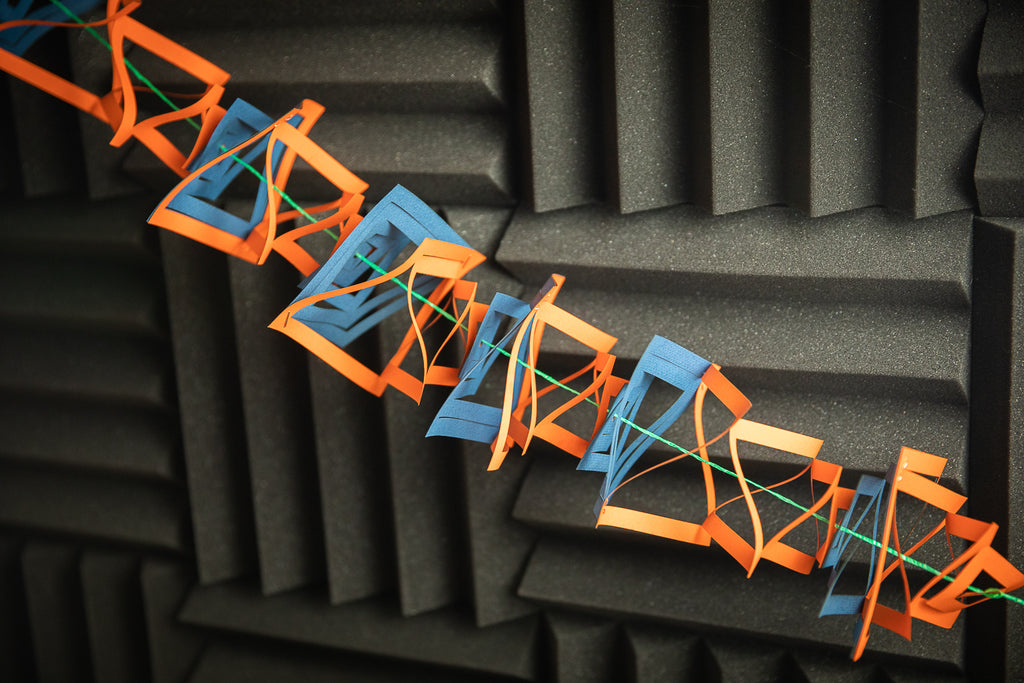
Variant 2: Crafts Harmonica Garland
Our Second garland variant is a little more complex designed. It consists primarily of squares with a few cuts in the middle, but then unfolds your spell when you pull apart the many individual parts like a drawing harmonica.
1. Create a drawing surface and body
Also in the second variant, we have again decided for a drawing area in the DIN A3 format and millimeters as a unit of measure.
And this time, our basic body is a simple square. This time it is not transformed, but as it is as it is. The size of the square later also corresponds to the dimensions of your garland.

2. Create patterns of the garland
To miss your garland part now the desired pattern, you first doubles the square. Then you go down to a desired value. In our case it is 15 mm.

Then you divorce the smaller square with the scissor tool on two opposite corners. The two resulting L parts are now sliding a piece outward towards the corners of the big square. For example, we push both parts 2.5 mm outward.
These two paths do you have to duplicate only several times and make a bit smaller again and again. To do this, you can turn it 90 degrees every time to get a little more variance in the final product. Finally, you create still in the middle a small circle which becomes a hole through which later leads the string.

3. Multiply object
Also in this variant, the garland should of course consist of several parts at the end. Therefore, the item is reproduced again, this time and edge placed on edge.

4. Simplify and export file
If you have put the edges all exactly together, some lines are twice again. We have All outer edges of the garlands simply picked up with lines again And for that, all outer squares removed.
We also colored these lines in a different color so that they can later be treated with the laser process extra.
Then you can decorate your garland parts anyway and finally export the file as SVG.

5. Lasers and crafts of the garland for carnival
You can then use the finished laser file on the work surface in the Mr Beam Place software. If you click on lasers, we recommend the red line in its own "Cut Section" to move. But you can leave the laser parameters identical. This ensures that the black lines are cut first. So nothing is relaxed and nothing can slip.
Assemble the carnival garland with some glue, a stapler and a long piece of string. Thread all the individual pieces onto the string, and always glue two garland pieces together in the middle. Then staple two opposite corners together with the corners of another pair so that you can pull the whole construction apart like an accordion at the end. You can tie a knot in the string at the end of each piece to keep the garland pulled apart.
Carnival garlands crafts to themselves
So you have now Two different variants of garlands to decorate your home wonderfully. Of course, the two garlands can also be combined and mixed. No matter what you do with it, we look forward to every variant you are with us and the community under the #madewithmrbeam Share! The garland can also be wonderful with our tutorial for the Carnival window decoration combine.


