
Carnival is just around the corner and my niece ABSOLUTELY wants to be a bird this year. Of course, it's clear that Aunt Marie gets to work straight away and lasers a great costume with her “magic light machine”.
In this tutorial I'll explain everything from choosing the material, to file creation, to lasering and gluing/sewing together. Even if your child doesn't want to be a bird but a lion, you'll definitely find a few practical tricks here.
Material for making the bird costume
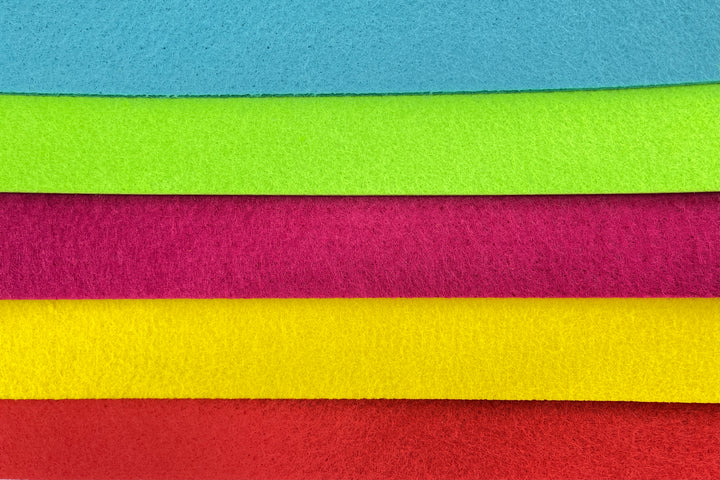
- Felt fabric in different colours 1 mm
- Spray adhesive, e.g. from UHU
- Cardboard box
- Rotary cutter or scissors
- Rubber band
- Needle and thread (optional sewing machine)
- Fabric ribbon

Mr Beam Glitter Acrylic Felt, 3mm, A3, various colours (5 pieces each)
CHF 16.00
Sale price
From CHF 11.00
Mr Beam Acrylic felt, 3mm, A3, 5 Pack, neon colours
Sale price
From CHF 16.00
Which material is suitable for the Mr Beam?
When choosing your material, you should definitely make sure that it can be lasered easily. A wool felt, for example, would simply burn and give off the smell of burnt hair after the laser process. That's why I chose an acrylic felt. This can be cut beautifully with the Mr Beam and the edges blend nicely, which saves me the hassle of missing edges. I also chose a thickness of 1 mm so that the felt would be nice and flexible even in several layers.
This is how you cut materials to fit

Since materials do not normally come in pieces that are perfectly tailored to the beam, but rather in strips, you have to cut your material to size first. I made a small template that I can definitely use for other DIY projects in the future. To do this, simply paint a square the size of the Mr Beam work area (50 cm x 39 cm) on cardboard and cut it out with scissors.
Then place the fabric on a cutting mat, place the template on top and cut with a rotary cutter. Alternatively, you can transfer the template to the fabric with tailor's chalk. For my niece's size (dress size 92) I need a cut piece of each colour, except red. Since it is my base colour, I needed 3 pieces here.
Create your own laser file for a carnival costume
Creating the files for this costume was a bit more complicated, but since I used some practical tricks, I'm happy to take you through the process and my thoughts. If you happen to want to make exactly this bird costume, you can skip this part because I have made the file available to you in the Mr Beam Design Store. ;)
Determine the appropriate size of the costume

In the first step, you need the child's arm length. Since my niece lives in another state, my sister-in-law simply sent me a piece of clothing so that I could measure the size for the pattern. To find the length of the wings, simply measure the entire sleeve length and create a circle with this length as the diameter. You already have your starting form. The circle is now quartered, and a piece is removed at the bottom so that the wings are not too big, and the tail feathers still stick out.
Tips for creating the costume file

In my case, I bought 8 different colours of fabric for the bird costume. That's why I divided the radius by 8 and created circles that get larger in the corresponding steps. They serve as baselines for the individual feather parts and are also cut to the length of the wing part. In order to then create the corresponding jagged pattern , we work with an effect. To do this, mark your line, go to the Effect tab and select “Zigzag…” under “Warping and Transformation Filter”. A window will then appear here in which you can select the size and quantity of your spikes.
It's important that your spikes are always the same length to create an even image. I started with three prongs at the top and added two prongs with each layer. Then I just had to create the corresponding surfaces. To do this, I created circles that are so high up that the spikes on the feathers cover everything afterwards. You convert your zigzag line into a path with “Object”, “Convert Appearance” and connect it to your circle. This saves material and the whole thing is not glued so thick and immobile. Only the red area is created continuously up to the top so that it serves as a baseplate and the transitions cannot be seen.
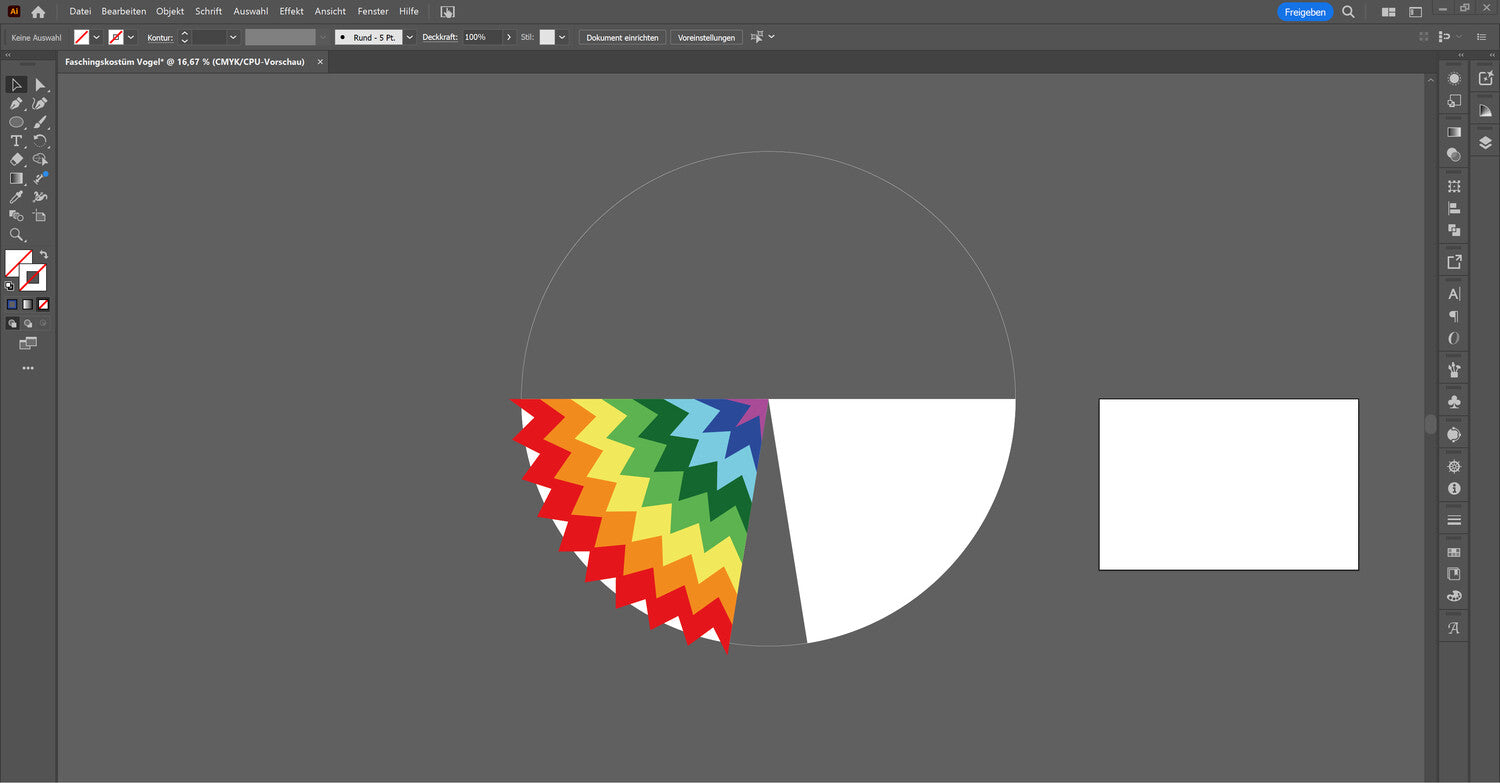
All you have to do now is arrange the individual parts next to each other and switch from filled area to contour so that your Mr Beam knows that you want to cut here. Do the same thing with the tail feathers and the mask. Always just create a baseline, use the zigzag effect, convert the path and create an area with the line.
Cut fabrics easily with the Mr Beam
Now it's time for the best part: cutting out with your Mr Beam laser cutter. This project is suitable for all Mr Beam models as the thin felt material is easy to cut. Only the light blue material can only be edited with the dreamcut [x] and this also needs a lot of power to get through due to the colour.
From here the process is very easy. You place your pre-cut parts one after the other on the work surface, focus the laser head and load your file into the beam. This is created with different line colours. This means you can process all processes with just one file. Either by separating the file by line colour using the Share option, or by selecting Skip when selecting laser settings, except for the colours you actually want to laser. The standard settings from BeamOS are suitable as laser parameters and since all parts are the same size, you can always leave your focus the same.

Now the bird costume is put together
I recommend using a spray adhesive to glue the individual parts together. Why? Because it can be applied nice and thin, but still over a large area and remains flexible afterwards. Which is particularly important for a costume. Of course, you can also sew on the individual colours. Please note that you will then see the seams on the inside of the wings. If you decide on this option, I would recommend feeding the whole thing.

Finally, it is fastened diligently
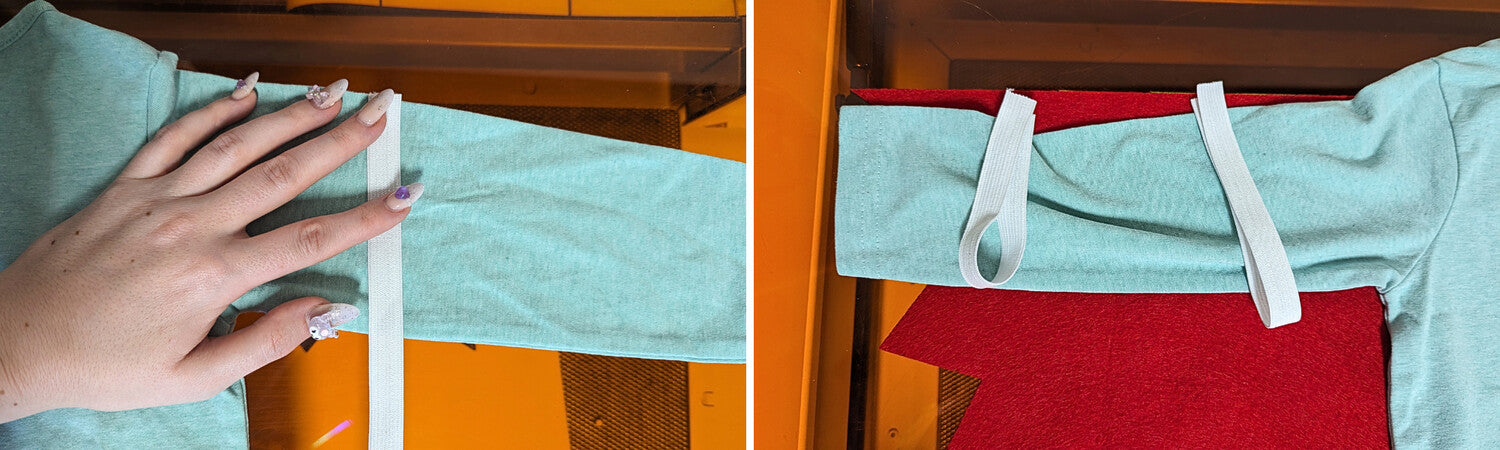
When all the pieces are glued together, we face the last big challenge. How do we get the costume to the child? For this I used ribbon and elastic band. There are two rubber bands on the wings. You can again use the long arm shirt to adjust the length. I sewed the whole thing by hand so that it couldn't be seen on the other side and could be easily unravelled if the length didn't fit.
I also hand-sewn the straps to the mask. You can use an elastic band or ribbon here, although I have found that masks with elastic bands tend to slip.

I also sewed two ribbons at the neck that can be tied with a bow. The idea here is that the costume grows with you. If the arms get longer, the loop can be made wider. There are also two ribbons on the tail feathers to tie the tail feathers around the belly.
So that the whole thing is very robust and doesn't fray, I sewed the straps twice. First on the left and then stitched again.

And your homemade laser cutter costume is ready ! I hope you all have a lot of fun at the carnival parades with your #madewithmrbeam costumes.
With confetti in your heart, your Marie


