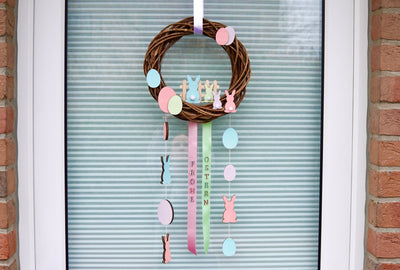
Winter is slowly receding, the first snowdrops are starting to bloom, and I'm really getting excited for spring! Have you already discovered all these beautiful dried flower wreaths on Pinterest etc. and thought “Wow, that looks great!”? Making a dried flower wreath yourself for spring is not difficult at all and can even be done quite quickly.
The great thing about making things yourself is, of course, that there are no limits to your creativity, and you can use your favourite flowers and your favourite colours. So it's best to start making your own spring decorations right away !
Material of your DIY dried flower wreath in spring
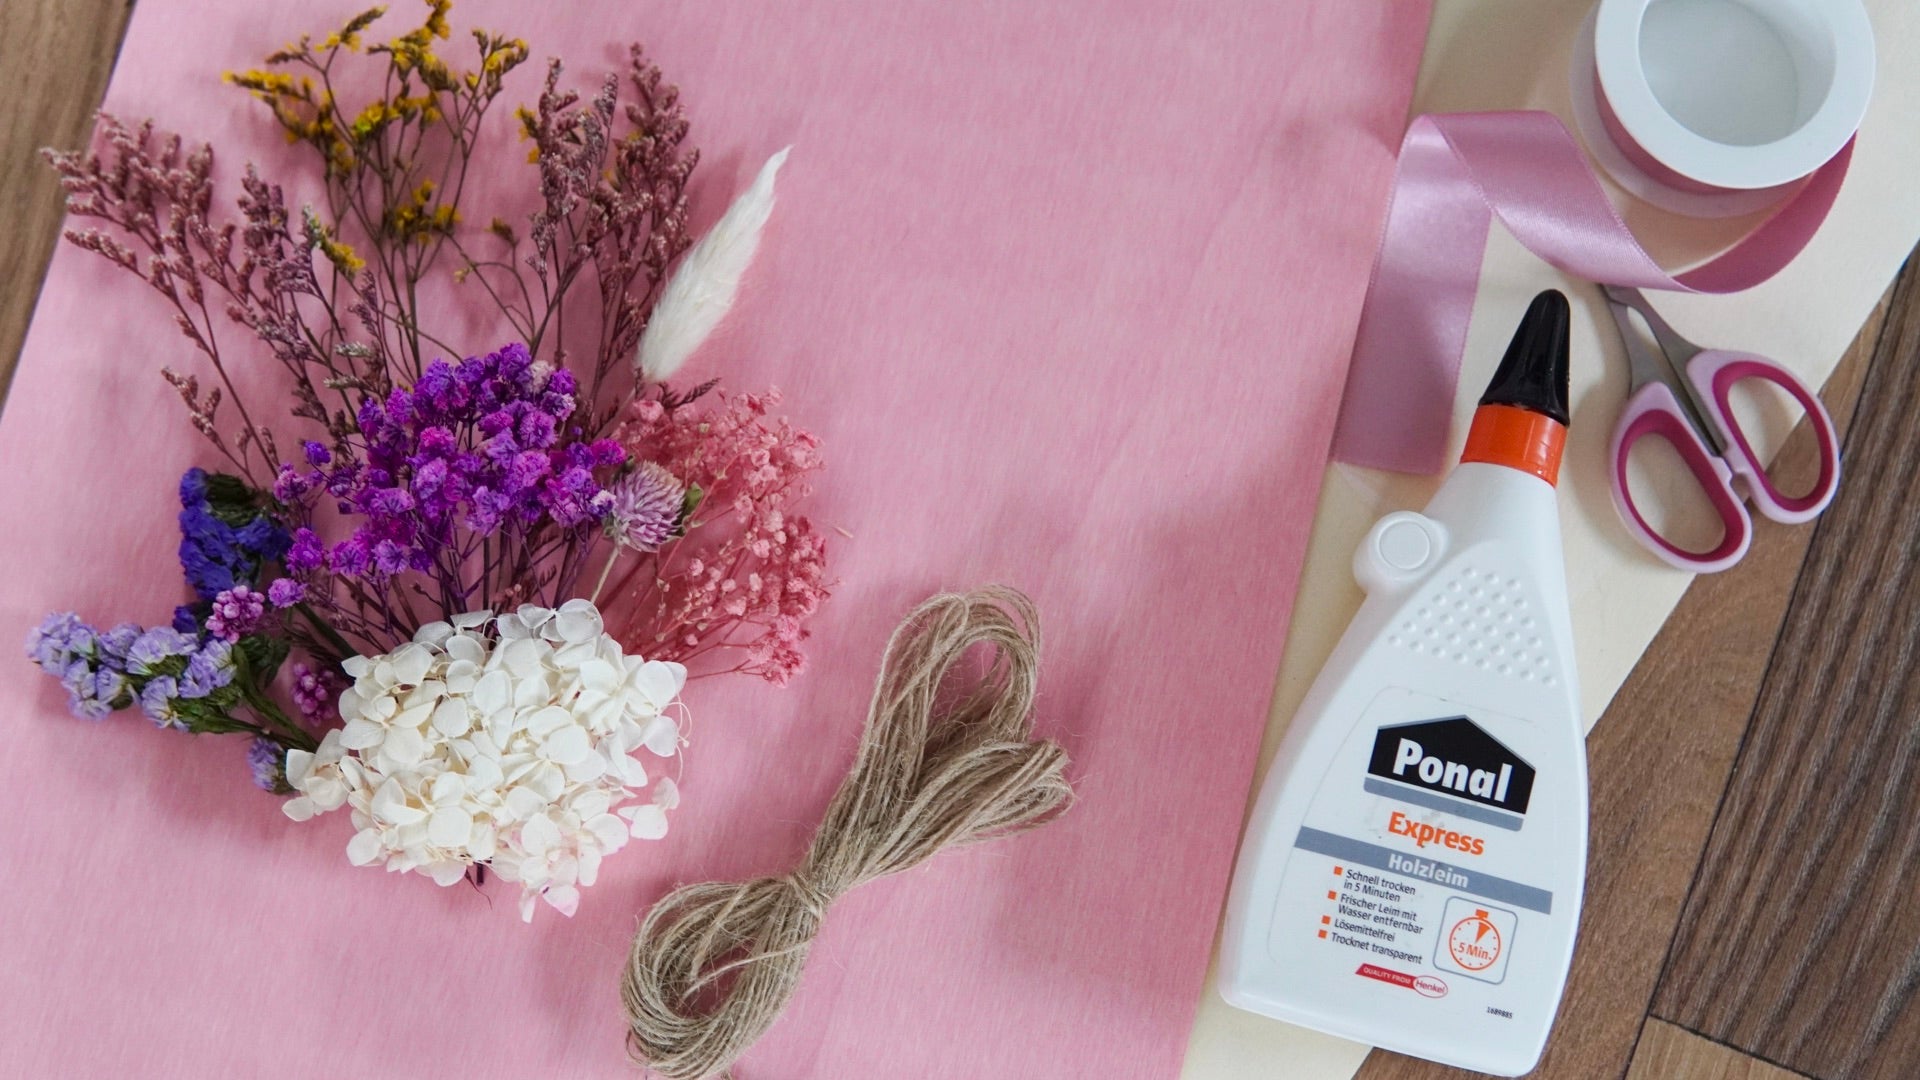
- Poplar or birch plywood in 3-4 mm for the wooden ring
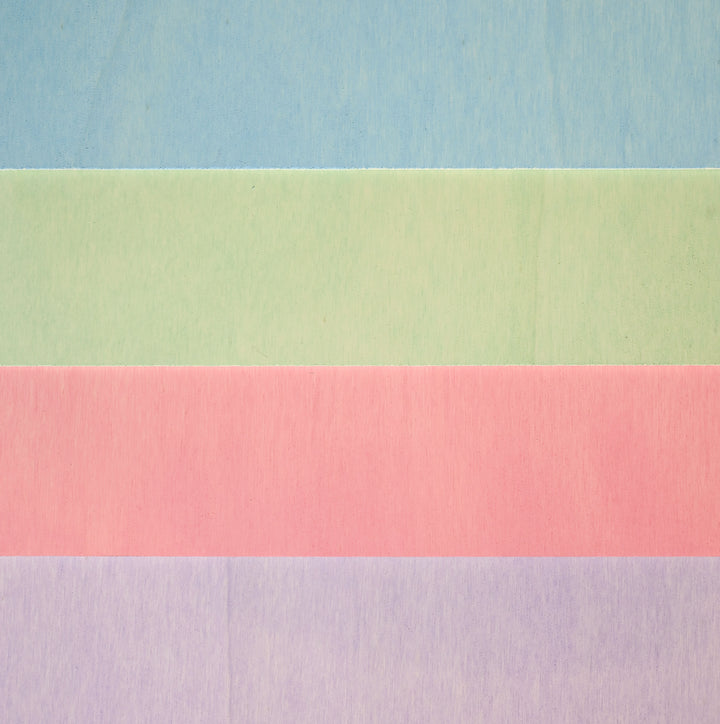
- Poplar plywood in a pastel colour of your choice for the lettering
- of course dried flowers in the right colours
- wood glue
- scissors
- thin wire or a sturdy cord
- a matching coloured ribbon for hanging
Plywood Pack of 5
Sale price
From CHF 30.00
Mr Beam poplar plywood 3mm, pastel, A3, economy pack (4 colors)
Sale price
CHF 62.00
Plywood birch 5 pack
Sale price
CHF 47.00
The wooden ring for your dried flower wreath from the Mr Beam
First, you need a ring, to which you can then tie the dried flowers into a wreath. You can find many different rings in stores to make a dried flower wreath . There are rings made of metal, plastic or wood. But to emphasize the natural look of the dried flower wreath, a ring made of wood is the more beautiful choice.
In addition, a wooden ring offers the unbeatable advantage that you can laser it yourself in no time with your Mr Beam and thus determine the width of the ring at the same time. The resulting support surface makes it much easier to attach the dried flowers as they cannot slip to the side, as would be the case with a round metal ring.
To laser the wooden ring for your dried flower wreath, start your Mr Beam and open the Mr Beam software in your browser. In the workspace you will find Quick Form. Here you can quickly create simple geometric shapes yourself.
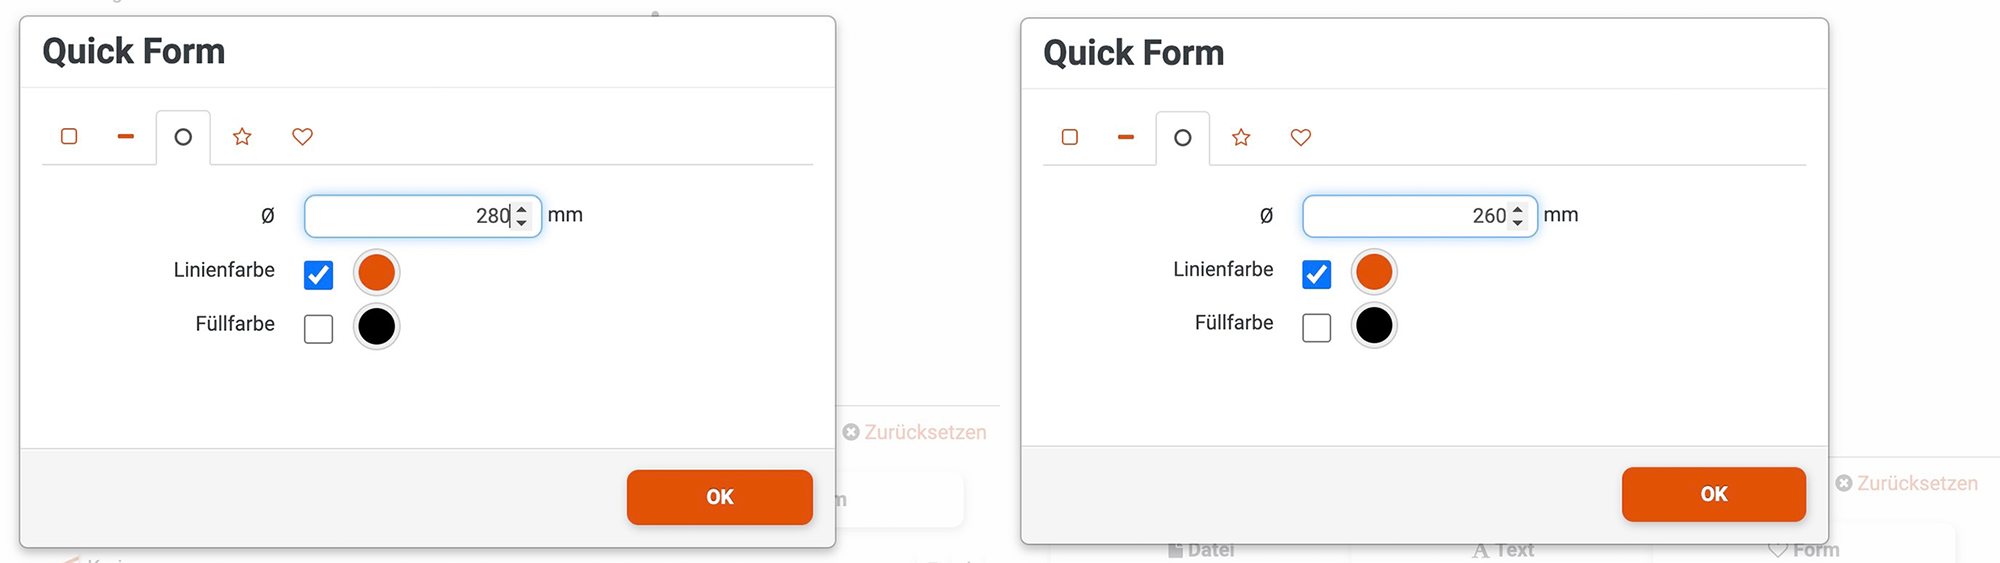
A ring is easily created from two circles. I chose a diameter of 280 mm for the outer circle and 260 mm for the inner circle, which creates a 10 mm wide support surface all around.

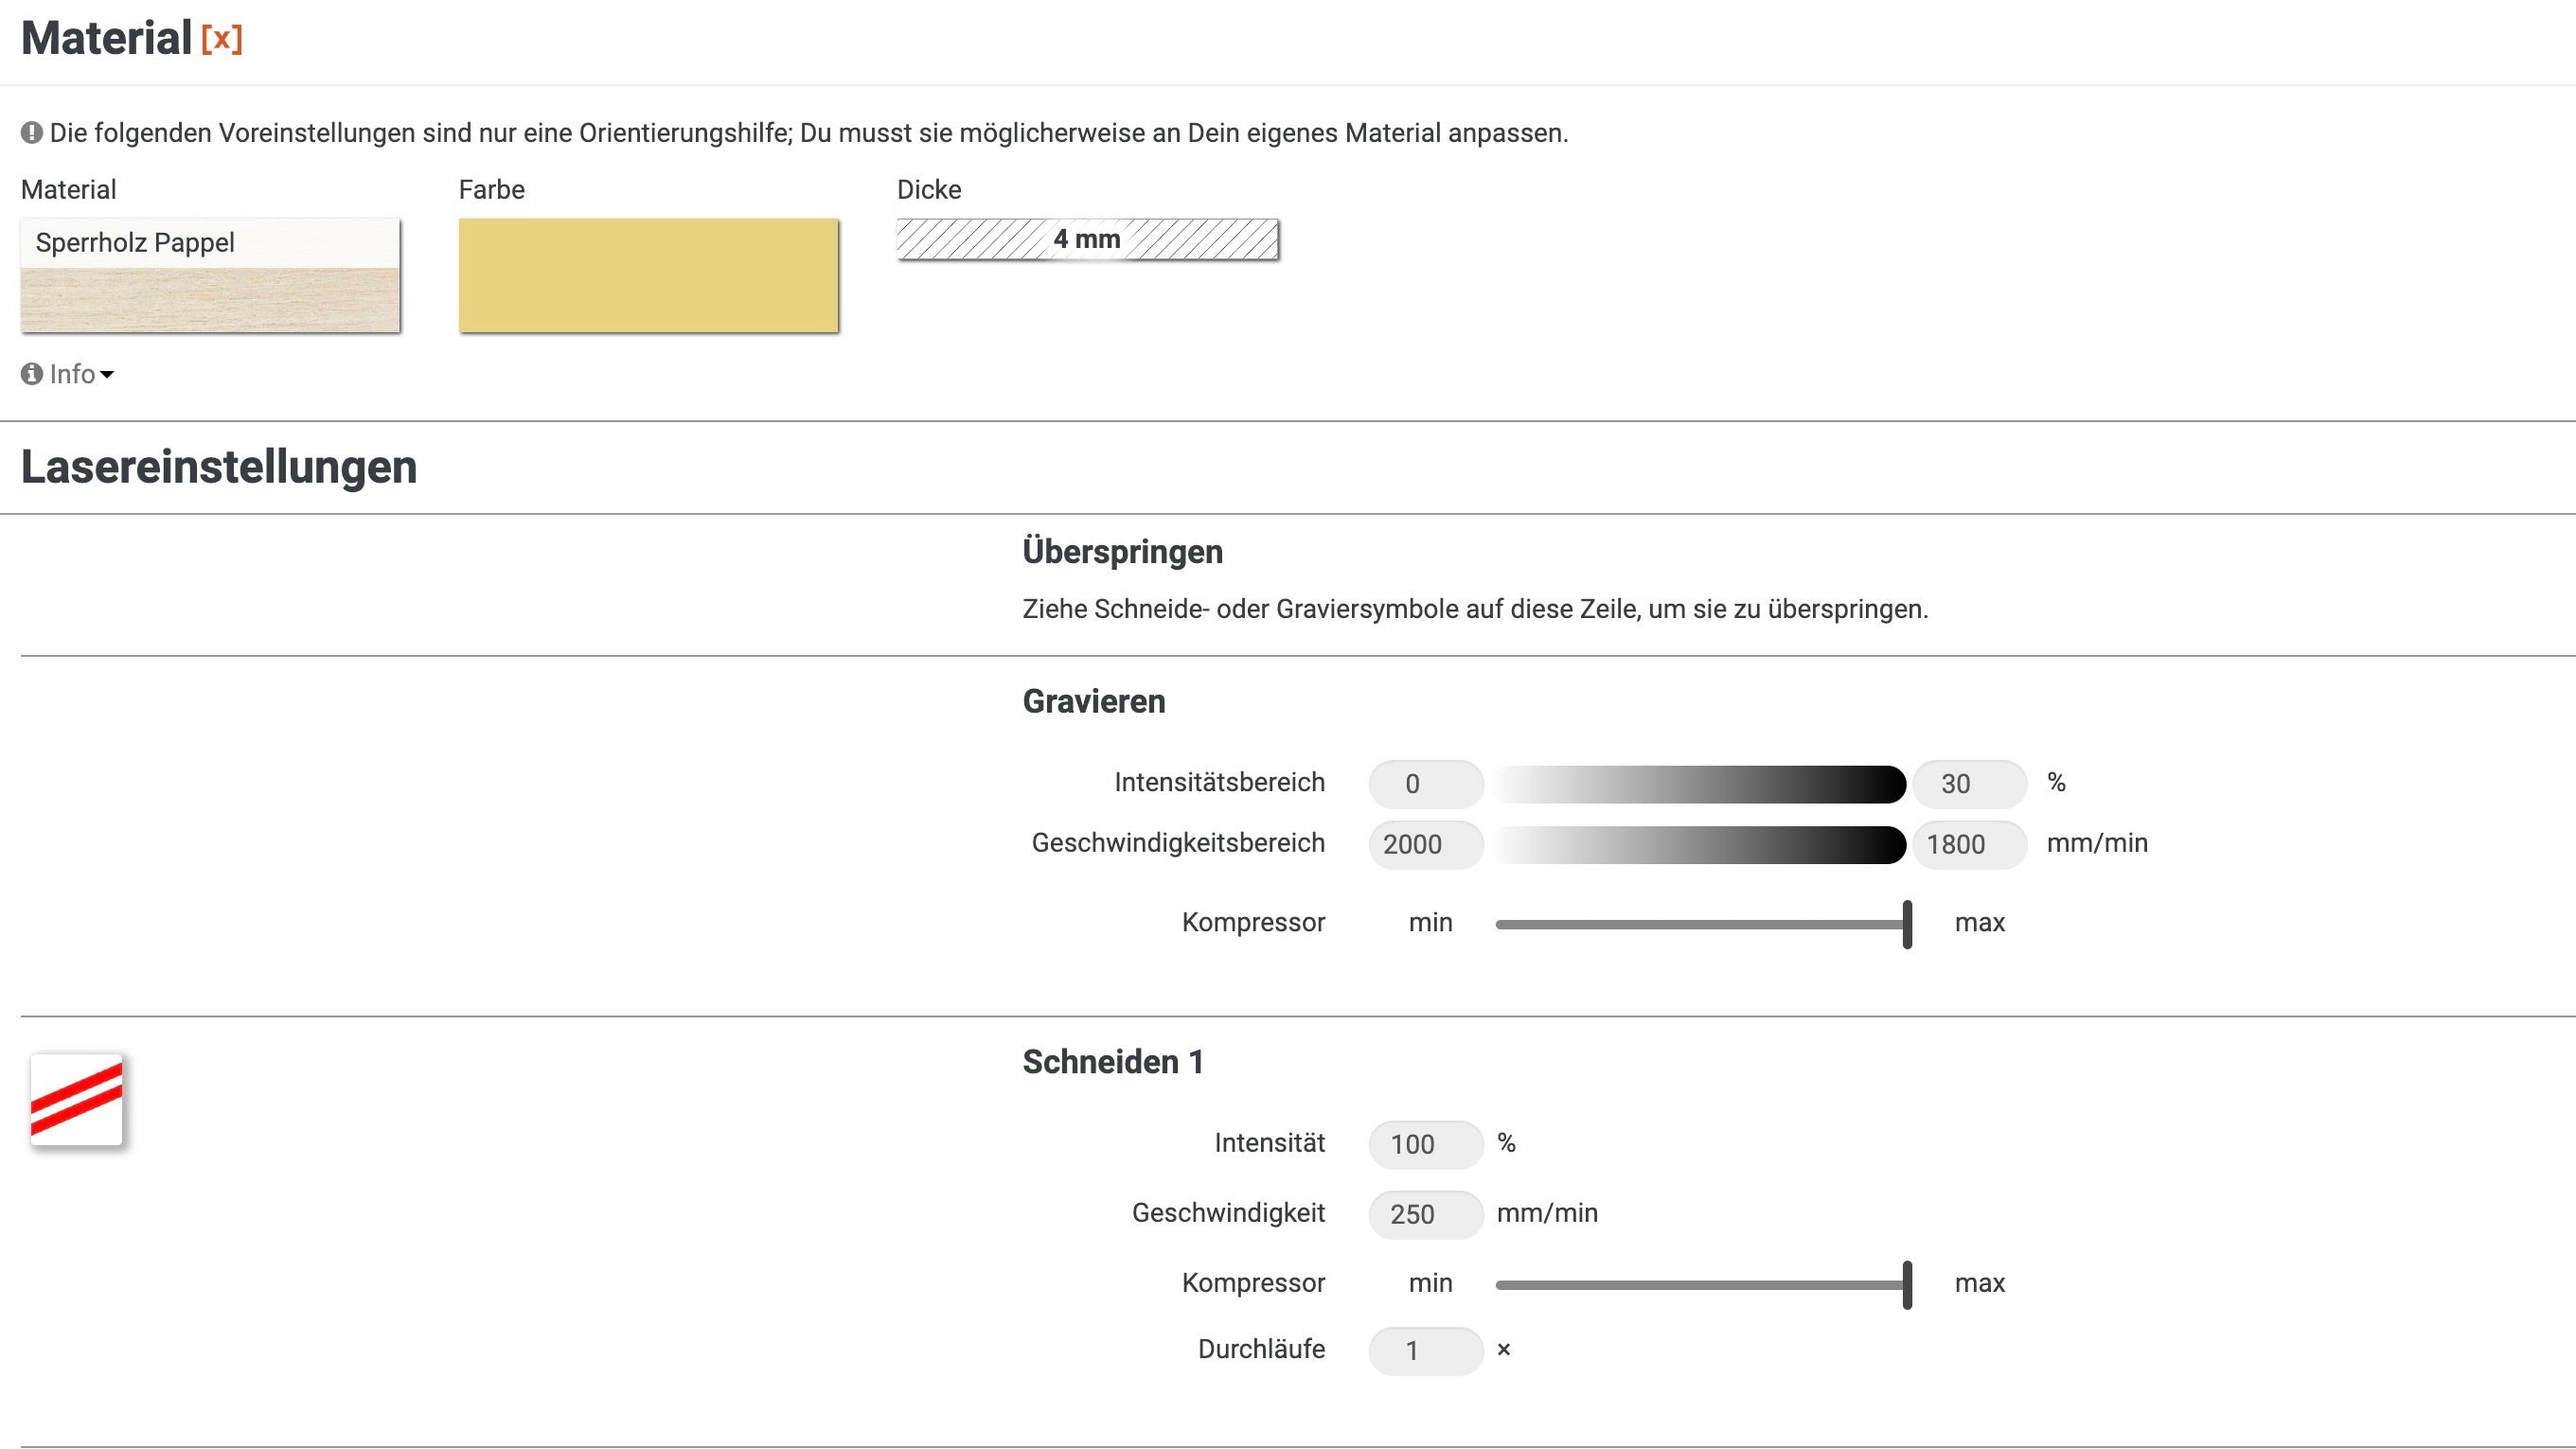
You can then access the laser settings using the “Laser” button, but only after the small reminder about focusing the laser head. Now choose poplar plywood and the appropriate thickness of your material. The parameters for lasering are already stored here, suitable for your laser head.
Select “Start”, close the lid of your Mr Beam and confirm again with the power button. After the laser job, take the finished wooden ring for your dried flower wreath out of the Mr Beam.
This is how you tie your DIY dried flower wreath for spring
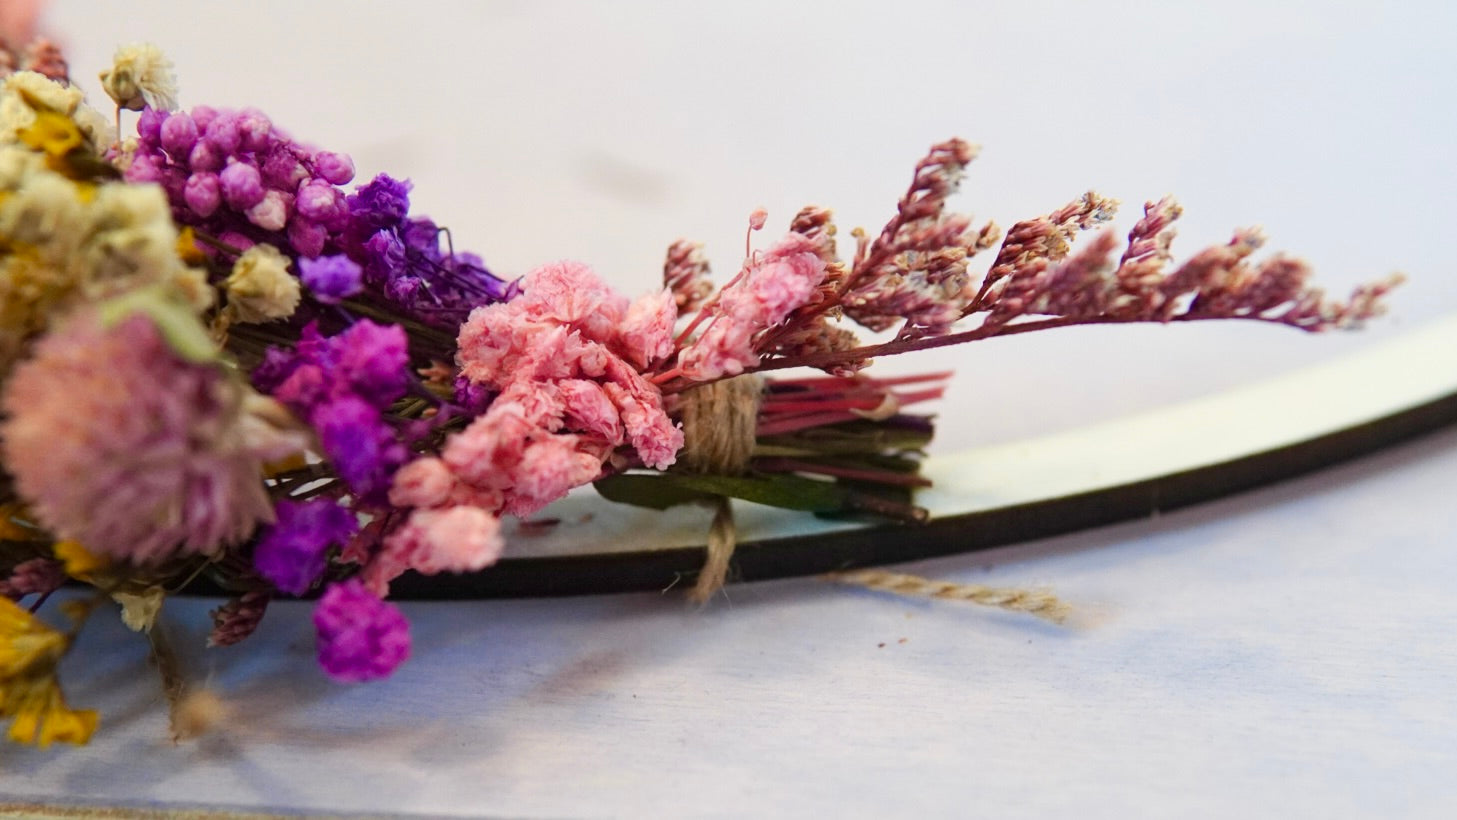
Shorten the dried flowers to a length of 10–15 cm with scissors.

Now you tie little bouquets out of them. Place the longer dried flowers at the back, followed by the slightly shorter pieces, and then the shortest ones at the top. You put them on top of each other like fish scales. This makes the bouquets look more harmonious and there are no bare spots when you tie the wreath.

Now tie a thin string or floral wire several times around the dried flowers, and leave some string or wire sticking out on the right and left at the end. You will need these ends later to tie them to the wooden ring for your dried flower wreath.

Now tie the small bouquets of dried flowers to the wooden ring.
To do this, first place the bouquets loosely on the wooden ring in the way you want them to be fastened. This makes it easier for you to keep track of things.
The “bottom” bouquet is tied first. Then place the next bouquet on top of the stems of the first bouquet to cover them, and tie it to the wooden ring in the same way.
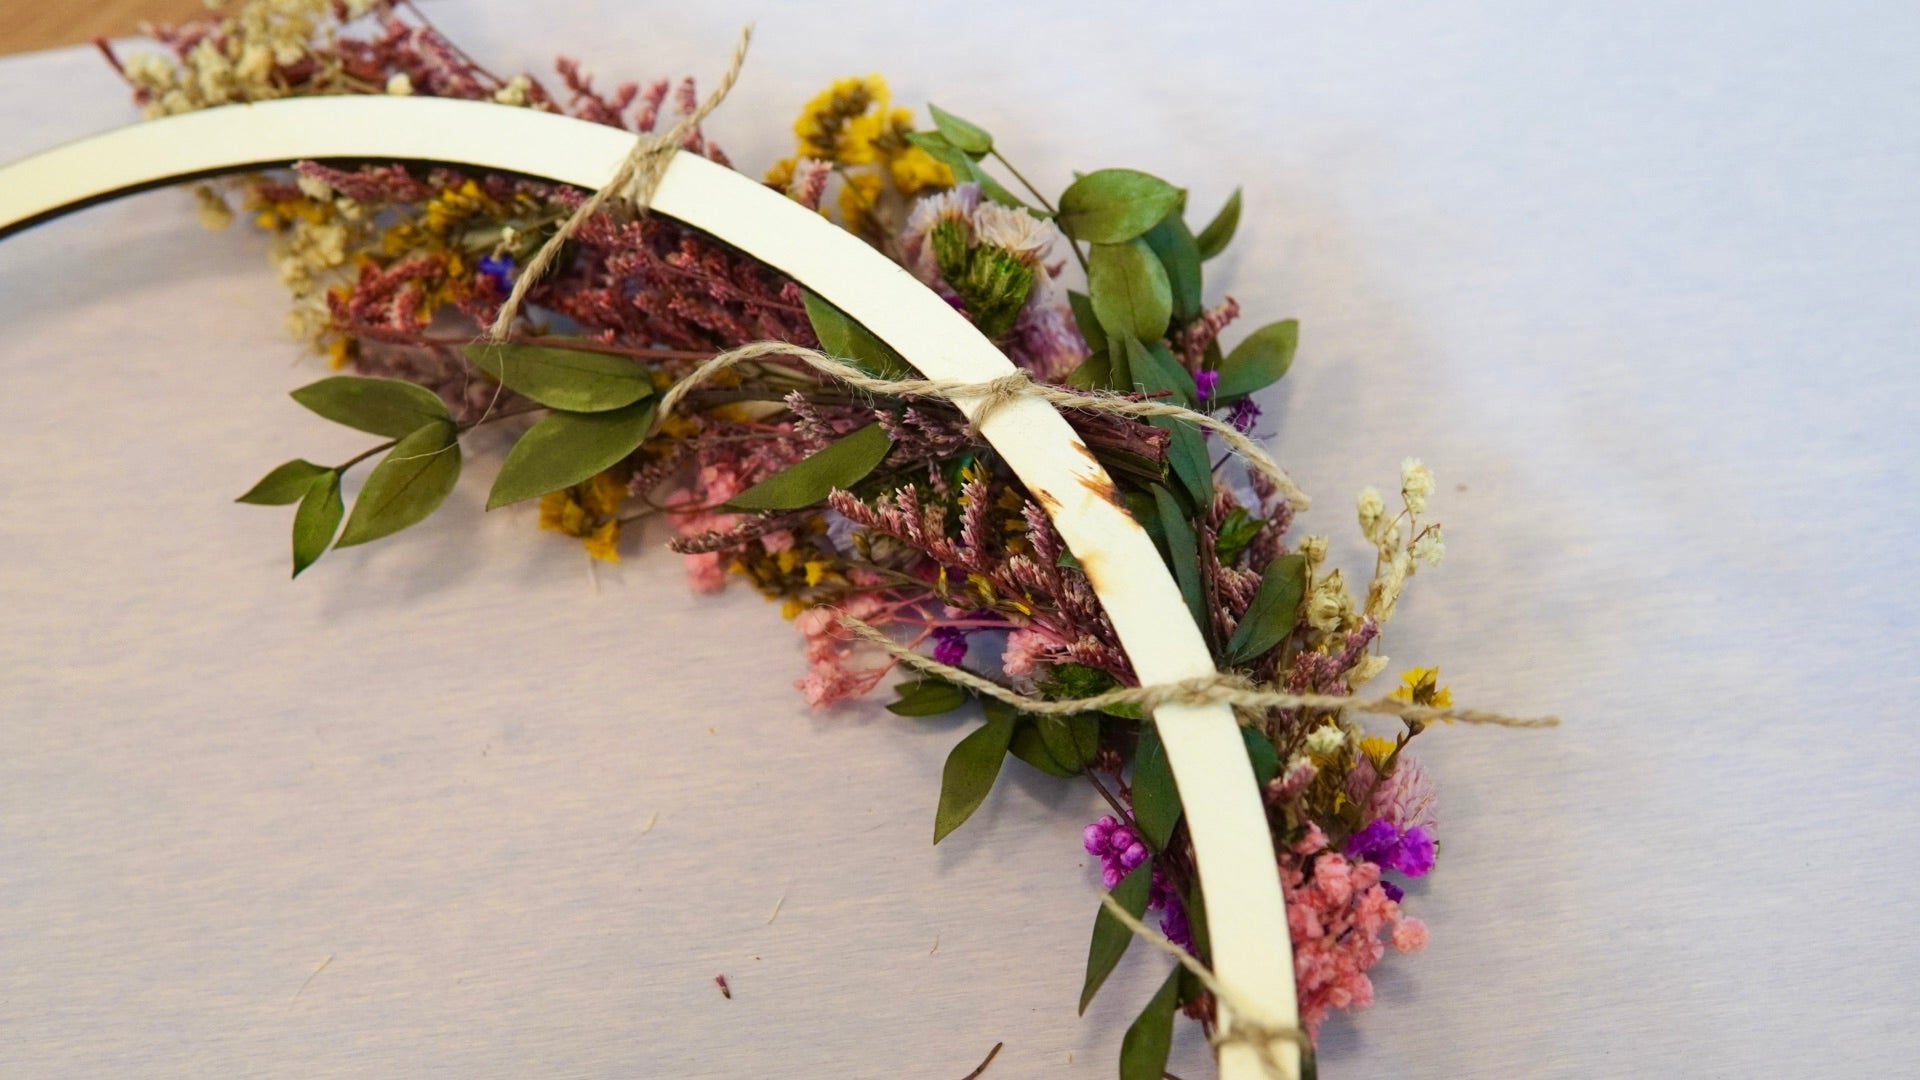
At the end, you will see the wire or string shimmering through on the last bouquet for your DIY dried flower wreath. You can conceal this very well with a few more dried flowers that you put in there, and at the same time have a harmonious finish to the dried flowers.
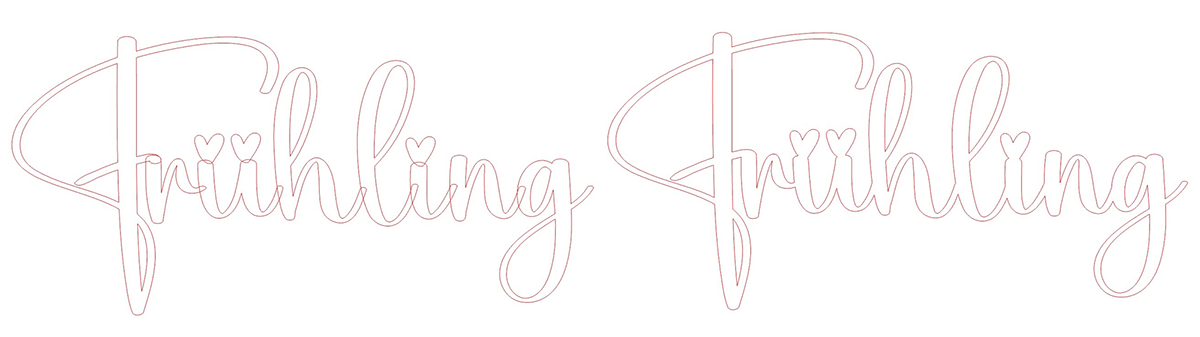
“Spring” for your dried flower wreath
Now you need the lettering “Spring”.
In addition to “Quick Form” there is also “Quick Text” in the work area of the Mr Beam software.
You can create the “spring” for your dried flower wreath with the pre-installed fonts.
Of course, you have more choice of fonts in your graphics program, for example Adobe Illustrator or Corel Draw. You can design “spring” just the way you like. Choose a font that matches your dried flower wreath.
I used the "Daddy" font. To cut a lettering, you only need the outline. You still have to weld or unite the letters.
Remember to move the dots of “ü” and “i” closer to the letters, and also weld them so that everything is lasered in one piece.
When you're done, convert your lettering into paths.
You can also find detailed instructions here. After you have saved the “spring” for your dried flower wreath, you can simply drag the file into your workspace in the Mr Beam software. Now place the pastel poplar plywood into your Mr Beam. Then you place your lettering on your material using the camera preview and start the laser job.
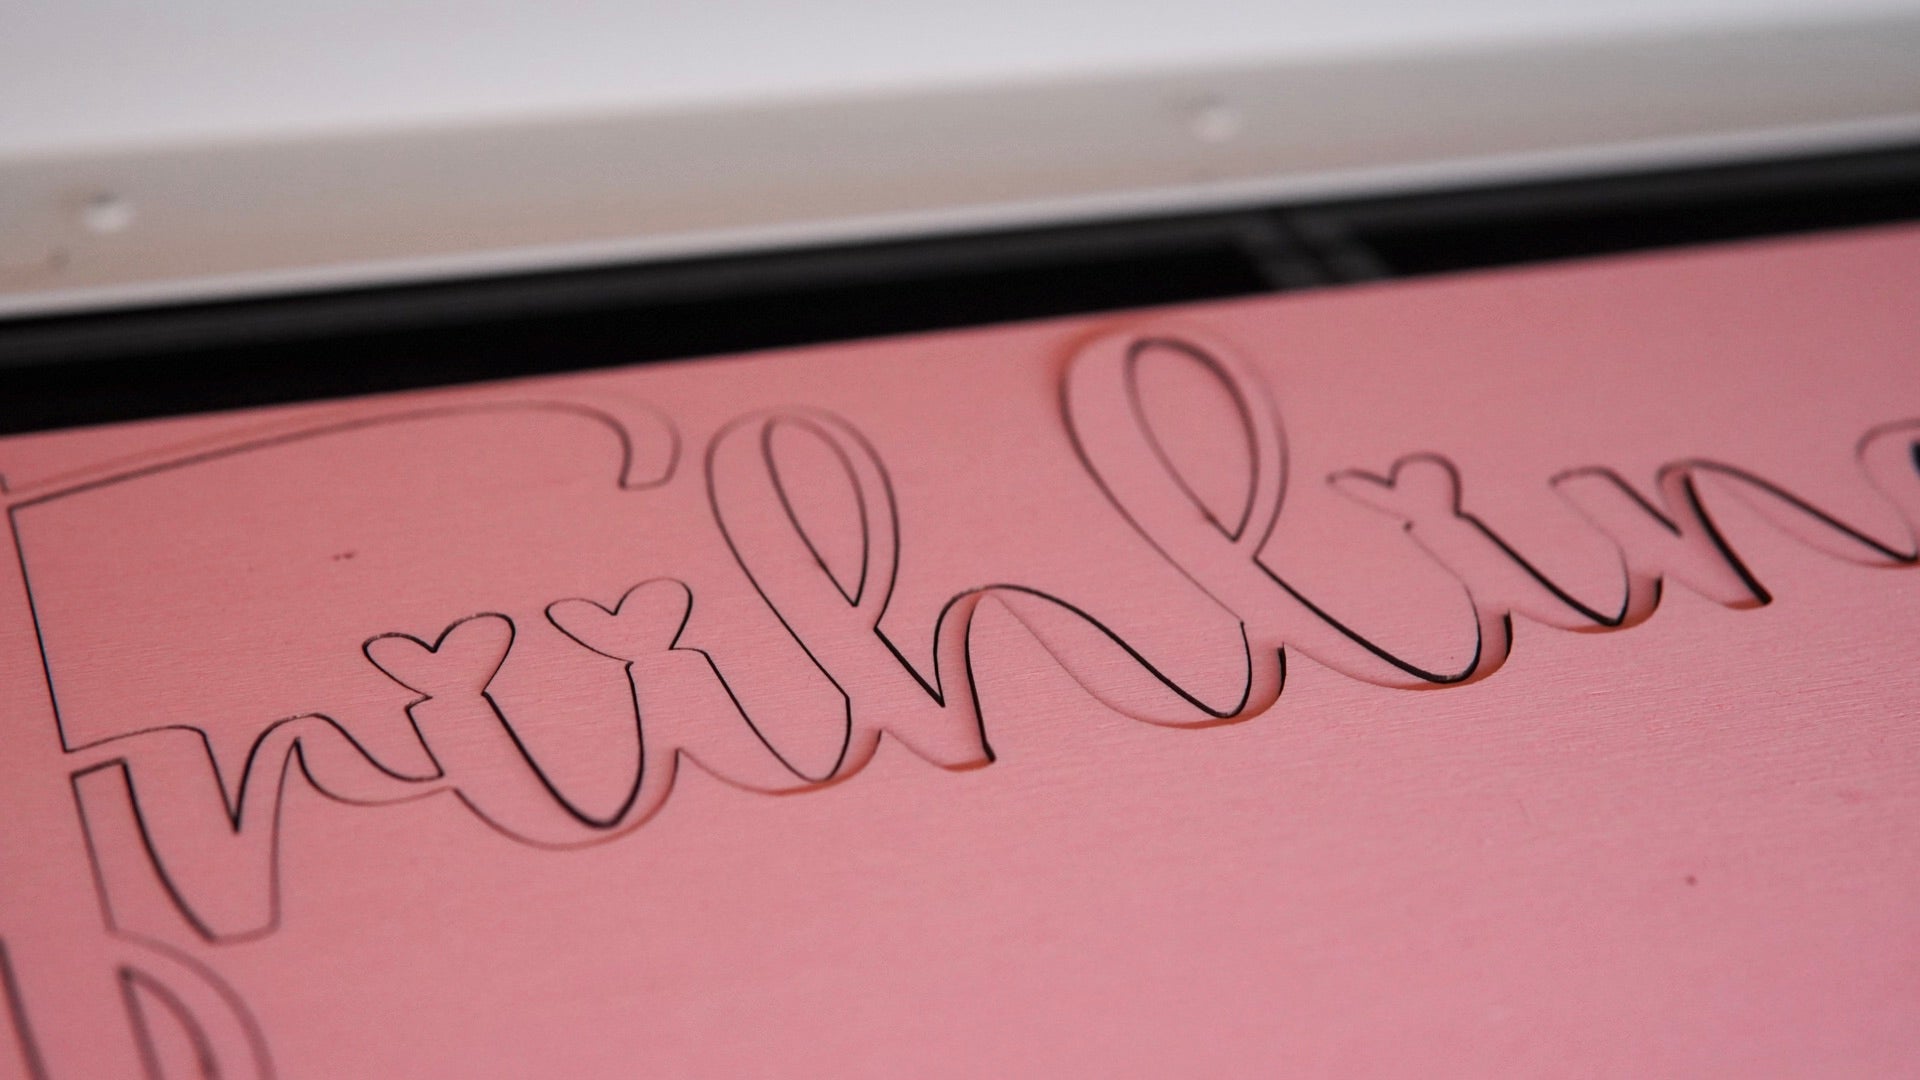
Depending on the thickness of the previous plywood, you should refocus the laser head.
After lasering, take your lettering out of the Mr Beam and place it on the wooden ring in the way you want it to be glued firmly. This way, you can see where you need to apply glue on the back of the lettering.

Now apply a thin layer of wood glue to these areas and place the “spring” on your wooden ring and press the areas firmly.
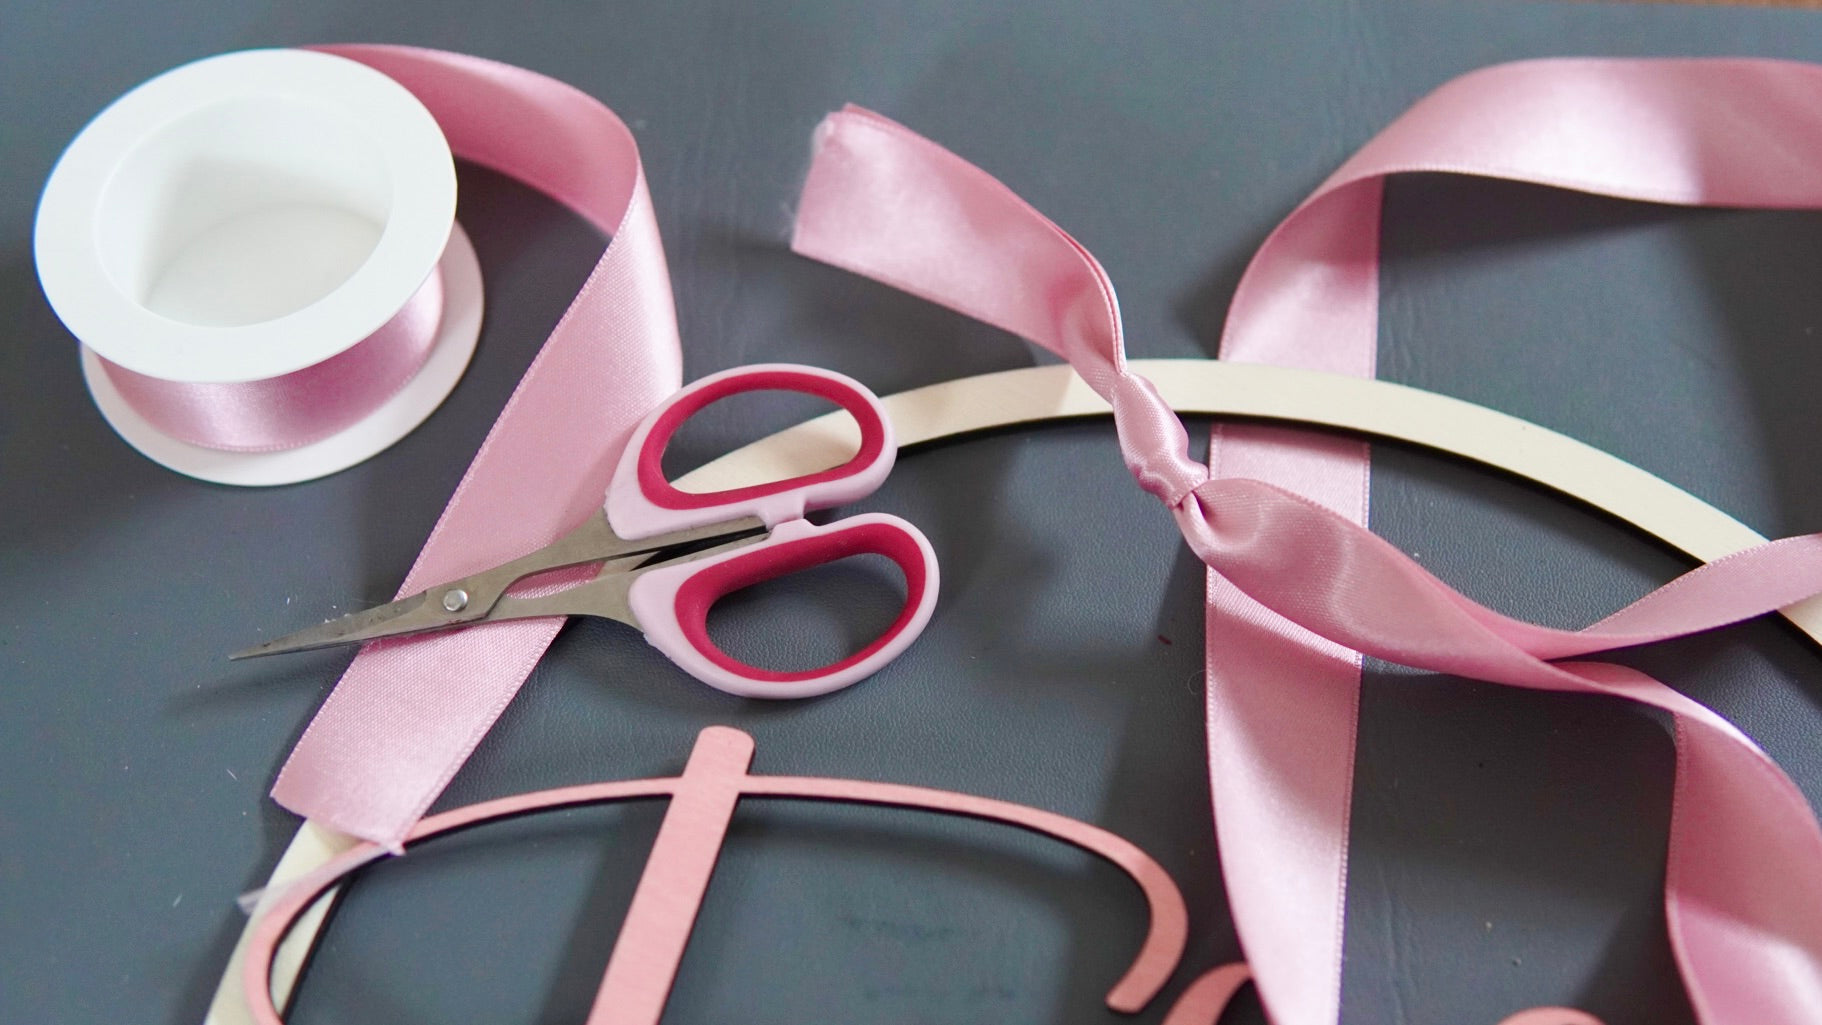
After the glue has dried, tie the ribbon, on which you can hang your dried flower wreath.
Complete!
And it wasn't that difficult to tie a ring with dried flowers yourself, was it?
A dried flower wreath like this is also ideal as a gift, for example for a house-warming, a souvenir or simply to give away a little bit of spring.
I hope you have fun crafting and “sprinkling spring”.
Your Rina