
They can actually be found in every baby or toddler room: mobiles.
Placed above the baby bed, changing table or freely in the room, they actually serve many purposes, especially for babies. They train sensory, visual and cognitive development. At the same time, looking at the mobile can calm you down or simply entertain you.
Our children are already 3 and 5 years old, but they love wind chimes. That's why I made you a rainbow-coloured mobile, which we hung up so that the wind from the open window can set it in motion. And in this tutorial, I'll show you how you can easily recreate the butterfly mobile in rainbow colours.
The choice of material for the mobile
There are a few things to consider when choosing a mobile for a baby
The most important thing is that the mobile is securely attached and nothing can come loose. Every tiny piece that falls off poses a choking risk!
When choosing materials, you should always consider whether the baby or toddler can reach the mobile (this may be desired). Then you should definitely make sure that the colours you choose are harmless to your health. If they are suitable for coating children's toys according to DIN EN 71-3, they are non-toxic and saliva-proof. The cord should be tear-resistant, and the knots should be tight.
Choice of material for our butterfly mobile
Colours:
Since our girls at their age no longer put anything in their mouths to explore it, I chose my great edding permanent spray colours for the colours.
Material:
I used Kraftplex as the material for the butterflies, because Kraftplex can be shaped wonderfully when it is moistened, it does not break and does not emit any odours after lasering.
- Kraftplex in 0.5 mm
- a small bowl of water
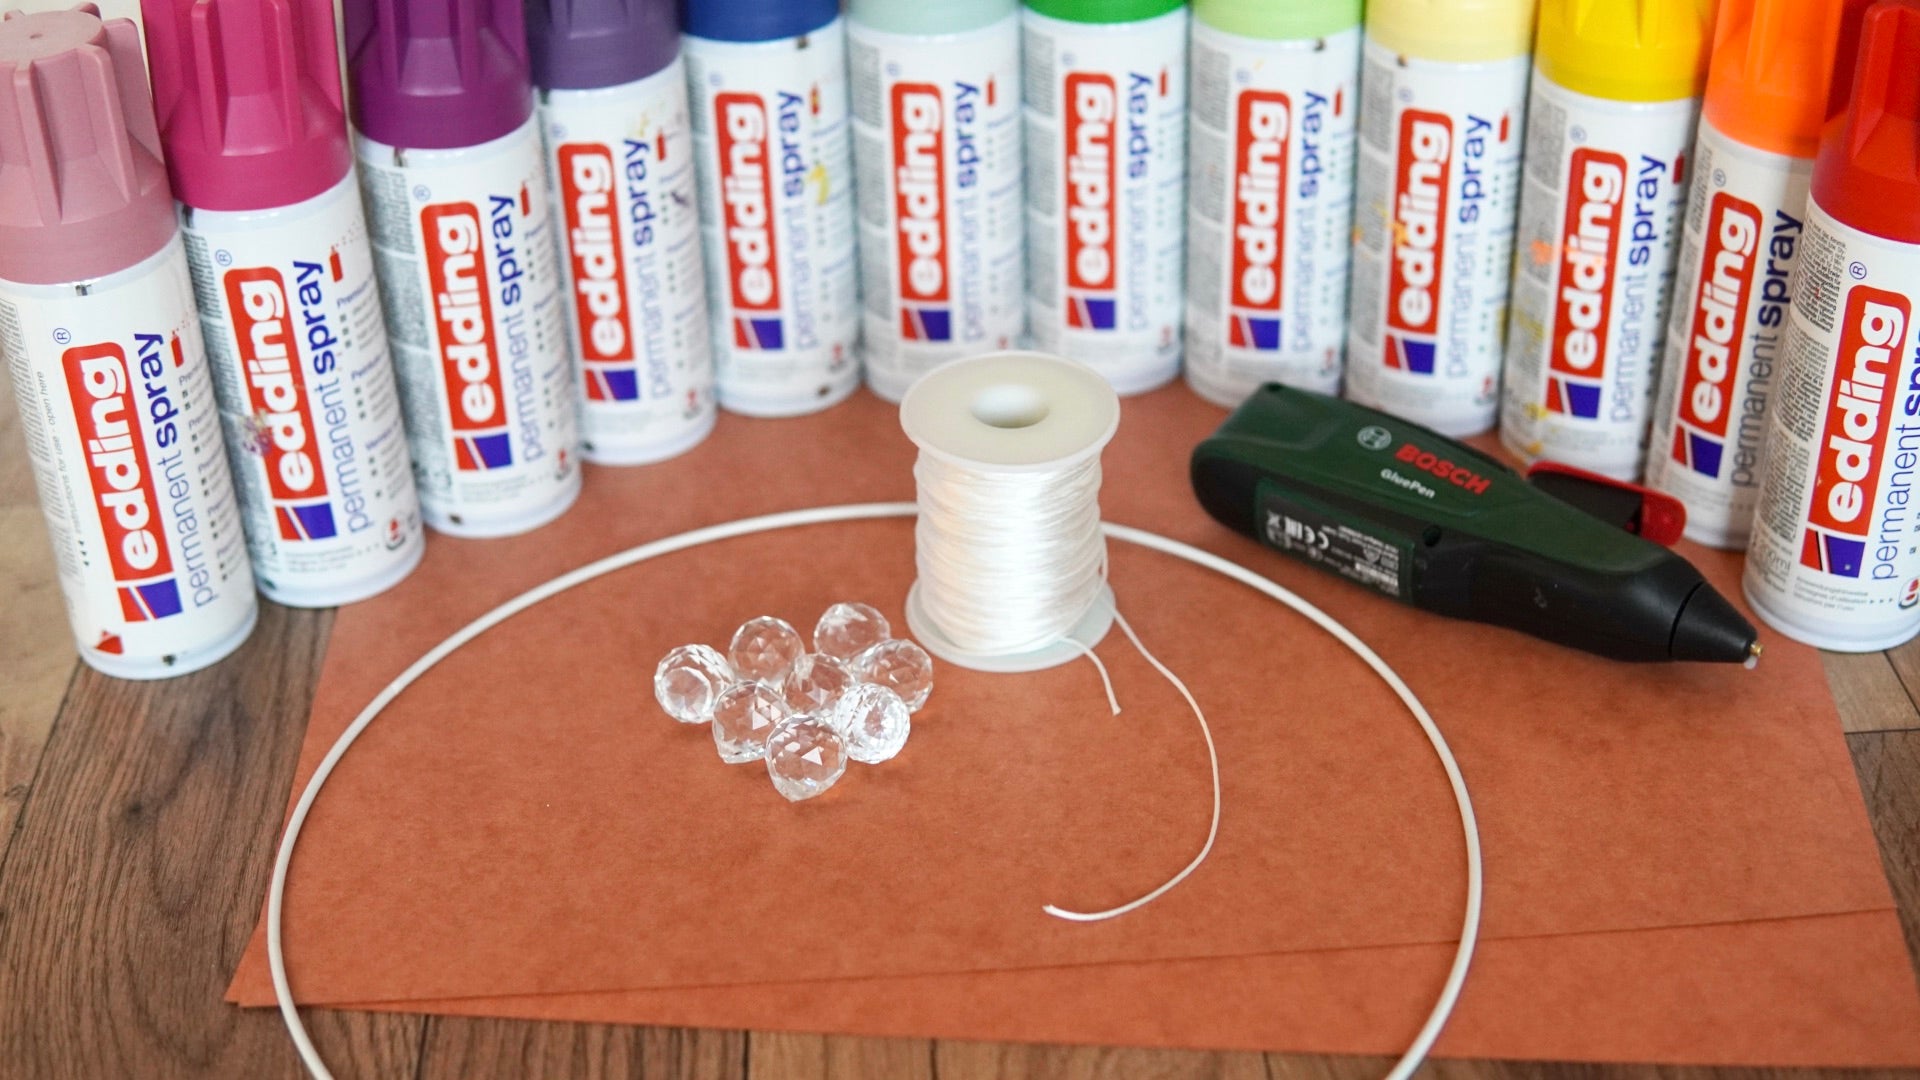
- edding permanent spray in all colours of the rainbow
- tear-resistant cord
- Glass crystals or heavy wooden balls or something else to weigh down the cords.
- Hot glue
- a white metal ring with a diameter of 30 cm
- the butterflies from the Mr Beam design store
KRAFTPLEX CL 0.5mm, Pack of 5
Sale price
£15.00 GBP

kraftplex Starter Set
Sale price
£27.00 GBP
Mr Beam Pastel Acrylic, various colours, 3mm, A3
Sale price
From £13.00 GBP
Laser the butterflies for your mobile
You can find two of the butterfly outlines used in the Mr Beam Designstore. They are from mamassachen. The file with all seven butterflies is also available in her shop.
For the mobile, you only need the contours.
Start your Mr Beam and open the Mr Beam software in your browser.
You duplicate the seven different butterfly shapes four times. However, each time you make it a little smaller. The largest ones are about 12 cm wide and the smallest ones are about 5 cm wide.

Now use the camera preview to arrange them as close to each other as possible on your Kraftplex. Depending on the size of your Kraftplex, you have to divide it into two laser jobs.
When everything is prepared in the work area, focus the laser head and then start the laser job.
The Mr Beam cuts Kraftplex really quickly and there are hardly any smells when lasering. I really enjoy working with it.

The butterflies come to life for the mobile
Kraftplex can be easily shaped if it is slightly moistened. If you cover the butterflies completely with water, you can give each one a very individual shape.
I used a slightly larger grill skewer to help bend the skewer, but you can also use a pin or something similar. This allows the wings to be easily bent upwards. A little different for every butterfly. Even the feelers and wings themselves can be individually designed.

Now your swarm of butterflies for the mobile still needs to dry. Afterwards they are solid again and ready for painting.

The mobile becomes rainbow-coloured
You already know from my blog articles that painting is always done in a well-ventilated place. As protected from wind and rain as possible. You will also need some kind of paint booth to protect yourself and those around you from the paint mist. A large shipping box is suitable for this.
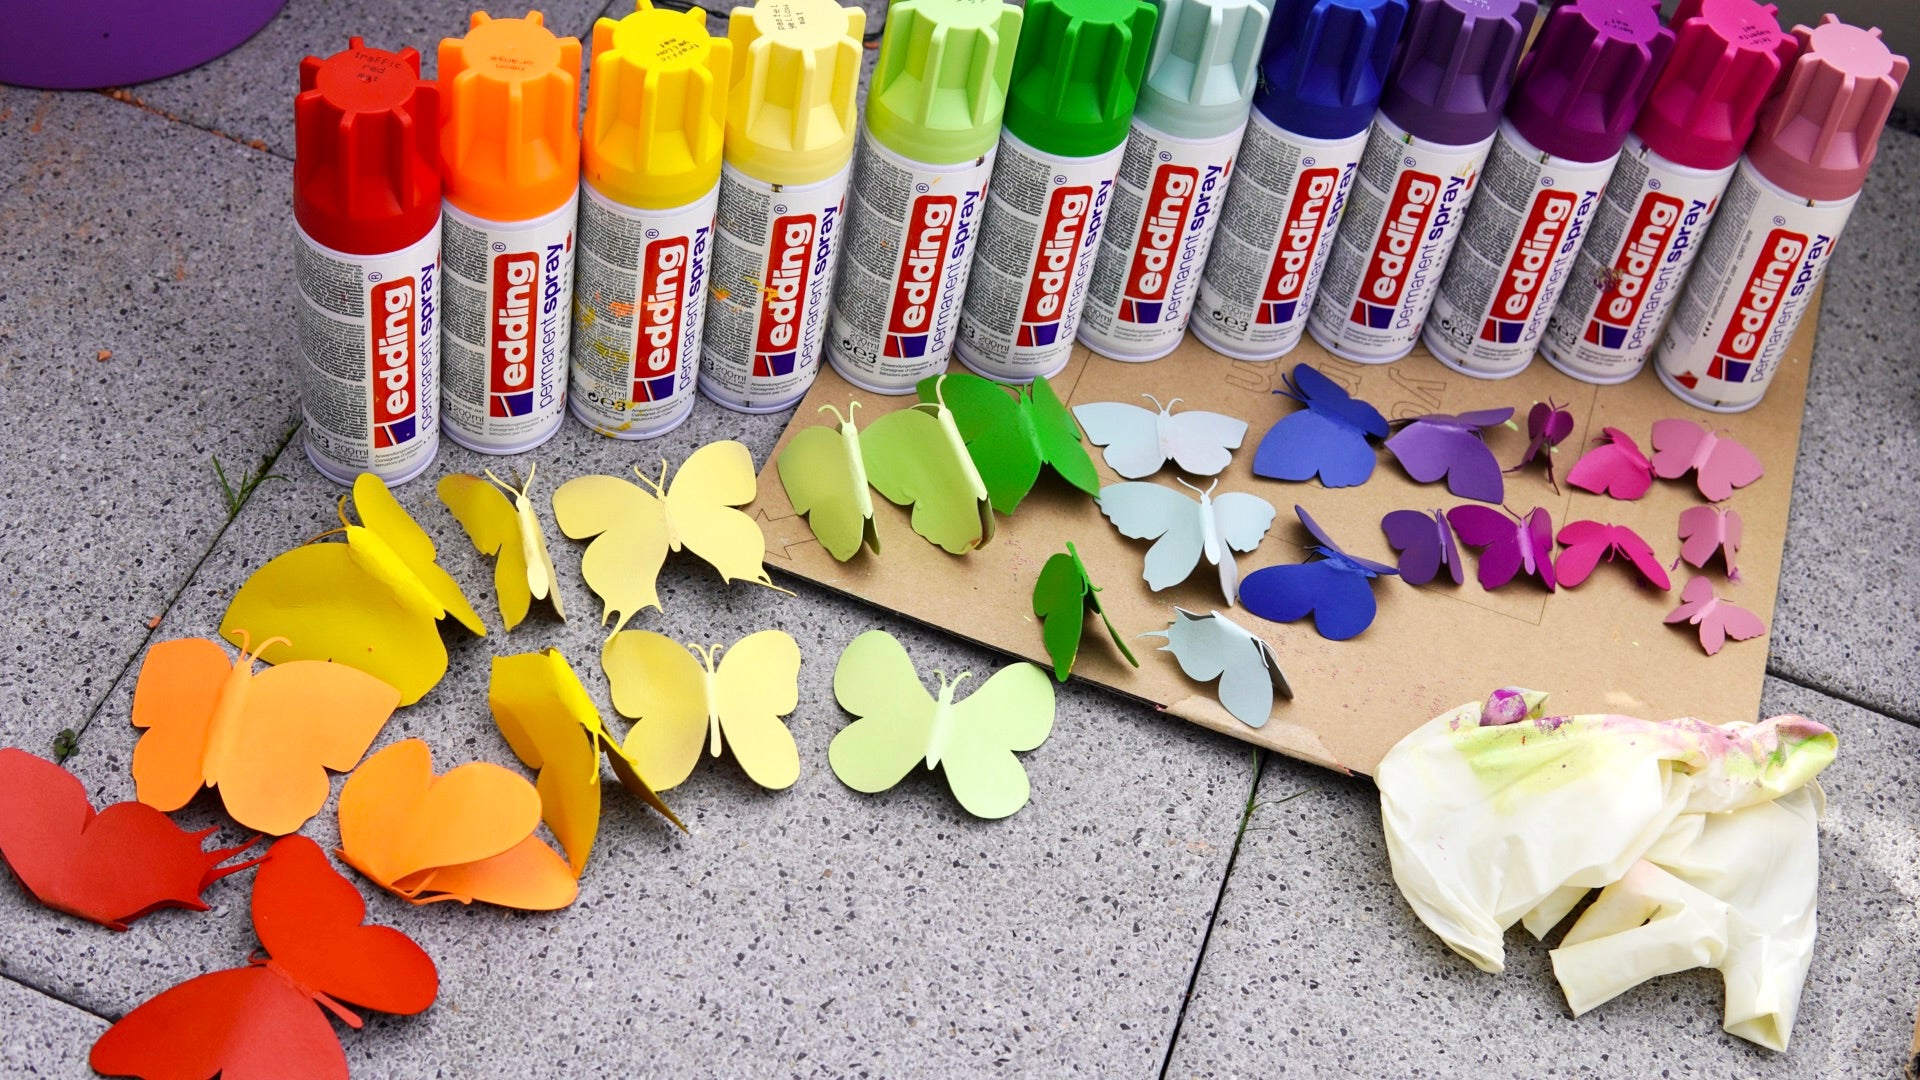
Prepare your spray paints according to the manufacturer's instructions, put on gloves, and then paint a few butterflies in one colour at a time. I divided them up so that I always painted three butterflies in the pastel shades and two each in the other colours. You work from large to small.
Finish building your mobile
Once the paint has dried on the butterflies for your mobile, you can start putting it together.
To do this, you now need a total of 20 pieces of 15cm each of your string, which you glue to the top and bottom of the butterflies. There will be eight strings with butterflies dangling from the end of your metal ring for the mobile.
In my case the colour sequence of the butterflies for the mobile was:
red - orange - yellow - pastel yellow - pastel green - green - pastel blue - blue - purple - violet - telemagenta - pink.
To make it easier to see when gluing, I laid them out in eight rows in front of me:
- red - pastel yellow - pastel blue - telemagenta
- red - pastel green - blue - pink
- orange - pastel green - blue - pink
- orange - pastel green - purple - pink
- yellow - green - purple
- yellow - green - violet
- pastel yellow - pastel blue - violet
- pastel yellow - pastel blue - telemagenta
Now glue a piece of string to each of the butterflies' undersides, except for the last ones in the row.

Then come the tops. When everything is dry, you will have eight strings with colourful butterflies in front of you for your mobile.
To attach the butterflies to the metal ring and make it look like they are flying in a spiral, cut eight pieces of string.
For example: 5cm - 7cm - 9cm - 11cm - 13cm - 15cm - 17cm - 19cm. You tie this onto the metal ring.

Now glue the shortest string to the red butterfly, and so on until the longest string is attached to the pastel yellow butterfly.
To ensure that the cords on your mobile hang straight, hang weights at the bottom of each last butterfly.
These can be glass crystals that sparkle beautifully in the sunlight, or heavy wooden balls or something else that is sufficiently heavy.
The suspension for your mobile consists of four long cords. Tie two opposite ones to your metal ring, bring them together in the middle and knot them.
Now your mobile for the children's room is ready.

I hope you have fun imitating it - and the children enjoy watching it.
Your Rina


