
Carnival is just around the corner, the costumes are ready, but no decorations in the windows yet? How good that the Mr Beam can be used to laser paper and cardboard in particular in no time. In this tutorial, I'll show you how you can quickly make really great window pictures for carnival..
Material for your clown as a DIY window picture for carnival
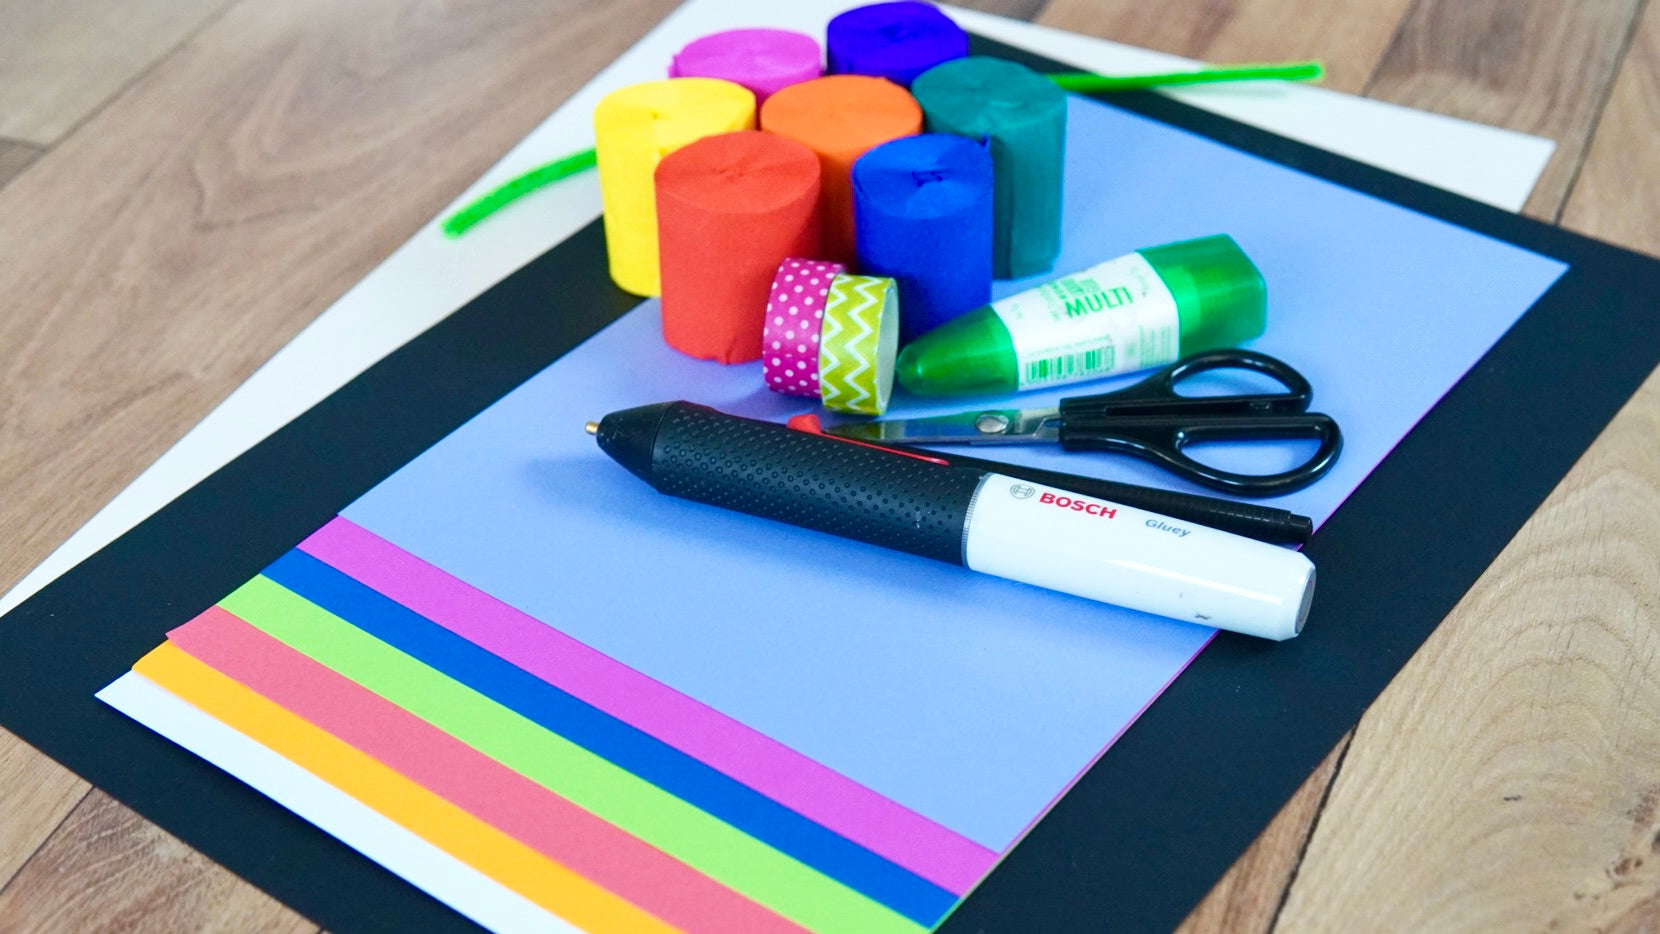
- beige, black and white cardboard
- Colourful cardboard for the nose, hair, hat and flower.
- Glue for the cardboard, for example a glue stick.
- Masking tape in many colours
- transparent adhesive film
- hot glue
- a green pipe cleaner as a flower stem
- scissors
- Colourful washi tape as shoelaces
- a black pencil for the eyes and mouth
The preparations for lasering your window picture for carnival
You can find the file for the clown as a window picture for carnival in the Mr Beam Design Store. To download it, start your Mr Beam and then the Mr Beam software in your browser.
Tip: If you want to make several clowns as window pictures, you can also find the file“ Candy dispenser in clown design” in the Design Store, where you can use the head, hands and shoes and then even have two different clowns on the window. There is also a tutorial for the clown candy dispenser on the Mr Beam blog.
If you have loaded my file for the carnival window pictures into your workspace, you will discover the different line colours. They roughly correspond to the colours that I used from my cardboard for the clown.

I added yellow line paint to the parts of the clown for the carnival window picture, which were laser cut from white cardboard.
Of course, you can change the size of your clown for the window.
In the work area, click on the three orange lines next to the file and divide it according to line colour.

This means you can freely arrange the individual parts of your clown on the respective cardboard as a window image for carnival using a camera preview, whereas otherwise you can only move the entire file.
Laser the carnival window picture with the Mr Beam
Now you gradually laser all the elements of your clown for your carnival window picture.

For the shoes, place the black cardboard into the Mr Beam and focus the laser head. Then align the two shoes on your cardboard and click “Laser”.
Now select “cardboard” as the material, and then the colour and thickness of your cardboard.
To laser-engrave just your clown's shoes as a DIY carnival window picture, move all other colours into the “Skip” field.

Tip: To keep things clearer, after the laser job, you can simply delete the finished elements in the work area by clicking on the “x”.
Confetti for your DIY carnival window picture
Confetti shouldn't be missing from any carnival window picture, right? If you laser the colourful cardboard, you can simply have it cut at the same time as the respective part of the clown.
To do this, create a few circles of very different sizes in the work area and use them to fill the spaces in your material.

This is easy to do using “Form”. There you select a circle and can directly determine the appropriate diameter.
Now work from colour to colour until you have lasered all the elements for your clown as a window picture.
If you also want your carnival window picture to look good both from the inside and outside, then you will need the clown's individual parts as follows:
- 1 x head (skin-coloured)
- 1 x the upper part of the hat (green)
- 2 x the edge of the hat (blue)
- 1 x shoes (black)
- 1 x hands (white)
- 2 x eyes (white)
- 2 x the hair (orange)
- 2 x the nose (red)
- 2 x the mouth (white)
- 1 x the petals (pink)
- 2 x the pistils (purple)
Making your clown as a window picture for carnival
Now glue the clown's head together. Glue the hair on the right and left of the head. This is followed by the hat.

To do this, first glue the blue edge of the hat to the green part of the hat, and then glue the entire hat to the clown's head. Then there are the eyes, nose and mouth. You can finish the eyes and mouth with a black felt-tip pen.

If you want to glue both sides, turn the clown's head over for your carnival window picture and first glue the hair, then the edge of the hat, eyes, nose and mouth.
Glue the purple circles in the middle of the pink flowers on both the front and back.

Now follow the little things for your clown as a carnival window picture
The green pipe cleaner serves as a flower stem. You can use a loop to form a side leaf. The stem is glued with hot glue to both the flower and the top side of the hat.

The shoes still have laces made from washi tape. To do this, cut small pieces of washi tape and cut them in half lengthwise with scissors so that the shoelaces don't become too thick.
Your clown as a window picture for carnival
You can finish making your clown as a carnival window picture at the table or directly at the window. In order to be able to better measure the final size and therefore the required length of the masking tape, I finished making our carnival clown right on the window.
To do this, stick the head, hands and shoes on the window with adhesive tape. You can arrange this however you like.
The colourful masking tape is now used to create the arms, legs and body of your clown for the carnival window picture.

Now cut the masking tape into suitable strips.
The clown's arms as a carnival window picture
You will need three bands that must reach from one hand to your head and across to the other hand.
Now glue the ends of the three strips overlapping to the bottom end of the clown's hands. You can do this with a glue stick or adhesive strips, as you like.
The legs and body for your clown
And then you need about ten straps to attach from your head to your shoes. You also stick them on the head overlapping and then lead five of the masking tapes to each shoe and stick them there too.
Now your clown is ready for a carnival window picture ! Now spread the lasered confetti on the window, and then all that's left for me to do is wish you a few great days and have fun imitating it.
ALAAF, your Rina.


