
Lucky pigs belong to New Year's Eve again, Christmas tree to Christmas heard. Nevertheless, it is boring, the New Year's Eve table decoration every year with the same small motivators. How practical it is that you just have a Mr beam next to you, with which you have your very own Lucky pig as New Year's Eve decor can make yourself.
For the annual accounts, something special: three different designs with many materials
In this article, we have prepared a classic three in a package for you. Of course, as always, you will find all designs in the Designstore under the search term "Lucky pig". If you prefer to create the files yourself, you will find valuable tips on each individual piggy tips below.

The abstract lucky pig in 3D

Material of DIY New Year's Eve Decor
Let's start with a right abstract lucky pig which impresses with its three-dimensional skills. It essentially cuts on 5 layers, wood or felt. This time is not as important, how thick the material is. The main thing is not too thin, otherwise the 3D effect is lost, and the pig can no longer stand.

Design of the lucky pig
The layers that produce the 3D effect consist only of rectangles in their abstract basic form, which have strongly rounded corners. In our design, the inner three basic forms are the same size, while the outer two are a bit smaller. The middle plate has thereby The most characteristic characteristics of a piggy On: the sniff snout and the march tail. A plain further outside we have placed the ilches and all the outside are eyes and legs again.

Lasers and assembly of DIY New Year's Eve decor
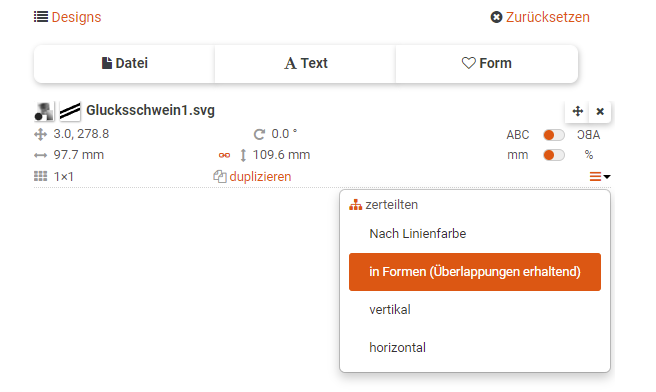
So that you can save as much room during the laser as possible, you can in the Mr Beam software Disconnect the file by clicking on the three strokes in the lower right corner in the design panel and the Design then divided into molds. Then you can move all items individually.
If the laser completed the job, you can, The lucky pig is completely uncomplicated. Just wear the places to be joined wood glue and in the case of felt normal glue and press the items well together. For the outermost two levels, it is particularly important to work exactly so that the pig's porcine does not wobble in the end.
The simple piggy head to hug - DIY New Year's Eve decor

material
Since this sweet little pork head consists of just one piece, you can actually use any material that the Mr Beam engraved and cut. Starting with paper, over Kraftplex and all types of woods, up to acrylic. For paper, you only have to make sure that it will not be too thin, otherwise it could be a bit heavy with the engraving.
=== Product ===
MR-Beam premium wooden box
=== Product ===
MR Beam Tasting Package Felt Box
=== Product ===
MR beam acrylic black
=== Product ===
Design
The basic shape of the head essentially consists of a large circle whose chubby cheeks are shown with two further small circles. Also, snout and eyes are made of ellipses, which we have in the eyes using the Pathfinder Tools down a corner clipped. Mouth and ears, we then created with the curve draftsman. Then you just need the paths that want to engrave it, convert it to areas and already is the second pig as a symbol of good luck finish, designed to.

Laser
Given the fact that you can apply this design on almost all materials, there is not really a universal tip. Usually you can simply take preferences for the material and off lasers. Sometimes very convenient, is not it?
The complete carefree DIY lucky pig

Material
Also in the third candidate you are quite free to choose the materials. However, we recommend Horseshoe and pig two different materials or at least colors to use. Also, it was supposed to be a bit thicker, so that the three-dimensional effect comes out better.
Design
The Horseshoe is quite easy to create. We have to simply create a path in the right form, made him very thick, then converted into an area and this eventually reassigned to a contour line. Add to that a few holes using incorporated circles and even the shoe is finished.
The Lucky pig itself is built of course much more complex. Although some of the basic forms consist of simple circles, the majority but we have created with the free curve draftsman. Here, too, must not be forgotten that convert to serious lines in space.

Lasers and assembly of DIY New Year's Eve decor
If you are using two different materials as recommended, you can Horseshoe and pig either save it in two different files and lasers in sequence, or you use again the parts function in the Mr Beam Software and deletes the time being out what you do not want to lase.
In assembly, you must now ensure that the pig in the correct position seated so that the gap to the horseshoe as small as possible or, at best, non-existent. The two legs and the shamrock then are the connecting piece between pig and horseshoe by you all glue another or stick together.
In luck: the DIY lucky pig from Mr Beam!
So you now have three creative ways for you your DIY New Year's Decor off steam. We are excited about what you've made of our ideas, so do not be shy, got your results with us and the community under the hashtag #madewithmrbeam to share. And so we wish on behalf of the entire Mr Beam team a happy new year!


