Easter egg hunts are fun for everyone and always exciting for children! The Easter bunny hides some Easter eggs and sweets in small Easter nests - it's especially nice for the children when they have made the Easter nests themselves.
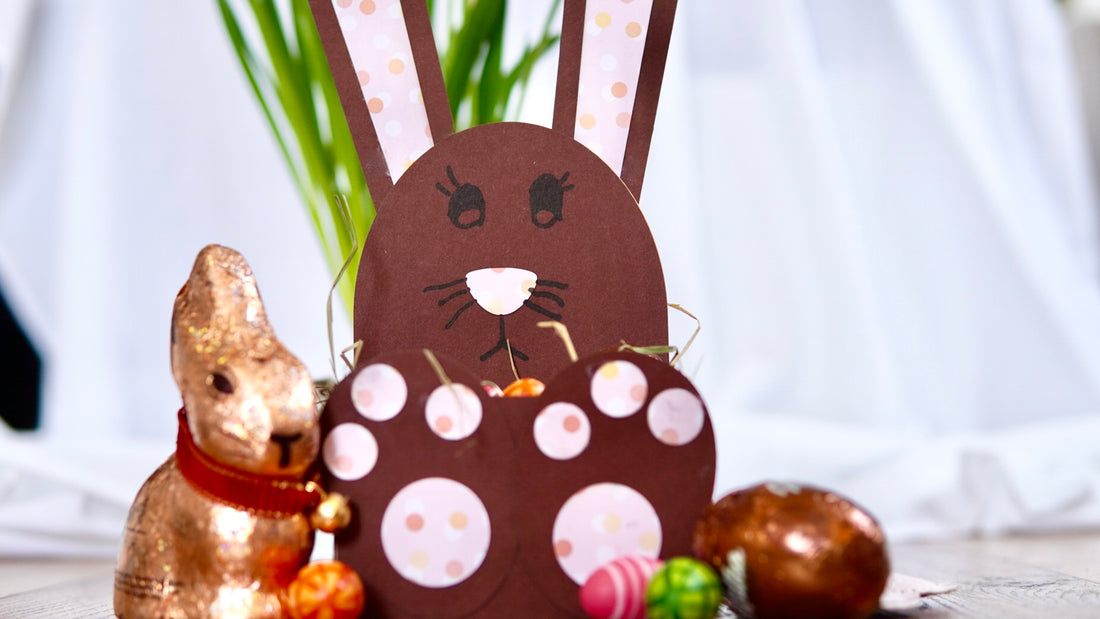
But my children didn't just want to make an Easter basket - it should be an Easter bunny as an Easter basket.
Everything you need to make an Easter basket with your children

A sitting Easter bunny as an Easter nest, in whose lap the sweets come - it doesn't take much for that. And the crafting of the Easter basket is so quick.
Your material list:
- construction paper your Easter bunny
- coloured or patterned construction paper as a coloured accent for the ears, as a nose and for the pads of the paws
- Glue. I always find a glue stick handy with kids.
- A thick felt-tip pen to draw on the eyes, whiskers and harelip
An Easter bunny as an Easter basket from Mr Beam
You can find my Easter nest file in the Mr Beam design store. Once loaded into your design library, you can scale it up or down in the workspace to suit your needs.
My daughter and I thought about having the Easter nest itself, i.e. the basket, lasered twice by Mr Beam so that it is even more stable afterwards, because she wanted to make the Easter nest for her two-year-old sister. If you already have very stable construction paper, this is of course not necessary.
Make a double-layered and therefore more stable Easter nest for smaller children

We chose beige construction paper for the actual Easter nest. You know I like working with the cutting mat. So I put the beige construction paper for the Easter basket on the cutting mat and weighted it down with magnets at the corners to smooth out any slight waves. Now you still have to focus the laser head, and you can start making the settings for the laser job.
I lasered the yellow lines with less intensity and higher speed so that the construction paper was only scratched. This is how practical folding aids are created. As always, these settings vary from paper to paper. You should do a test to find out whether they also fit your paper.

Remove the already lasered Easter basket from your Mr Beam and put in the colour that your Easter bunny should later be made of. Again, make sure the paper isn't curled. Otherwise, you balance it again with, for example, a heavy magnet to ensure accurate focus.
We chose dark brown. Since it is now about the stabilization, I lasered the yellow lines once exactly like the black lines in the laser settings for the outer, visible layer in brown and thus cut through them.
Because we just glue this layer to the appropriate areas on our Easter nest. The trapezoidal adhesive flaps are not required.

You can also have the ears and paws lasered directly. To do this, arrange the four elements in your work area around the Easter nest to save space and thus material, and start the laser job.
Now it's getting a little more colourful - colour for your Easter nest
You laser the nose, the inner elements of the ears and the pads for your bunny as an Easter basket from a colour that differs in colour from your Easter bunny.
The construction paper can also be coloured or patterned. That brings even more colour into play. My daughter chose pink dotted paper.

I always find it fascinating how fast the Mr Beam lasers paper.
Here we go - making an Easter basket with children
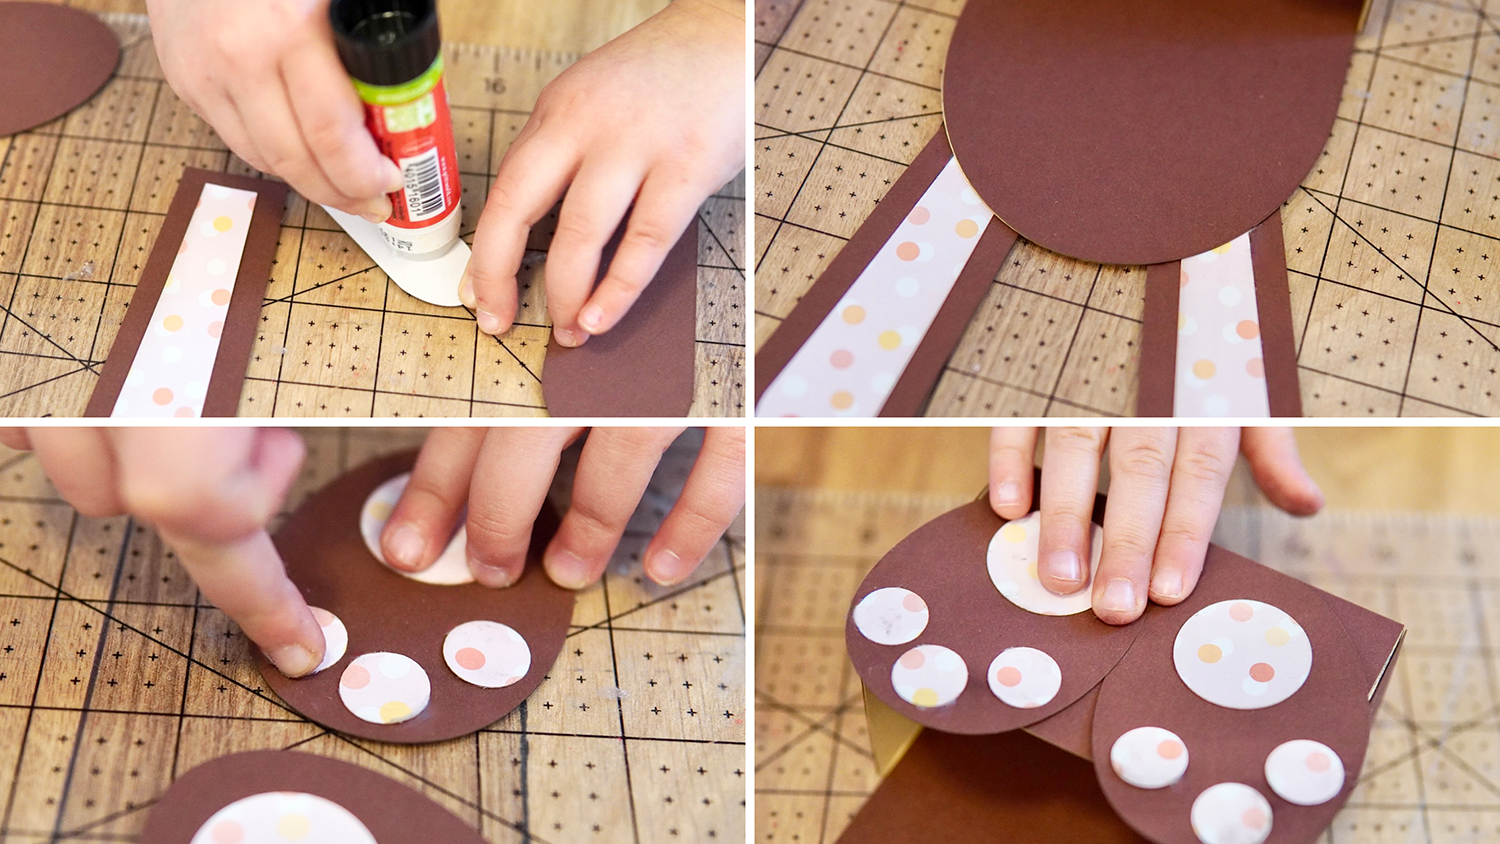
Lay out all the lasered elements. Your children can now start gluing and paint afterwards.

First, you glue the actual Easter basket - here made of beige construction paper - together so that a small box is created. Fold the four glue tabs along the scored lines and apply glue here. We usually use a glue stick, but of course you can use any other glue.

Press firmly and wait a few minutes for it to dry. You can use paper-clips or masking tape to avoid having to hold down the glued areas.
The basic structure for your Easter basket is already finished. So that the beige Easter nest becomes a brown Easter bunny, you start with the largest brown element. This part will be the head and the belly of the Easter bunny, in whose lap the sweets will be placed.
When you have applied the glue, push the headboard, corners first, all the way down into the box of your Easter basket. Make sure everything is flush and press firmly.

You and your children also glue the square pieces for the front, sides and bottom flush to the appropriate areas of your Easter basket.
The Easter bunny as an Easter nest gets a face
Your Easter bunny as an Easter basket now needs ears, a nose, eyes and a mouth.
Glue the coloured construction paper to the ears and paws. Her ears are attached to the back of her head. The finished paws go to the front of the Easter nest. So it looks like your Easter bunny is sitting.
It is best to draw on the eyes, the whiskers and the harelip with a thick felt-tip pen.

And you've already made an Easter basket with your children. Now a little Easter grass is missing and it can be filled ;)
Have fun recreating the Easter decorations with your children
Your Rina


